• Home
  • About
  • Vegan
  • Gluten Free
  • Chocolate
  • Cookies
  • Cupcakes
  • Cake
  • No bake/ Raw
  • Savoury
  • Natural Health
  • yoga
  • Tradtional
  • juice

VeganEtcetera

~ Eating healthily easily

VeganEtcetera

Category Archives: No bake/ Raw

Homemade Almond Milk -Vegan & Gluten Free

27 Sunday Sep 2015

Posted by Aissa in Gluten Free, Natural Health, No bake/ Raw, Traditional, Vegan

≈ Leave a comment

Tags

Almond Milk, Gluten free, Natural Health, Raw, Traditional, Vegan

I am on a almond kick at the moment. Almonds in my smoothies, ground almonds in sauces, plans for a version of almond butter and I will have a Almond Cake recipe for you guys after this.

Once you have a metal sieve and a strong blender or food processor you are all set for making Almond Milk. I was in Sicily for my holidays recently, we stopped in a small town near Mt.Etna and when getting our necessary espressos the gentleman in the bar gave us a taste of his almond milk. It was made from locally grown almonds, was crazily sweet and had a just a hint of lemon in it. Delicious! So I was inspired to add a little lemon juice! The organic unwaxed lemon I got is Italian – so I have decided it was a Sicilian one!

Warning extremely addictive!

Warning extremely addictive!

Almond Milk

  • A generous cup of whole organic almonds- soaked overnight
  • Two big dessertspoons of desiccated/ shredded coconut
  • Less than an eighth of a teaspoon of himalayan pink salt
  • Half a teaspoon of vanilla powder/ insides of a pod
  • Two teaspoons of fresh lemon juice
  • Optional: two medjool dates/ two teaspoons of maple syrup
  • A pint and a quarter or approx. 600ml of water (maybe more)

Method:

Soak your almonds overnight- make sure they are well covered by water as they will swell.

Throw the water out that they have been soaked in and give them a brief rinse. Put  them into your blender/ food processor. Add your coconut, date/maple syrup, water, salt and vanilla. I blend mine on the setting for nut butters/ dips. Basically a few short burst and then continuously for 45 seconds. Add half your lemon juice. Blitz again for another 30 seconds. Taste it and see if it needs more lemon juice or not!

Straining your milk. You can use a nut bag or muslin cheese cloth. I just use my metal sieve. I pour some in to the sieve over a wide topped measuring jug. Press the ground almonds to get all the milky-ness out of them! It should deliver just over a pint.

Taste again! If very creamy you may want to add more water- you can either stir it through or give a quick blitz again to throughly mix. Put in the fridge it is best served chilled! I keep the almond pulp for making cookies/ raw little sweets or adding to a dinner.

I will have a glass tonight to toast the Lunar Eclipse! Hope you try making it!Xs Aissa

Moon looking beautiful already!

Moon looking beautiful already!

Vanilla Berry Summer Sponge Cake, Strawberry Mint Sorbet- Vegan & Gluten Free

01 Saturday Aug 2015

Posted by Aissa in Cake, Cupcakes, Gluten Free, No bake/ Raw, Superfoods, Vegan

≈ Leave a comment

Tags

Cake, Gluten free, No bake, Superfoods, Vegan

I made Seasonal Rhubarb & Orange Crumble Cake a little while ago. I was quiet happy with it, especially the texture. So I thought I could adapt it for further use! I have to apologise though- there are pics of the sorbet but the cake pictures are not up to par. I thought I took a picture of my berries- nope. I thought I took a picture of the cut cake- showing the crumb and melted berries in it- nope…I just ate it. So I will put a pic of the Rhubarb cake in so you get an idea of the cakes texture at least! 😦

It has a creamy caramel colour due to the coconut blossom sugar.* It has a lovely fruity flavour, as one would expect, what with it having berries in it. It is the fruit puree that gives it an overall … fruity almost summery taste. I used some defrosted organic mixed berries I had, but fresh ones would of course be great too. Lots are in season here now, we had such a lovely spring there seems to be a bounty crop this year! This cake would make lovely faery cakes (cupcakes). Just reduce your cooking time by five or six minutes.

Dark Vanilla Berry Summer Sponge Cake

  • I cup of apple and strawberry puree (200g)
  • Three and a half dessertspoons of melted coconut oil
  • A quarter cup of xylitol
  • A quarter cup of coconut blossom sugar
  • A third of a cup of hot water- for right near the end
  • A third of a cup of buckwheat flour
  • Half a cup of ground almonds
  • Two thirds of a cup of fine maize meal
  • An eighth of a teaspoon of himalayan pink salt or sea salt
  • One teaspoon of vanilla powder- two pods/ teaspoons of extract
  • One teaspoon of gf & aluminium free baking powder
  • Half a teaspoon of gf & aluminium free baking / bread soda
  • One teaspoon of gf cornstarch
  • Two/ three dessertspoons of defrosted or fresh berries
  • I used a mix and chopped the strawberries so everything was the same size

* If you would prefer it the more traditional pale colour you can use all xylitol or replace the coconut sugar with agave and increase the dry ingredients by a few dessertspoons.

Method:

You will need a 7.5inch/ 20cm cake tin, if using a metal one be sure to line the base.

Preheat your oven to 170C/340F/ or 180C/350F if not a fan oven.

There are lovely sugar free mixed organic fruit purees you can get here by Clearspring. If you cannot get your hands on something similar then just sugar free apple puree will do.

Grab a perspex bowl and pop in your fruit puree and coconut oil. Put them into your preheating oven, this is so your coconut oil melts and your puree warms. Add in the xylitol and coconut blossom, stir stir stir and you will find the sweet stuff melts into the mixture.

In another bowl and throw in your flours, salt and vanilla powder. Sieve in the baking powder, soda and cornstarch. Mix and make sure there are no lumps.

Now for the fast bit. Ensure your cake tin is at hand. Add your hot water to the wet ingredients, mix through and pour into the bowl of dry ingredients. Stir until there are no dry lumpy bits and toss in your berries and give a quick stir. Pour into your cake tin and put straight in the oven. The hot water starts to react with the soda so it can’t be left sitting about the place.

The batter

The batter

It takes about 25 minutes. It is done when coming away from the sides of the tin, the top has little cracks and if you stick a skewer or knife in it  comes out dry.

Under exposed cooked cake!

Under exposed cooked cake!

Rhubarb Crumble Cake on the windowsill!

Rhubarb Crumble Cake on the windowsill!

Enjoy with vegan vanilla ice-cream (suggestion not an order). OR with….

Strawberry Mint Sorbet... melting

Strawberry Mint Sorbet… melting on my windowsill.

Strawberry Mint Sorbet

  • About two and half cups or 250g of frozen strawberries
  • Two dessertspoons of organic dark raw agave
  • Four big mint leaves

Soo I took the leaves off my Irish strawberries, washed them and popped them in the freezer over night. I advice chopping the berries before freezing, as even in the crazy strong jug blender the whole ones were like little rocks bopping about the place. They took ages to blend.

Frozen strawberry rocks

Frozen strawberry rocks

This is so easy. Put the CHOPPED frozen berries, agave and mint in your blender/ food processor and blend them to a liquid. Put in a freezer safe container and put in the freezer for at least three hours. Or use an ice-cream sorbet maker!

Blended nearly sorbet- what a colour!

Blended nearly sorbet- what a colour!

If you are good at quenelle-ing you can do that..or pop it in a ramekin like I did!

Hope you enjoyed the berry fest! Xs Aissa


No Bake Nutty Banoffe Pie – Vegan & Gluten Free

26 Friday Jun 2015

Posted by Aissa in Gluten Free, No bake/ Raw, Tart, Vegan

≈ Leave a comment

Tags

Banoffe Pie, Gluten free, No bake, Pie, recipe, Tart, Vegan

We have been having a bit of (lowers voice to a whisper) “summer weather” here recently- shh or we might scare it away!  Warm weather = ripe bananas calling out to be dessertified. Hence Banoffe!

This is my second version of this pie. In the first version I did a base with medjool dates and I just found the fudge-y gooey-ness of the dates just a bit too fudge-y and gooey! Also the taste a little too strong. That said it went down well with my work mates so feel free to blend up four medjool dates instead of using the maple and agave syrup in this one. There will be a lot of either ors in this e.g. I blended cashews but I will give the measure in the recipe for substituting cashew butter if you would prefer to use that.

No Bake Nutty Banoffe Pie

  • Half a cup of cashews soaked over night

Drain the cashews and blend with two dessertspoons of the soaking liquid. I did not blend it completely smooth as I wanted the odd chunk.

Press in Crust

  • One and a half generous cups of ground almonds
  • Three dessertspoons of chopped toasted almonds /almond flakes
  • Two dessertspoons of desiccated / shredded coconut
  • An eighth of a teaspoon of pink himalayan salt or sea salt
  • Half a teaspoon of vanilla powder / insides of one pod
  • Three ground apricot kernels
  • OR a quarter teaspoon of natural almond extract
  • One dessertspoon of organic raw coconut oil
  • Two dessertspoons of the blended cashews
  • OR one and a half dessertspoons of cashew nut butter
  • Two dessertspoons of maple syrup
  • Two dessertspoons of raw agave syrup

Banana Bananas Banana-y topping

  • The rest of the blended cashews
  • OR One and a half dessertspoons of cashew nut butter plus two dessertspoons of non dairy milk
  • Three large ripe bananas or four medium ones*
  • One dessertspoon of organic cold pressed coconut oil
  • Half a teaspoon of runny tahini paste
  • Two dessertspoons of the set coconut from the top of a can of coconut milk**
  • OR two dessertspoons of hard creamed coconut mixed to a tick paste with some warm water
  • Two dessertspoons of chia seeds
  • Optional: one dessertspoon of roughly ground cacao nibs
  • Half a teaspoon of vanilla powder/ insides of one pod
  • A square of dark chocolate for grating on top

*when I say ripe I mean mostly brown skinned. If just ripe you could add a teaspoon of maple syrup to the mix.

** the rest to be used in a curry

Crust Method

So you need a 20cm or 7.5 inch pie tin. Rub it with a little raw coconut oil so you can get the pie out afterwards.

First chop and toast your almonds/ almond flakes and set to one side.

toasted almonds

toasted almonds

Mash your coconut oil with the blended cashews. Add in the rest of the wet ingredients.

Mix your dry ingredients- except the toasted almonds. Add the dry to the wet mashing it together really well. It should be sticky but not sloppy- like a slightly wet drop cookie mix. It should be holding together 🙂 Now add in your toasted almonds and stir through evenly.

Crust mixture pre the toasted almonds

Crust mixture pre the toasted almonds

Press the crust into the pie tin as evenly as you can. It will make a thin crust. Cover and pop in the fridge while you make the topping.

Press in crust

Press in crust

Banana Bananas Banana-y Topping Method

Get the rest of the blended cashews (or cashew butter and some non dairy milk) add in the coconut oil, the tahini, the creamy coconut (or the creamed one you’ve made into a paste) and either one large banana or two medium ones and blend together- or really really really really mash LOTS!

Next roughly mash in another banana- the reason for doing them separately is to give different textures. Add in the vanilla, chia seeds and ground cacao nibs.

The topping- pre the pretty

The topping- pre the pretty

Now so, take the crust out from the fridge. Pour your mix on top and spread evenly. Get your last banana and slice really thinly- like a few mm thick. Decorate your pie with the slices. Next grab your square of dark vegan chocolate and grate it over the top. Cover it up again and leave to set in the fridge. I didn’t decorate it with banana the last time- I think the banana decorating should probably wait until you are serving it it incase they turn black.

Banoffe in (shh) Sunshine! I actually nearly threw it out the window...

Banoffe in (shh) Sunshine! I actually nearly threw it out the window instead of gently placing it… oops, flying banoffe pie.. ? Or maybe it just wants to fly- I ramble.

There you have it – Nutty No bake Banoffe Pie! Hope you try it out! Xs Aissa


Quick and Zesty Pickled Cucumber Salad! Vegan & Gluten Free

01 Monday Jun 2015

Posted by Aissa in Gluten Free, No bake/ Raw, Savoury, Vegan

≈ Leave a comment

Tags

Gluten free, Raw, recipe, Savoury, Vegan

My wonderful partner was, yet again, cooking me dinner and said it would be lovely to have pickled cucumber with it. Just to give a refreshing acidic side to our onion-y, lentil tomato sauce. My task was set. Had I a few days notice as opposed to forty-five minutes, I could have actually pickled, fermentation style, some cucumber, but this is healthy next best. I imagine it would get yummier if you have the time leave it for a couple of hours!

I used a spiralizer but you could use a potato peeler to get thin strips, or if you are the daring type and like to risk your fingertips you could use a mandolin (shivers all over 😉 )

Quick and Zesty Pickled Cucumber Salad

  • One organic cucumber- spiralized
  • One small organic carrot- spiralized
  • A quarter cup of proper fermented brown rice vinegar
  • A tablespoon of real fermented tamari (gluten free )
  • Two tablespoons of extra virgin olive oil/ sesame oil
  • A teaspoon of grated ginger
  • A dash of mirin
  • Juice of half a lemon
  • Five or six twists of black pepper
  • A third cup mix of lightly toasted sunflower & poppy seeds
  • Toast the seeds with an eighth teaspoon or pinch of himalayan pink salt/ sea salt

Grab a salad bowl. Whisk together your vinegar, tamari, oil, mirin, pepper, ginger and lemon. Add in your cucumber and carrot, mix so that it is all covered in the liquid.

Everything in the bowl

Everything in the bowl

Press mixture down so it is covered and leave to macerate for thirty minutes.

The toasted seeds

The toasted seeds


Toast the seeds with the salt, in a dry pan on a high heat for about a minute. The sunflower seeds should be barely changing colour. Add in the seeds when you are about to serve – so they are still crunchy!

Quick and zesty pickled cucumber salad!!

Quick and zesty pickled cucumber salad!!

There you have it Quick and easy zesty pickled cucumber salad! Hope you like it. Xs Aissa


After Dinner Mint Pie or Torte! Vegan, No bake & Gluten Free

28 Tuesday Apr 2015

Posted by Aissa in Chocolate, Gluten Free, No bake/ Raw, Superfoods, Tart, Vegan

≈ Leave a comment

Tags

Cacao, Cacao Butter, Chocolate, Gluten free, No bake, Pie, Superfoods, Tart, Vegan

Chocolate, Coconut, almonds and mint, they are such a lovely combination! Pre my launch into an imformed healthy veggism* and then veganism I used to be fond of a after dinner mint chocolate. Who says I can’t have one??? and I’ll make it better too, added uber antioxidants from the cacao and minus the nasty processed sugar and artifical stuff! Ta-da! Vegan After Dinner Mint Pie!

Chocolatey goodness

Chocolatey goodness

Though there are three layers to make, really all you are doing is mushing stuff together, blending bits to something and melting a whole lot of things and pouring them ontop of eachother. What I am saying is- it is easy!! 🙂

After Dinner Mint Pie / Torte

Almond Base

  • Two and a half dessertspoons of raw organic coconut oil
  • Four dessertspoons of raw dark agave
  • A quarter teaspoon of natural almond extract or five ground apricot kernals
  • A quarter teaspoon of sea salt or himalayan pink salt
  • One and two third cups of ground almonds
  • Half a teaspoon of vanilla powder or one pod
  • One or two dessertspoons of fresh lemon juice

Coconut Peppermint Filling

  • One cup of dessicated/ shredded coconut
  • One and a half dessertspoons of raw organic coconut oil
  • Nine drops of food grade peppermint oil or a teaspoon of natural extract
  • This is an odd measure- 15 dessertspoons of non dairy milk

Raw Chocolate Layer

  • Three dessertspoons of chopped cacao paste
  • Two dessertspoons of chopped cacao butter
  • One dessertspoon of cacao powder
  • One and a half dessertspoons of raw organic coconut oil
  • A quarter teaspoon of himlayan pink salt or fine sea salt
  • A quarter teaspoon of vanilla powder or half a pod
  • Four dessertspoons of raw dark agave
  • Five dessertspoons of non dairy milk

Base Method:

Grab your 7.5 inc or 20cm tart tin/ pie dish!! Rub it with a little coconut oil or if using a spring form one line with grease proof paper.

Mash your coconut oil together with the dark agave first. Mix your ground almonds, salt and vanilla and add these into the wet. Mix and then get in there with your fingers and start pressing the mix together. It will remain a little crumbly. Sprinkle one spoon of your lemon juice in and press the mix again. You may or may not need another spoon. You just want to wet the ingredients enough that it will hold together when pressed between your fingers.

from another base recipe- but this gives you an ides

from another base recipe- but this gives you an idea- the base for this will be darker

Now press into your tart/pie dish. Attempt to do so evenly- it will look prettier when cutting it later! 🙂 Cover it up and put in the fridge.

Coconut Peppermint Filling Method

You will need your blender or food processor for this bit. I imagine an immersion blender would do fine if you can figure out away to stop the coconut from flying all over the room!

Start with your coconut, coconut oil, peppermint and half the non dairy milk ( I used a light coconut one designed for use in cereals or coffee). Give this a blitz with your preferred pre-mentioned electric contraption. Gradually add more non dairy milk until you get the desired snow like consitancy.

Peppermint coconut snow!

Peppermint coconut snow! With very planned soft focus- really…

Take your base out of the fridge and gently press the peppermint coconut snow ontop. Again try and keep it even. Cover up again and put back into the fridge.

Coocnut moon!

Coconut moon!

Raw Chocolate Topping-hmmm

Chop your raw cacao paste and cacao butter. I use an Irish brand called Nua Naturals- it is where I get my vanilla powder and agave too!

The raw fabulousness

The raw fabulousness

Put some water on to simmer and find the right sized a heat proof bowl (e.g perspex ) to place ontop. The water should not touch the bowl or it will be too hot. Pop in your cacao paste, cacao butter and coconut oil. Once melted add the agave, gently stir in the cacao powder, salt, vanilla and non dairy milk of choice. The milk helps the chocolate layer be a little bit softer so that it possible to cut the torte / pie.

Take your nearly finished pie out of the fridge. Use a towel or oven mitt to pick your perspex bowl and pour the yummy gooey chocolate goodness over the snowy coconut layer. It looks so lovely as it coats it. I find it easiest to pick the pie dish up and gently tilt it this way and that until the chocolate has coated it all in a pretty swirling manner. I like to make a tent or tee-pee for my pie out of paper. This keeps it hidden and also reduces the risk of the top of the pie being marked by a collapsing cover.

Leave to chill for a couple of hours at least. You can keep it in the fridge but it really does need to be out at room temprature for a half an hour before serving. I find the the coconut layer goes so solid when refridgerated it will actually separate from the base upon slicing. At room temprature it softens and it all holds together like pies should!

The after dinner mint pie !

The after dinner mint pie !

Though rich and chocolatey the peppermint adds a freshness that keeps it from being too heavy! Hope you try it out . Xs Aissa

* I was ten when I turned veggie first, so my eduaction re ingredients was a gradual process!

Raw/No bake “Intensely Dark Decadent Cacao Fudge”- Vegan & Gluten Free

03 Friday Apr 2015

Posted by Aissa in Chocolate, Gluten Free, No bake/ Raw, Superfoods, Sweets, Vegan

≈ 2 Comments

Tags

Cacao, Chocolate, chocolate fudge, Gluten free, No bake, Superfoods, Sweets, Vegan

Fair warning- this is a decadently intense chocolate experience. That said a little spoon of this dark fudgey goo hits the the chocolate/cacao craving nail right on the head! You will need a food processor or blender to make it as is. You could use ready prepared ground almonds chop some walnuts to a dust like consistency but you will get a lighter more of cake like version.

Anyone thinking that person spelled cocoa wrong? Cacao is raw cocoa, it has a slightly more complex flavour and a lighter colour. In it’s raw form more of the nutrients survive (esp antioxidants & magnesium) so you get all the fabulousness of cocoa with an extra health kick!

This Fudge is Filled with Filling nuts so is almost like protein chocolate fudge, if the richness doesn’t get you the amino acids will 😉

Intensely Dark Decadent Cacao Fudge

  • One cup of whole almonds
  • Half a cup of walnuts
  • Half a cup of cacao powder
  • Four dessertspoons of dark raisins*
  • Two and a half dessertspoons of raw coconut oil
  • A quarter teaspoon of good quality sea salt
  • Half a teaspoon of vanilla powder/ a pod
  • One dessertspoon of pure maple syrup
  • One dessertspoon of water kefir/ water**
  • Zest of an unwaxed organic orange- hold half a teaspoon back
  • Five walnuts chopped
  • A dessertspoon of desiccated/ shredded coconut

Method:

Ready your machinery and pop in the nuts with half the raisins and the coconut oil. Blend / pulse until they are chopped a bit. Add in the rest of your ingredients bar the last three.

Nearly raw fudge!

Nearly raw fudge!

It may seem like it it is not going to come together, gradually add in the water kefir/water. The texture will begin to change, you will prob just be pulsing it a bit at this stage. Transfer the fudgey-ness to a bowl add in the orange zest and mix it through. Keep half a teaspoon of the orange zest back, as you will be putting it on top later.

OOooOoo look how dark it is!

OOooOoo look how dark it is!

I used a 15cmx15cm (5.9inc x5.9inch!) perspex container. I gave it a little wipe with coconut oil to make it easier to remove the fudge. No-one wants delayed access! Plop half the goo in the middle and spread evenly. Add on your chopped walnuts and gently layer more of the fudge on top. Decorate with your orange zest next. Finally sprinkle on your desiccated coconut, press this into the fudge so it can’t go anywhere. Cover and put in the fridge for ten minutes. Take it out and use a knife to cut your little squares of dark delight! Pop back in the fridge and leave to set for another forty five minutes or so.

Intensely dark fudge :-)

Intensely dark fudge 🙂

It is fast and easy to make and will keep fantastically in the fridge or freezer. So can be made well in advance or be an emergency chocolate store! Xs Aissa

*Footnotes*

* I used these fab organic Black Beauty raisins from Uzbekistan! I was gifted them 🙂 they had no oil and were really juicy. I think a good substitute would be Jumbo Chilean Black raisins or Muscatels

**Water kefir, why not get some live bacteria, good yeasts and enzymes in your fudge? Kombucha might work too…

Cacao Nut Bites – Vegan & Gluten Free

13 Friday Mar 2015

Posted by Aissa in Chocolate, Gluten Free, No bake/ Raw, Superfoods, Sweets, Vegan

≈ 1 Comment

Tags

Cacao Butter, Chocolate, Gluten free, No bake, organic coconut oil, Superfoods, Sweets, Vegan

These are mainly nuts and seeds, as a result they are high in protein, healthy fats and are super filling. Be great to bring if you were going on a big hike, mine was mainly from the kitchen to the couch while going back and forth for more! People think making your own raw chocolate is some complex mystery. It is actually really easy and it means you can control the flavour, sugar content and get all those lovely antioxidants and minerals in the cacao too! Hmmm chocolate.

You will need a strong food processor or blender to follow the recipe exactly, I will give alternatives in the footnotes if you are with out these contraptions. I used a 15cm x 15cm (almost 6inc x 6inc ) perspex dish, so it made nine good sized Cacao Nut Bites. They are very fast to make and the joy of raw vegan baking is you can taste everything along the way. 🙂

Cacao Nut Bites

The Base*

  • 125g/ three quarters of a cup of whole almonds
  • Twelve whole brazil nuts
  • One flat dessertspoon of organic coconut oil
  • One teaspoon of vanilla powder
  • An eighth of a teaspoon of fine Himalayan pink salt or good sea salt
  • One dessertspoon of good quality maple syrup

The Sprinkle layer

  • Three dessertspoons of sunflower seeds
  • Approx. twenty organic dried mulberries

The Topping

  • One dessertspoon of organic coconut oil
  • Roughly one and a half dessertspoons of organic cacao butter
  • Roughly three dessertspoons of organic cacao paste
  • One teaspoon of organic cacao powder
  • Less than an eighth of a teaspoon of good fine sea salt
  • Two dessertspoons of good quality maple syrup

The very simple Method

Starting with the base, through everything into your food processor and blend until it starts to get a bit sticky. I find you still need to work it a bit with your hands, in order to help it all stick together. Just press it into your container- as evenly as possible.

Base ingredients

Base ingredients

Sprinkle your sunflower seeds and mulberries on top and put it all in the fridge while you make your raw chocolate!

Avec toppings

Put a saucepan half filled with water on to your hob. Bring it to a simmer and pop a perspex bowl (that will fit ) on top. The water should not touch the base, or it will be too hot and burn the precious chocolate. Melt the cacao paste and butter and coconut oil, take off the heat for maybe thirty seconds (something about cacao crystals realigning) . Put back on the heat and add in the cacao powder, salt and maple syrup. Mix and melt together.

melting

Take your base out of the fridge. Using a oven glove or tea-towel grab your bowl of melted goodness and pour it over everything. You may have to move your mulberries a bit after to make sure they are evenly spread. Put back in the fridge to set. It would probably be a good idea to take it out after five minutes and score the top in the way you plan to cut it. The chocolate sets quite hard!

hmm melted chocolate

hmm melted chocolate

Hope you try them, I found the brazil nuts bring something more interesting to the flavour. Who knew sunflower seeds and chocolate would be such a good combination?

Xs Aissa

*Footnotes

No machine? No fear! You can use ground almonds instead of the whole ones. You can use a big dessertspoon of brazil nut butter or cashew nut butter instead of the other nuts. Finally add barely an eighth of a teaspoon of natural almond extract to your coconut oil. Mash the oil, nut butters, maple syrup, almond and vanilla extract together first. Add in the ground almonds and salt, mix and press it altogether.

Raw Electrolyte Smoothie

22 Sunday Feb 2015

Posted by Aissa in juice, Natural Health, No bake/ Raw, Superfoods, Vegan, Vegan Smoothie

≈ Leave a comment

Tags

Gluten free, Juice, Natural Health, Raw, Superfoods, Vegan, Vegan Smoothie, water kefir

My little hand held emersion blender died 😦 It is an ex-blender. I have a jug one now. The other evening after work, having drunk little water and feeling the lack of veggies, I made this. I upped the nutrient factor with green food powder. For good live bacteria, good yeasts and enzymes I popped in some homemade water kefir.

raw green goodness

raw green goodness

Raw Electrolyte Smoothies

  • A full mug and a half of organic coconut water
  • A double shot of water kefir – you could use kombucha if you like
  • A tablespoon of chia seeds (for the good fats)
  • A thin inch long slice of organic ginger
  • Two stalks of celery
  • One small carrot
  • A teaspoon of a green superfood powder of your choice
  • One kiwi
  • Optional: A spoon of natural peanut butter or almond butter

Peel the kiwi and chop the carrot and celery. Put your water kefir and coconut water in the jug first and add in everything else and blend. The ginger gives it a nice lift.

Filled me up too and stopped me just eating spoon after spoon of natural peanut butter while I cooked dinner! xs Aissa


Sweet Coconut Cashew Wonders! Vegan Gluten free & No bake!

19 Thursday Feb 2015

Posted by Aissa in Gluten Free, No bake/ Raw, Superfoods, Sweets, Vegan

≈ Leave a comment

Tags

desiccated coconut, Gluten free, No bake, Superfoods, Sweets, Vegan

These are filling, sweet, a little fruity and they melt in your mouth. I added some exotic treats to enhance the nutrition factor. I’ve included the antioxidant packed acai powder and the wonderful ashwagandha powder which is said to have adaptogenic properties amongst other things. I added a couple of teaspoons of vanilla rice protein to make them more substantial. If all these goodies are not normally on your shopping list you can leave them out, they will still taste just good, just up your ground almonds a little!

Sweet Coconut Wonders!

  • Two dessertspoons of cashew nut butter- raw if you like
  • One dessertspoon of organic raw coconut oil
  • Three and a half dessertspoons of good quality maple syrup
  • The zest of half a lime
  • A cup of ground almonds
  • Two dessertspoons of desiccated coconut- for in them
  • And Three dessertspoons of desiccated coconut- for rolling them in
  • A little under an eighth of a teaspoon of himalayan pink salt or sea salt
  • Half a teaspoon of vanilla powder or inside of one pod
  • A quarter teaspoon of ashwagandha powder
  • Half a teaspoon of acai powder
  • Two teaspoons of vanilla rice protein

Mash your cashew nut butter, coconut oil and lime zest together make sure they are well combined- no lumpy coconut oil bits! Add in the maple syrup and mix again.

cashew coconut lime

cashew coconut lime

Mix all your dry ingredients- except the three spoons of coconut that you will be rolling them in! Add the dry to the wet, begin by mixing with a spoon. Once it is a bread crumb texture get in there with your hands. Press the mix together until it forms a ball.

dry stuff!

dry stuff!

Get a plate and put your three spoons of desiccated coconut on it. By the teaspoonful roll the mixture into little balls and roll them in the coconut. That is all you have to do. Fast and simple to make!

Coconut sweet making!

Coconut sweet making line!

Hope you like them. Xs Aissa

No Bake Salted Chocolate Banana Loaf. Vegan & Gluten Free

30 Friday Jan 2015

Posted by Aissa in Chocolate, Gluten Free, No bake/ Raw, Sweets, Tart, Vegan

≈ 2 Comments

Tags

Cacao, Cacao Butter, Chocolate, Gluten free, No bake, Sweets, Tart, Vegan

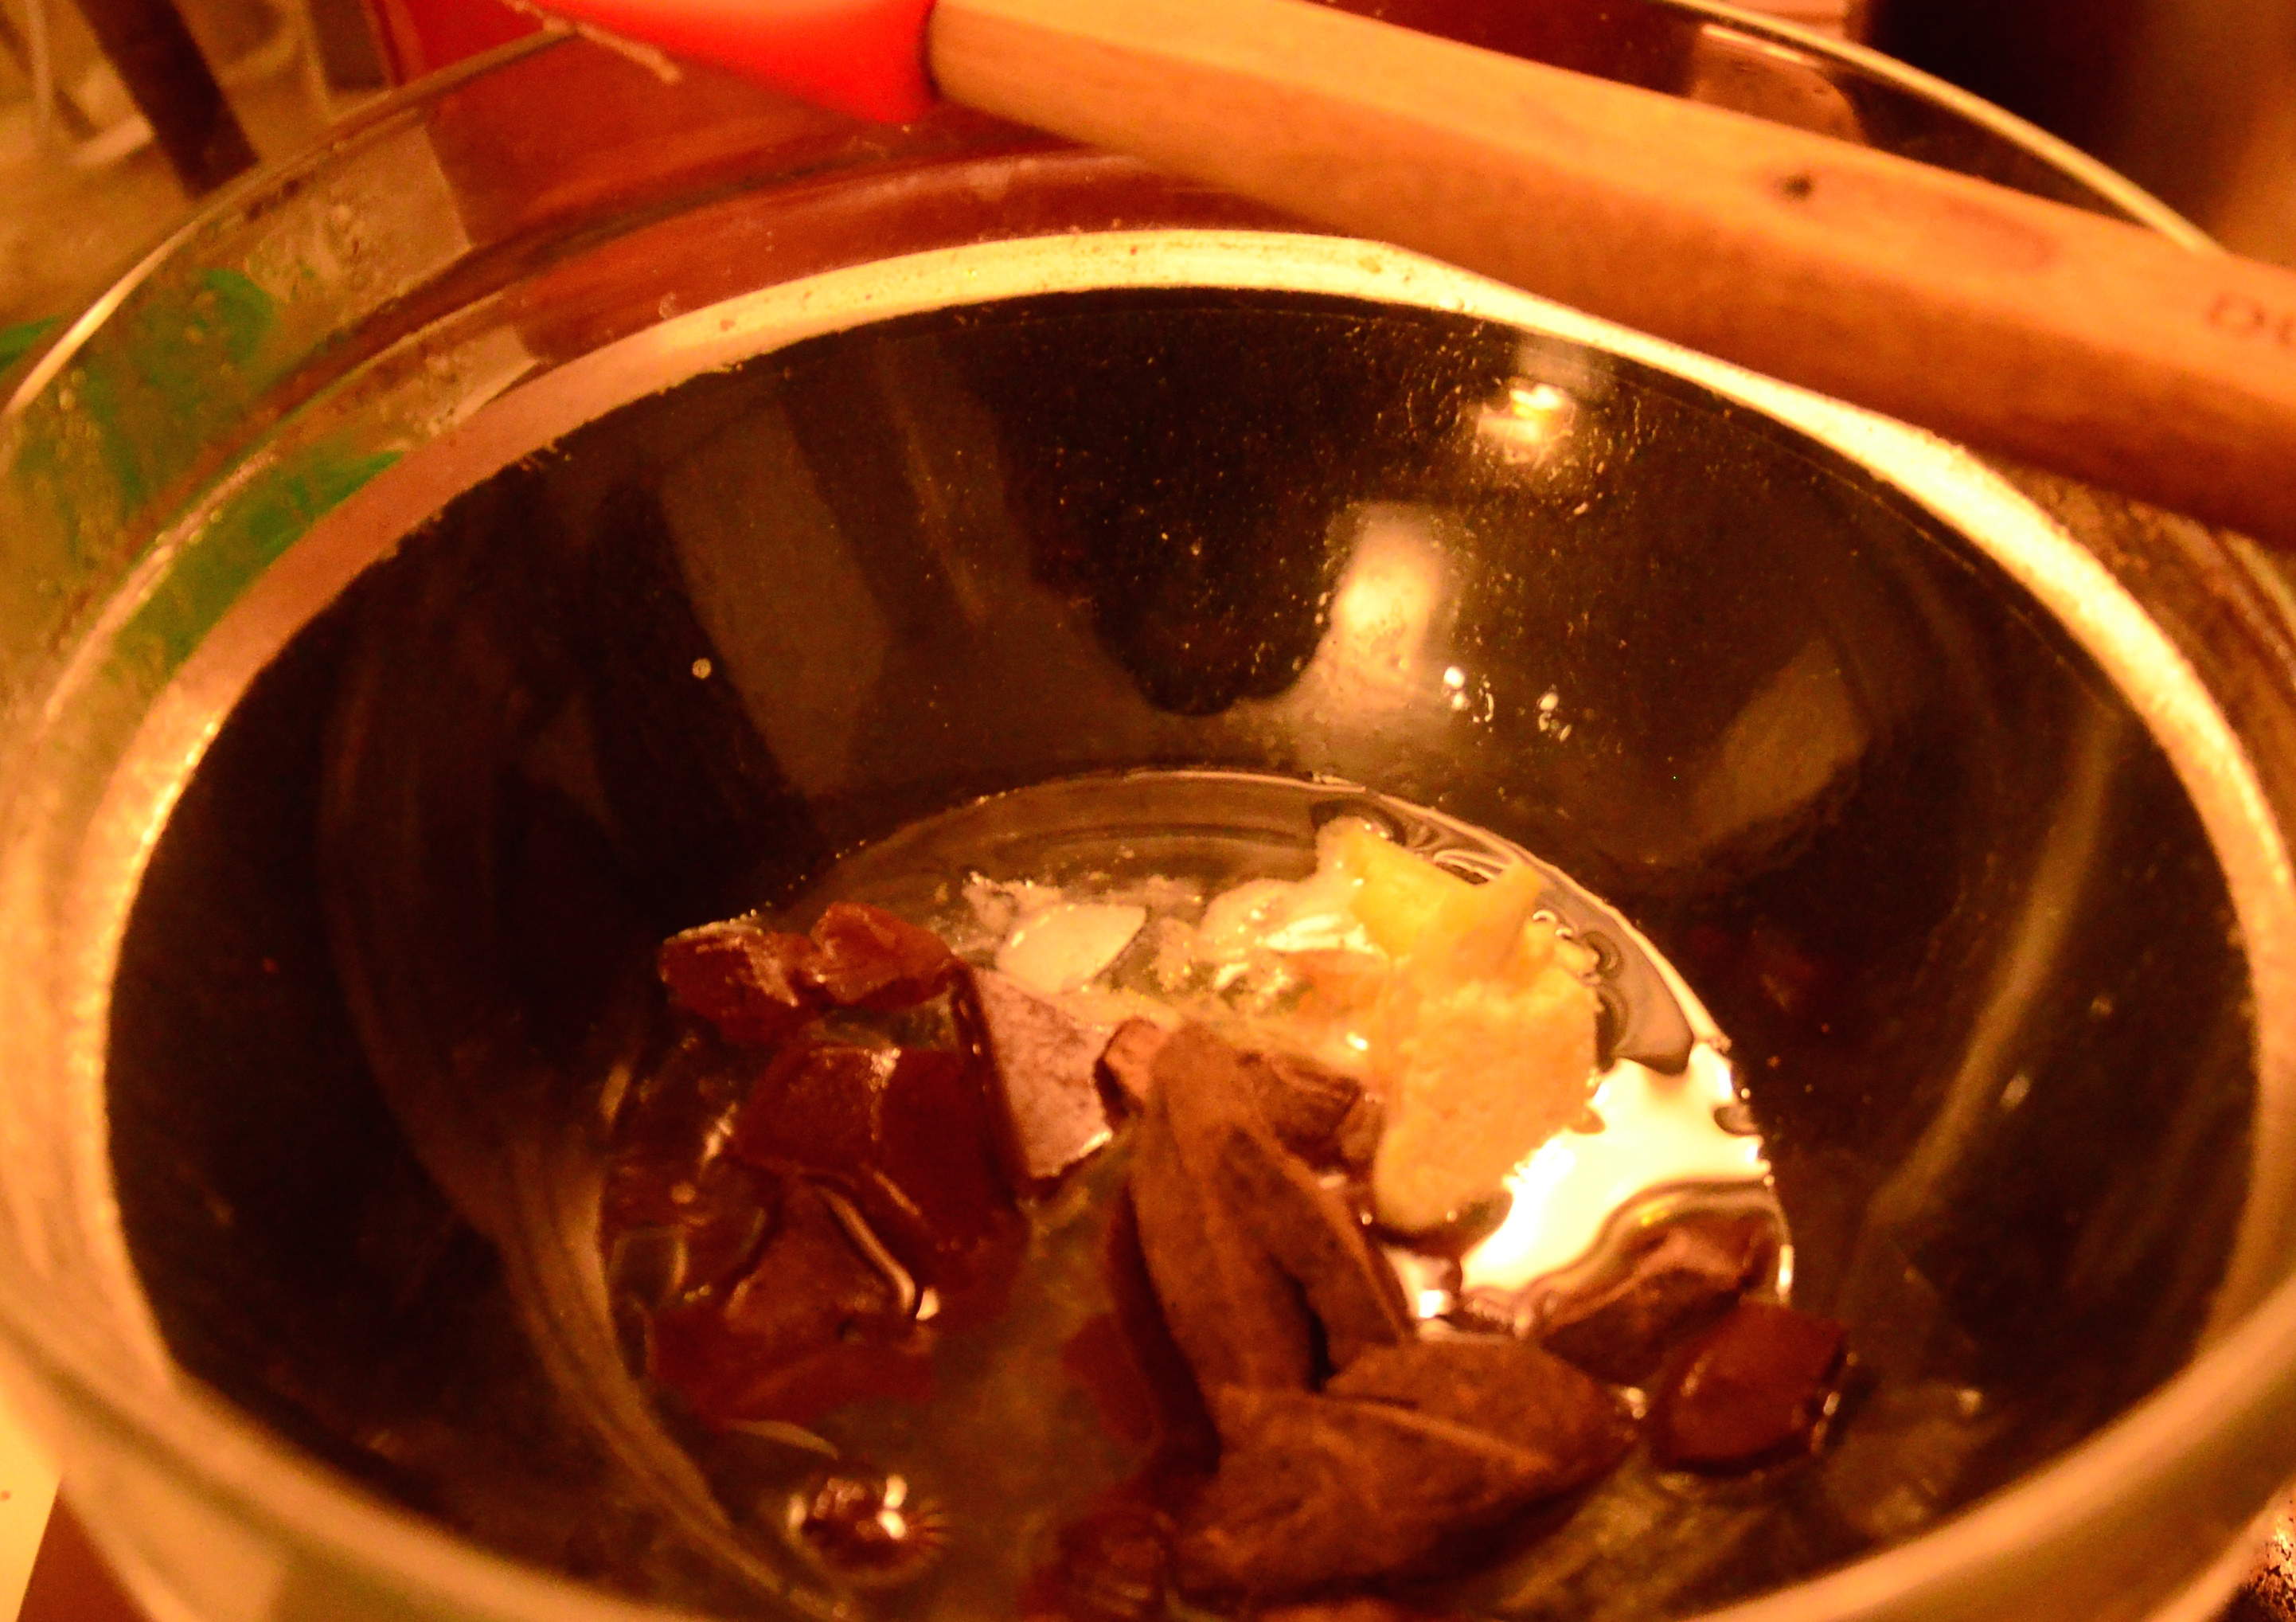
Raw Chocolate, banana, walnut and coconut make such a sweet melody of flavours. Do not be afraid of the amount of salt, it really is key to the recipe. As with a lot of raw recipes it takes a little planning but then it is quite simple to bring it all together. You need to soak the cashews and apricots over night so that they will blend easily. I was lazy almost every evening so I actually did this over three days!

I really want to start mastering the art of stevia use. When I first got into vegan baking stevia was not available in Ireland, due to a very weird ban! I actually bought it Berlin on a college trip! It was a disaster, I used far too much. I learnt my lesson so feel safe to trust the amounts I have used here.

You will need a blender- hand-held will do. A loaf tin, I used silicon, if using an actual tin one make sure to line it with paper so it is easy to take out.

No Bake Salted Chocolate Banana Loaf

Fudgey Apricot Almond Layer

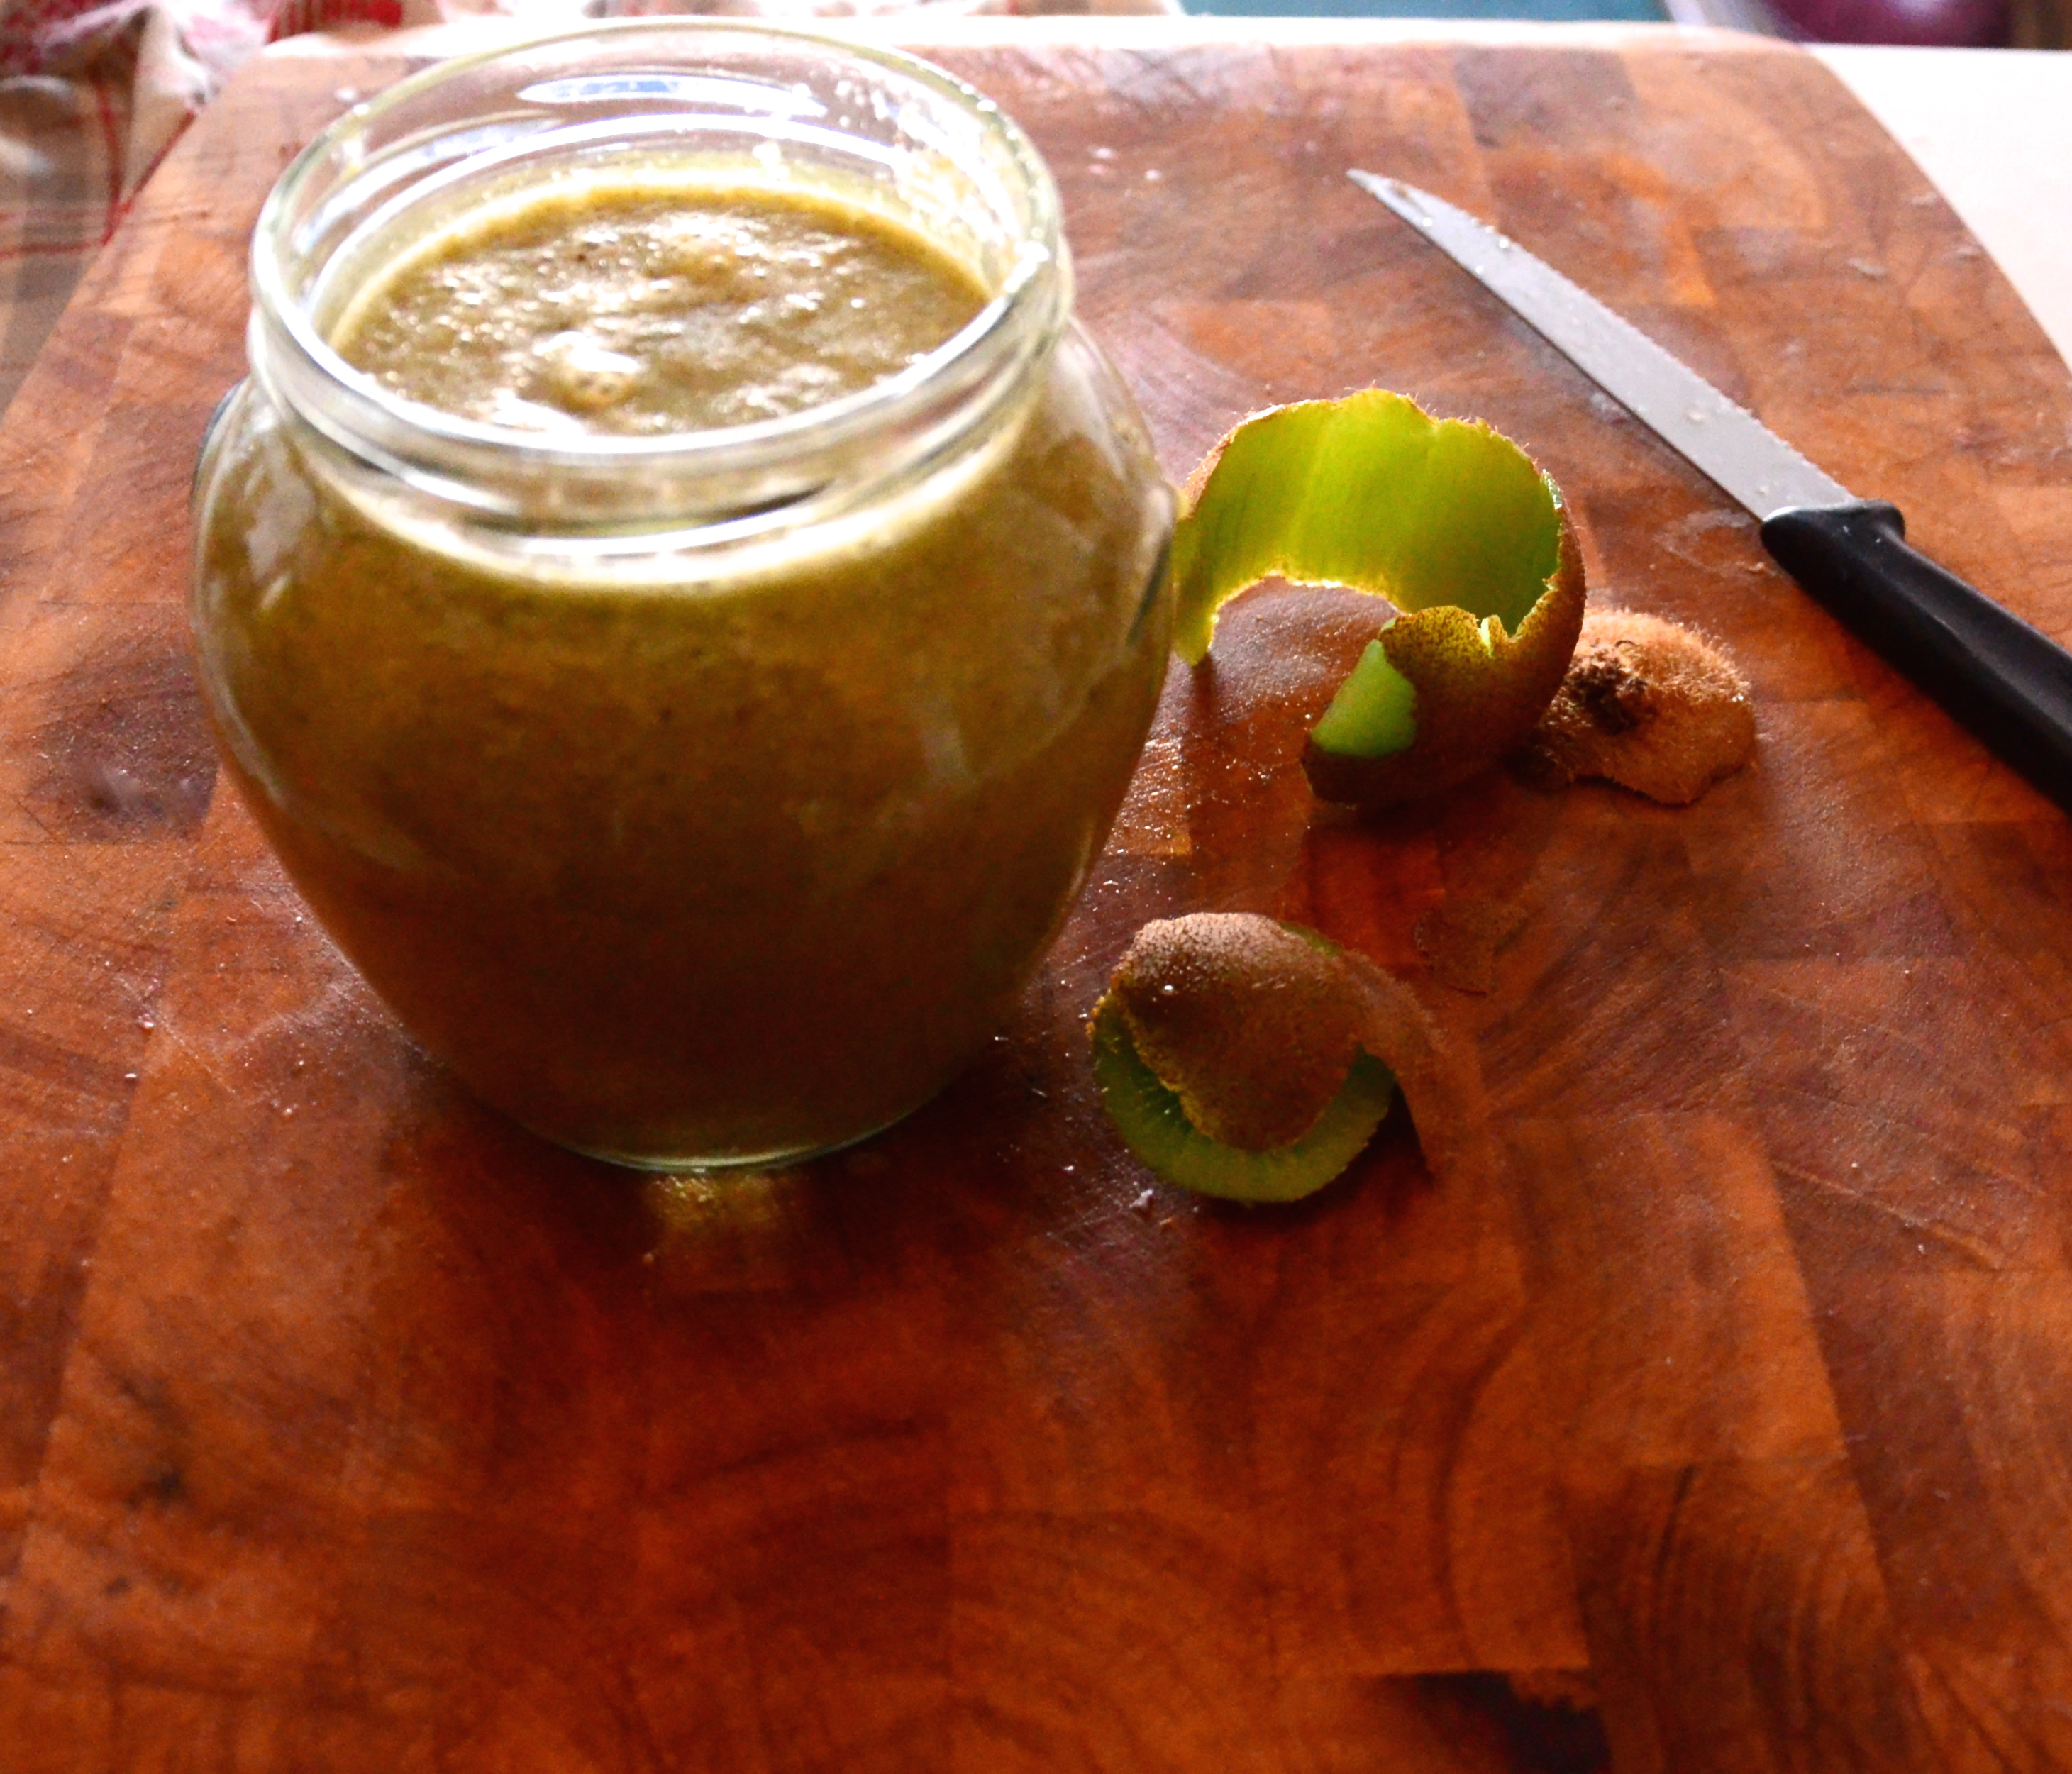
  • Seven Un-sulphered Apricots soaked over night (use to less for a dryer texture)
  • Zest of a unwaxed orange
  • Two dessert spoons of tahini raw if preferred
  • Half a dessertspoonful of organic coconut oil
  • Four or five drops of a liquid stevia
  • One and a third cups of organic ground almonds, grind yourself for a raw version
  • One and a half dessert spoons of raw cacao powder
  • An eight of a teaspoon of Himalayan pink salt or sea salt

Method:  You will need to get the blender out at this point. I have an immersion hand-held blender and it does okay but if you have a jug better it will come together even better.
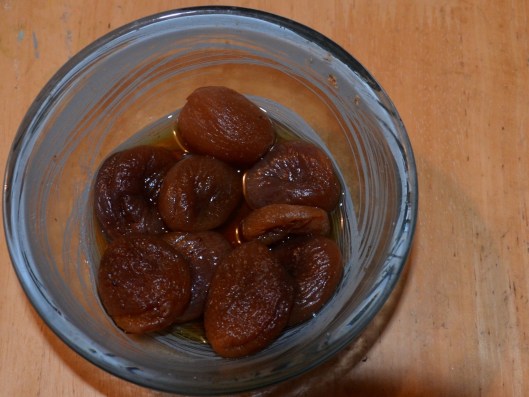
soaked apricots

soaked apricots

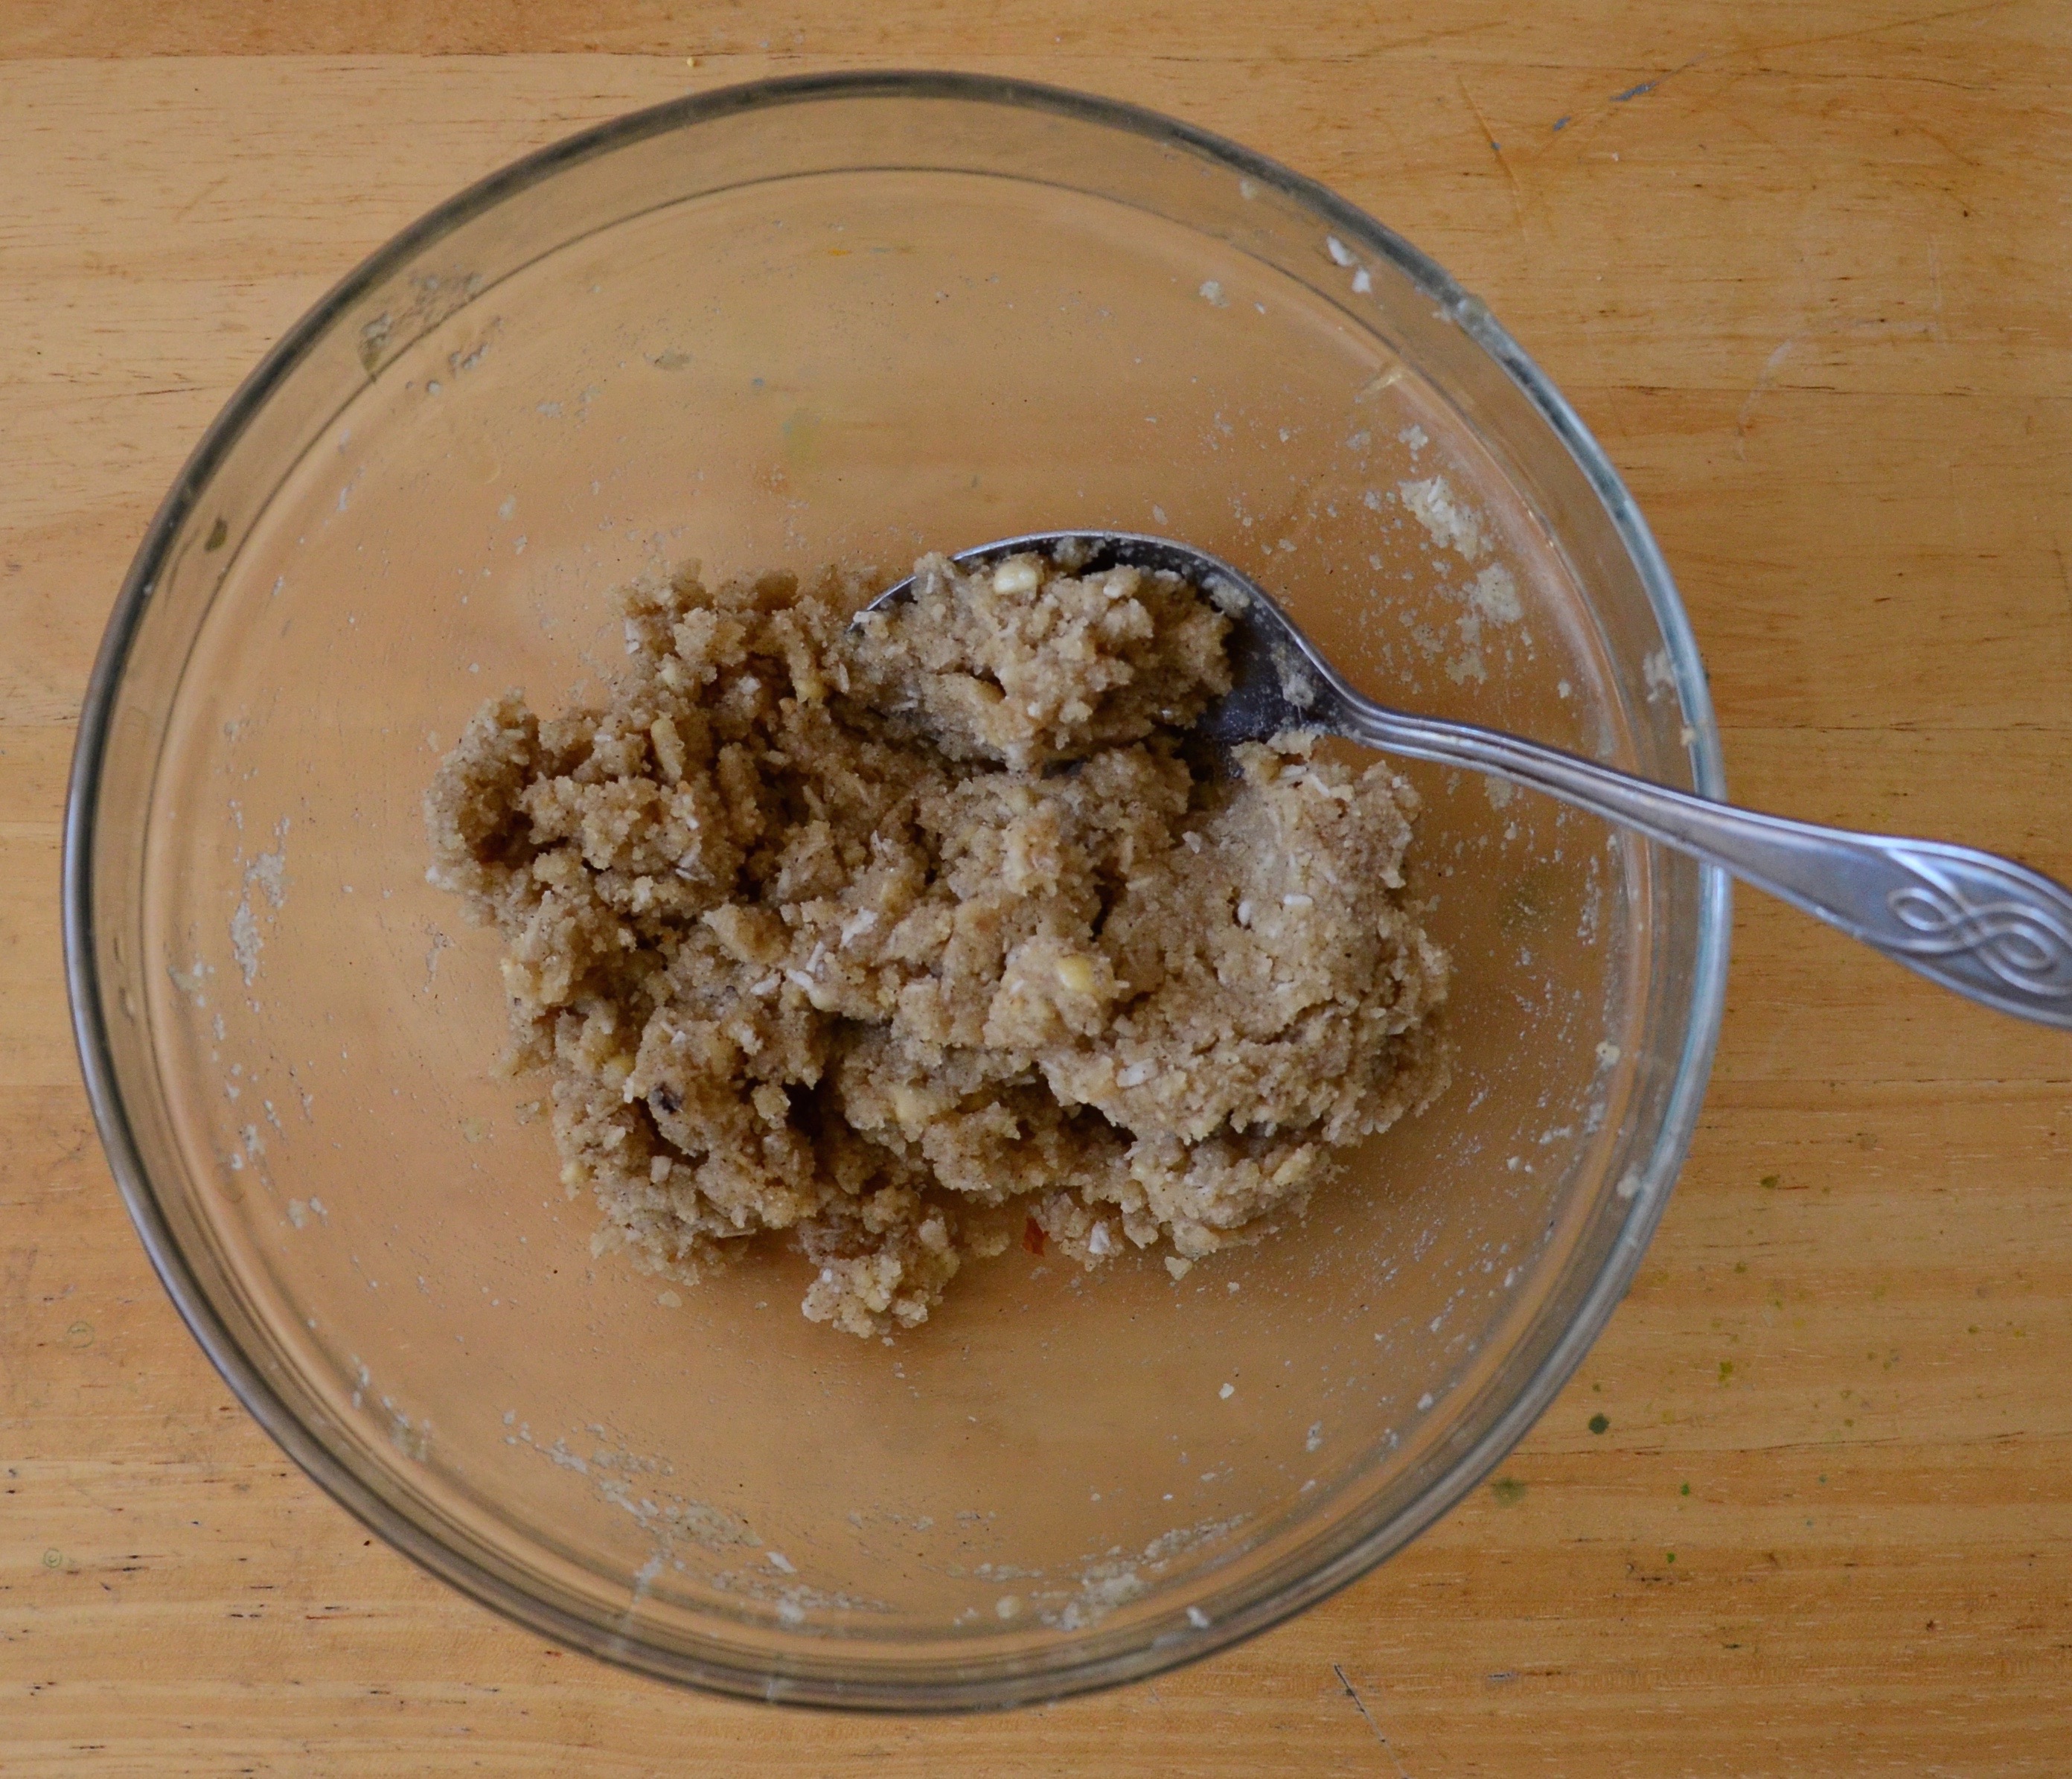
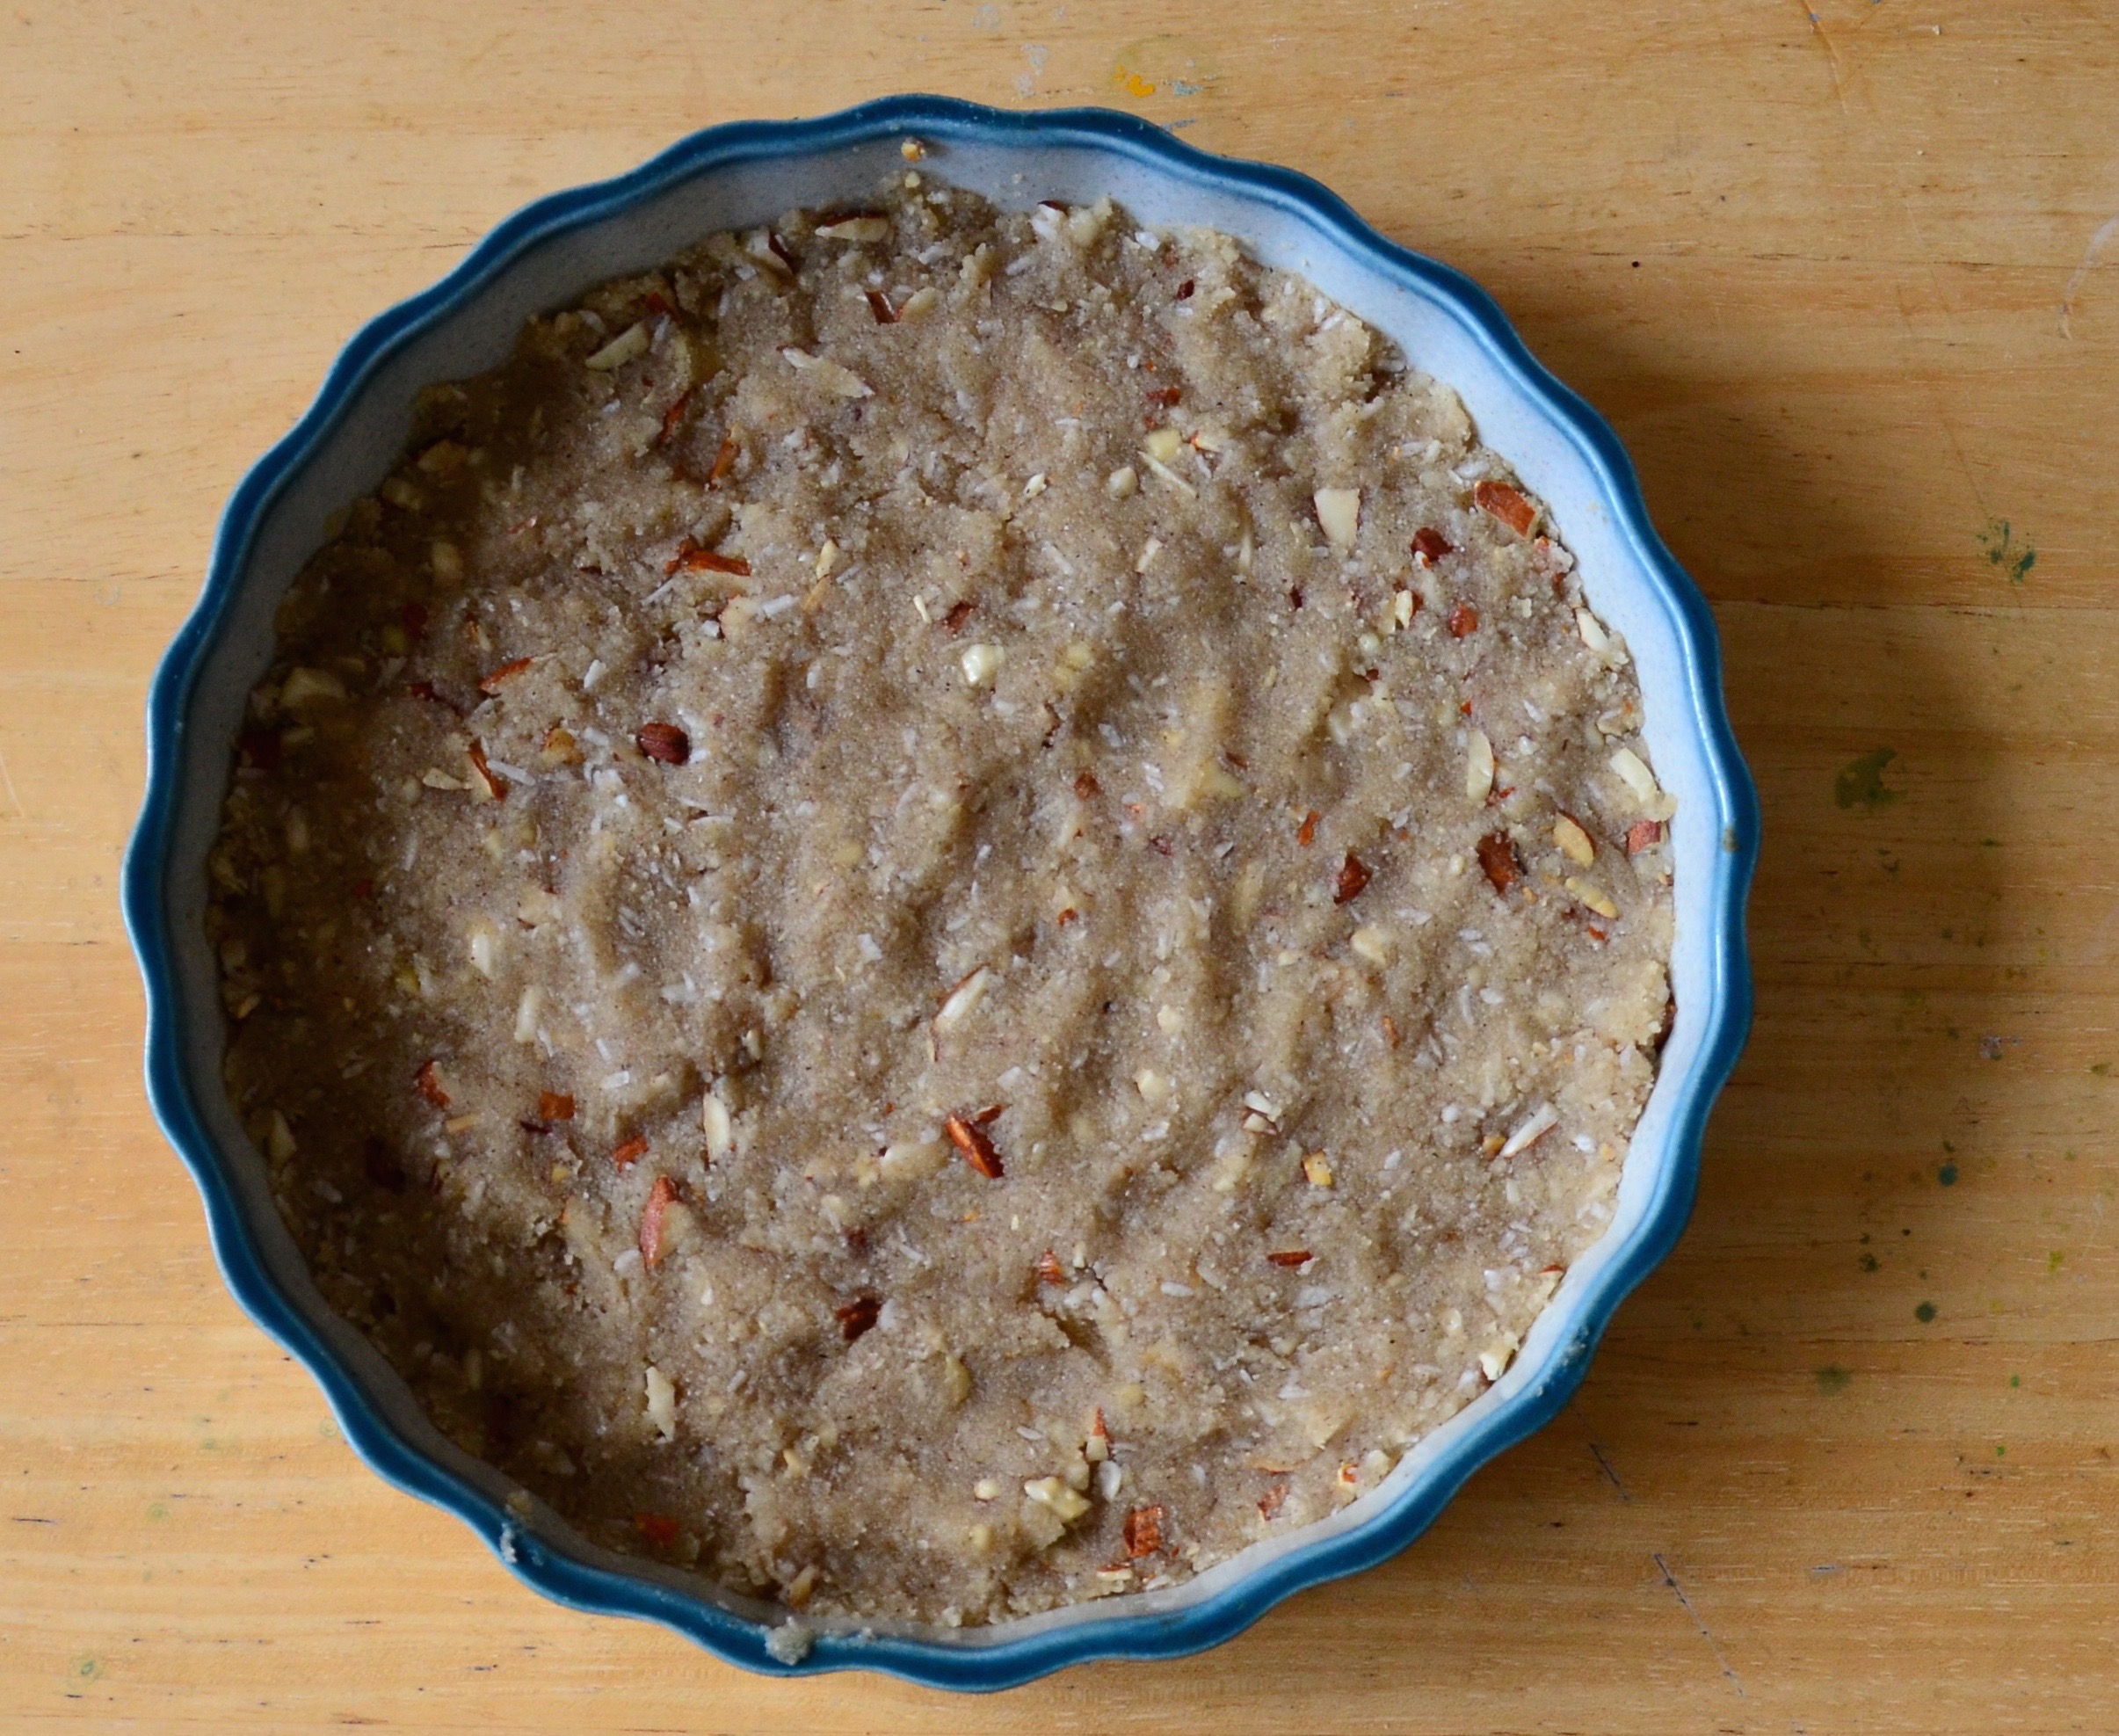
Smush your tahini, coconut oil, stevia and orange zest together. Chop your soaked apricots and add to the tahini mix. Now blend them a bit. In another bowl put your dry ingredients together i.e. ground almonds, salt and cacao. Add half to your wet mix and blend again. Add the other half. It is a bit dry for my blender at this point so I mix the second half through. Now press into your lined or silicon loaf tin and pop into the fridge.

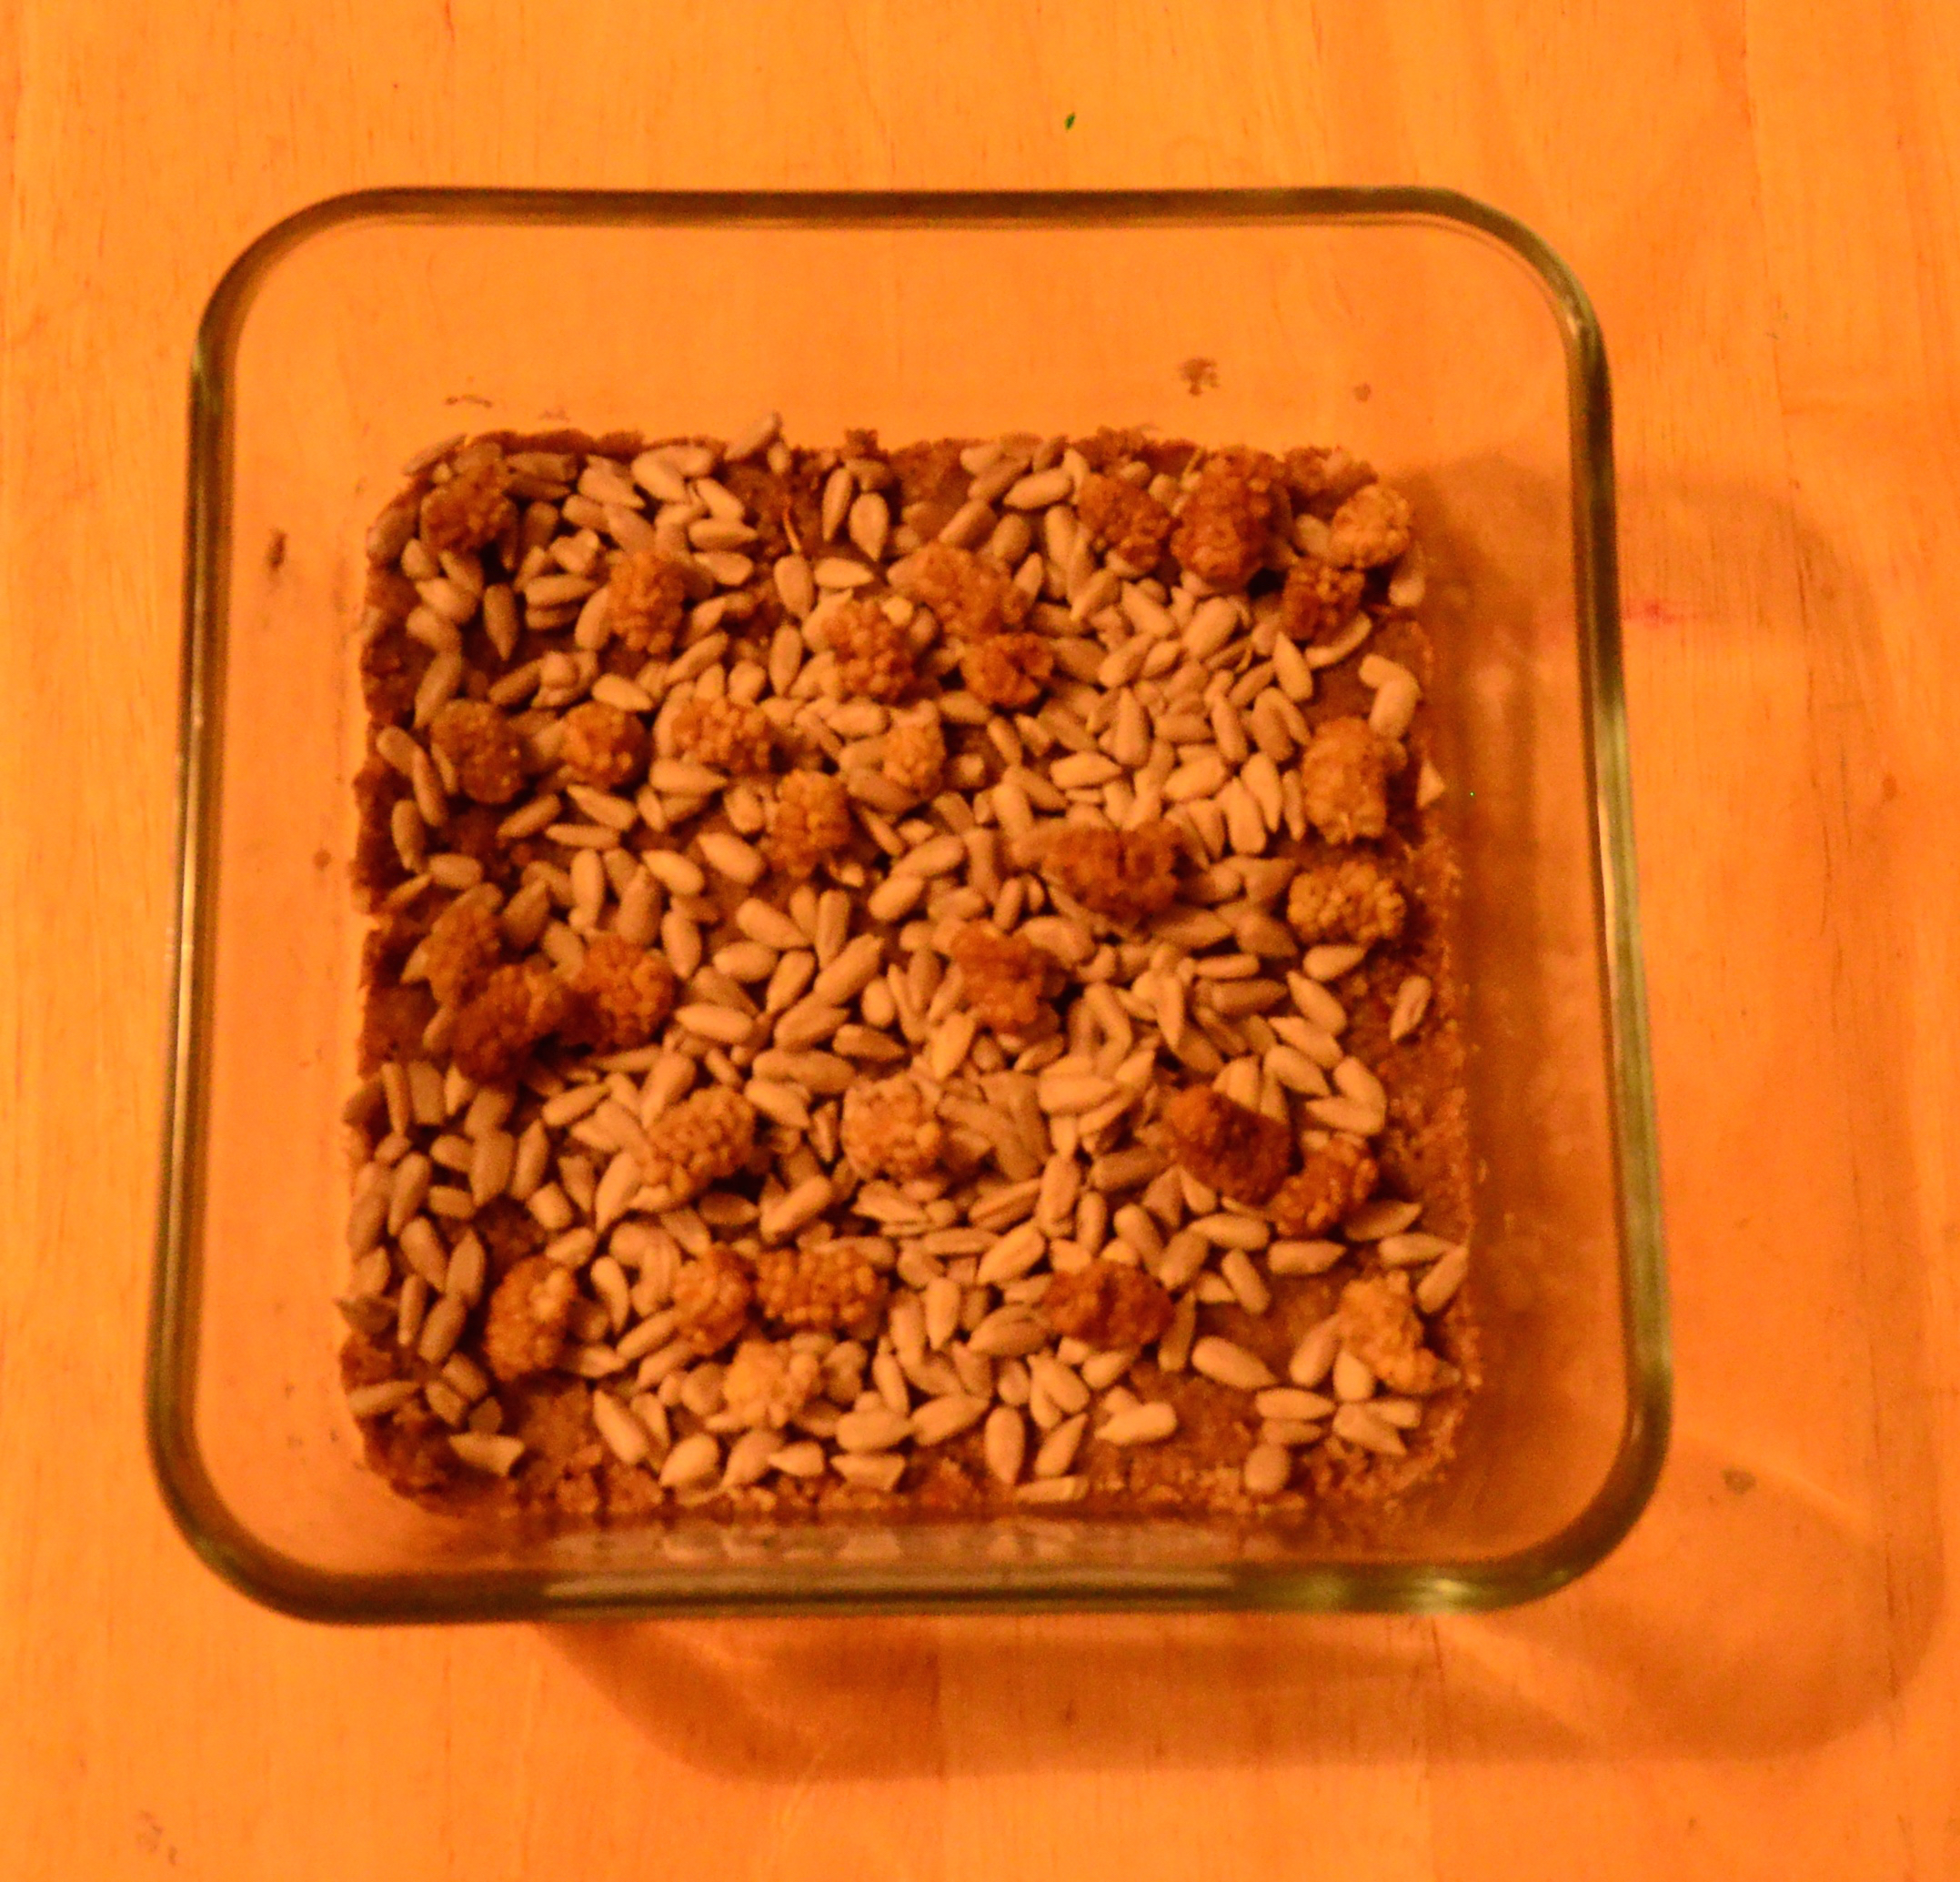
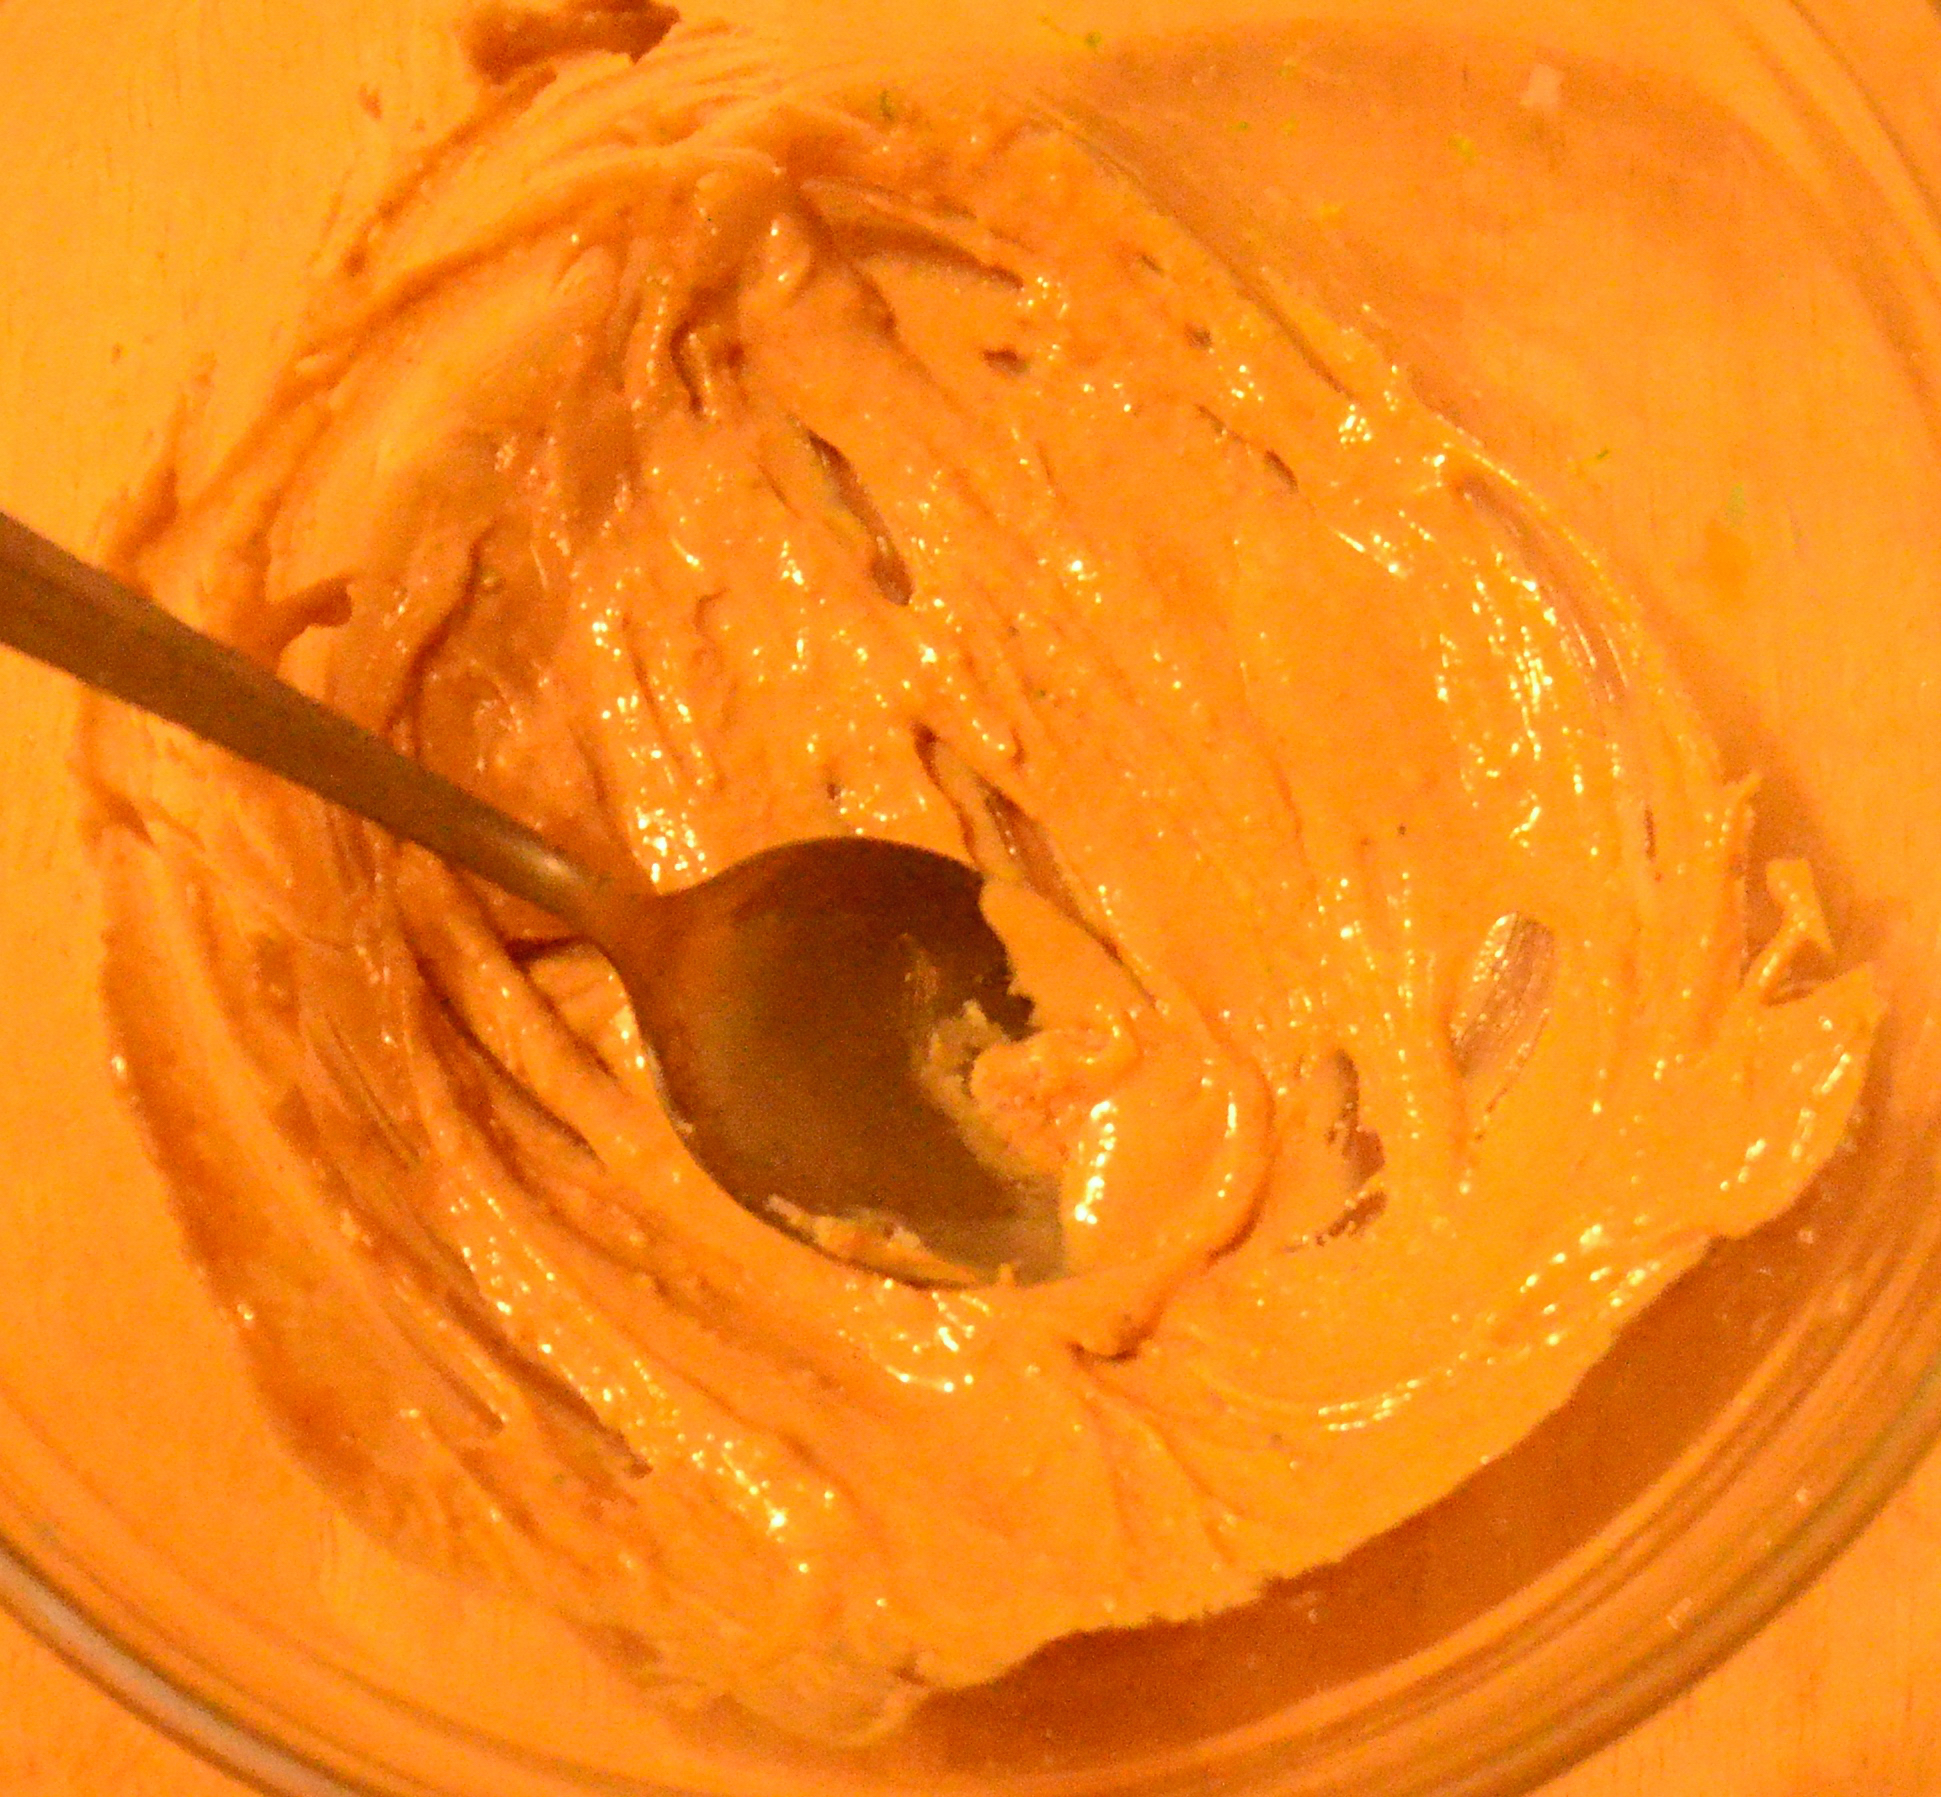
Banana Cashew Coconut Layer

  • Half a cup of chopped cashews soaked over night. (make sure they are covered by the water as they will swell )
  • Two ripe bananas very well mashed
  • Two drops of stevia
  • One dessertspoonful of pure maple syrup
  • A teaspoon of vanilla powder/ two pods/ tsp of vanilla bean paste*
  • A third of a cup of desiccated coconut, roughly ground raw flakes for a raw version
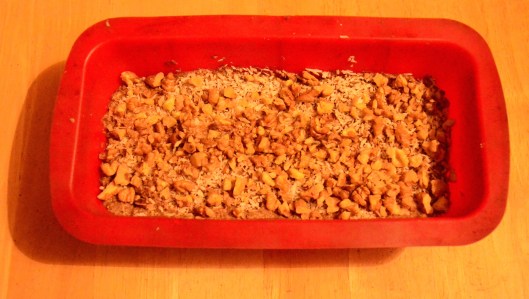
  • Keep a rounded dessertspoonful of the coconut back for sprinkling

Method: Mash mash mash your bananas, add the vanilla, stevia, maple syrup  and mash again! Now add the cashews. Using your blender and blend! Spread this on top of the fudgey layer. Cover and pop back into the fridge.

Pre the chocolate layer

Pre the walnut layer

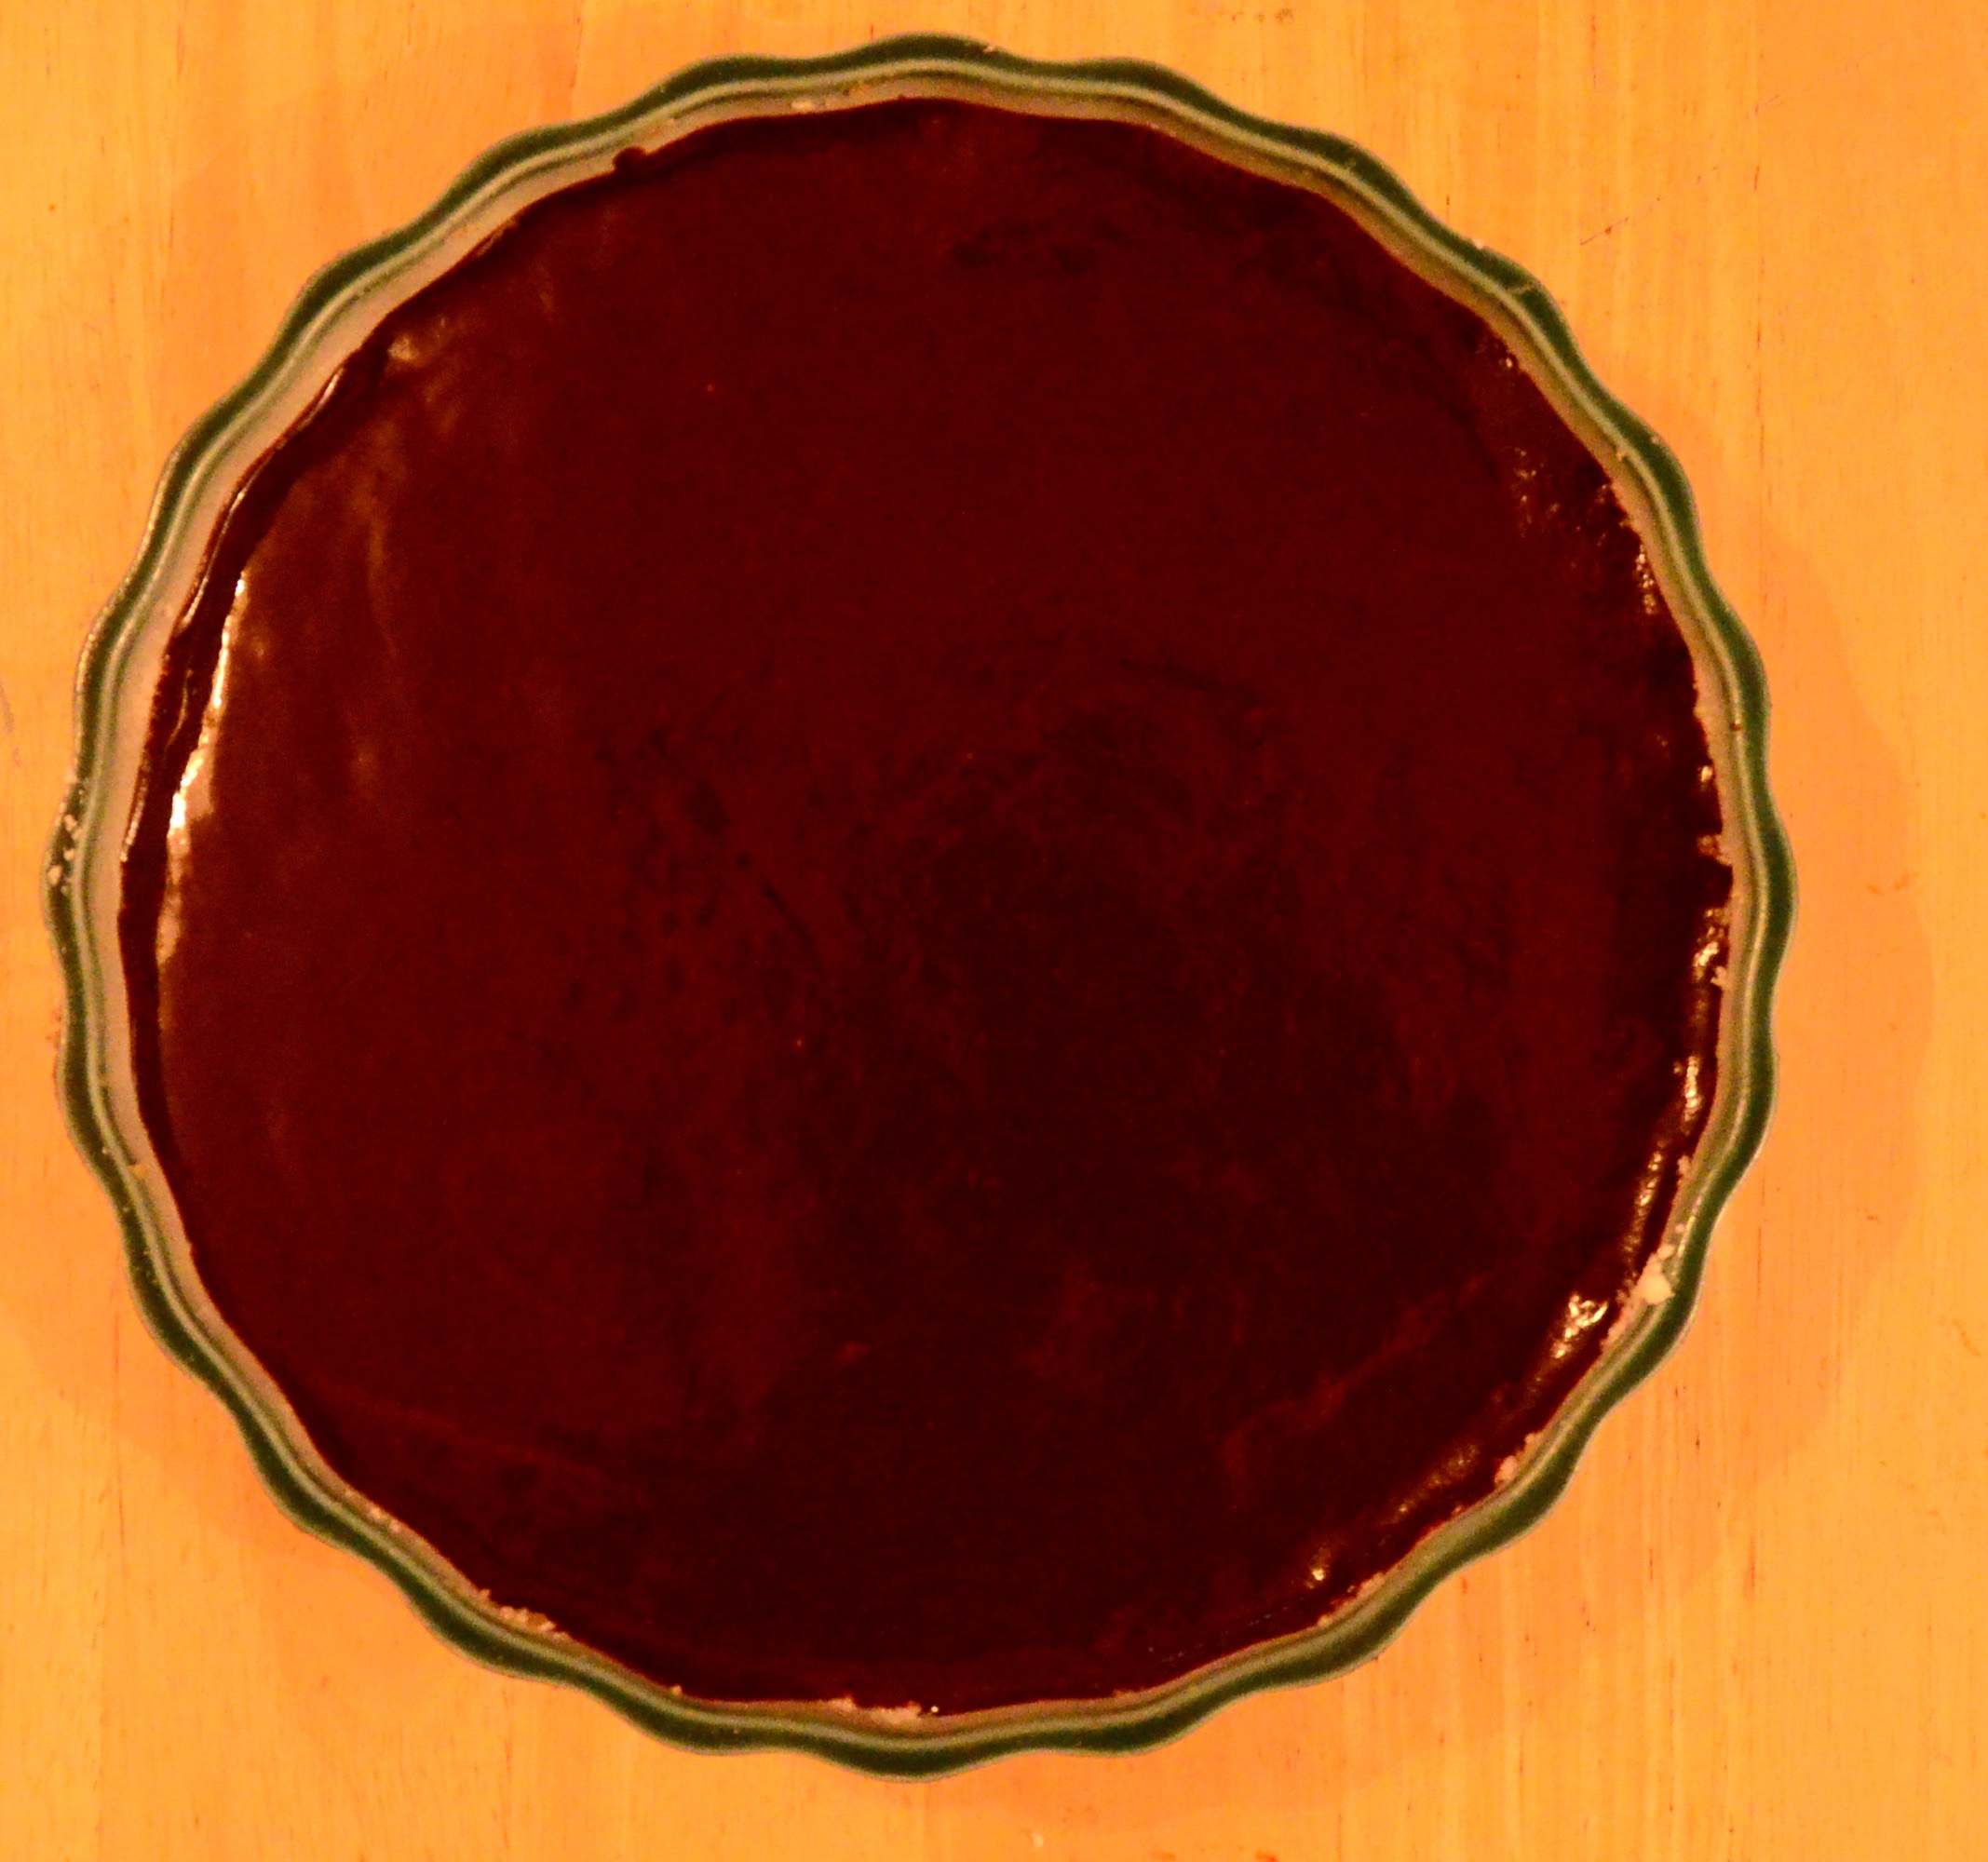
Toasted Walnuts and Raw Chocolate Salted Layer

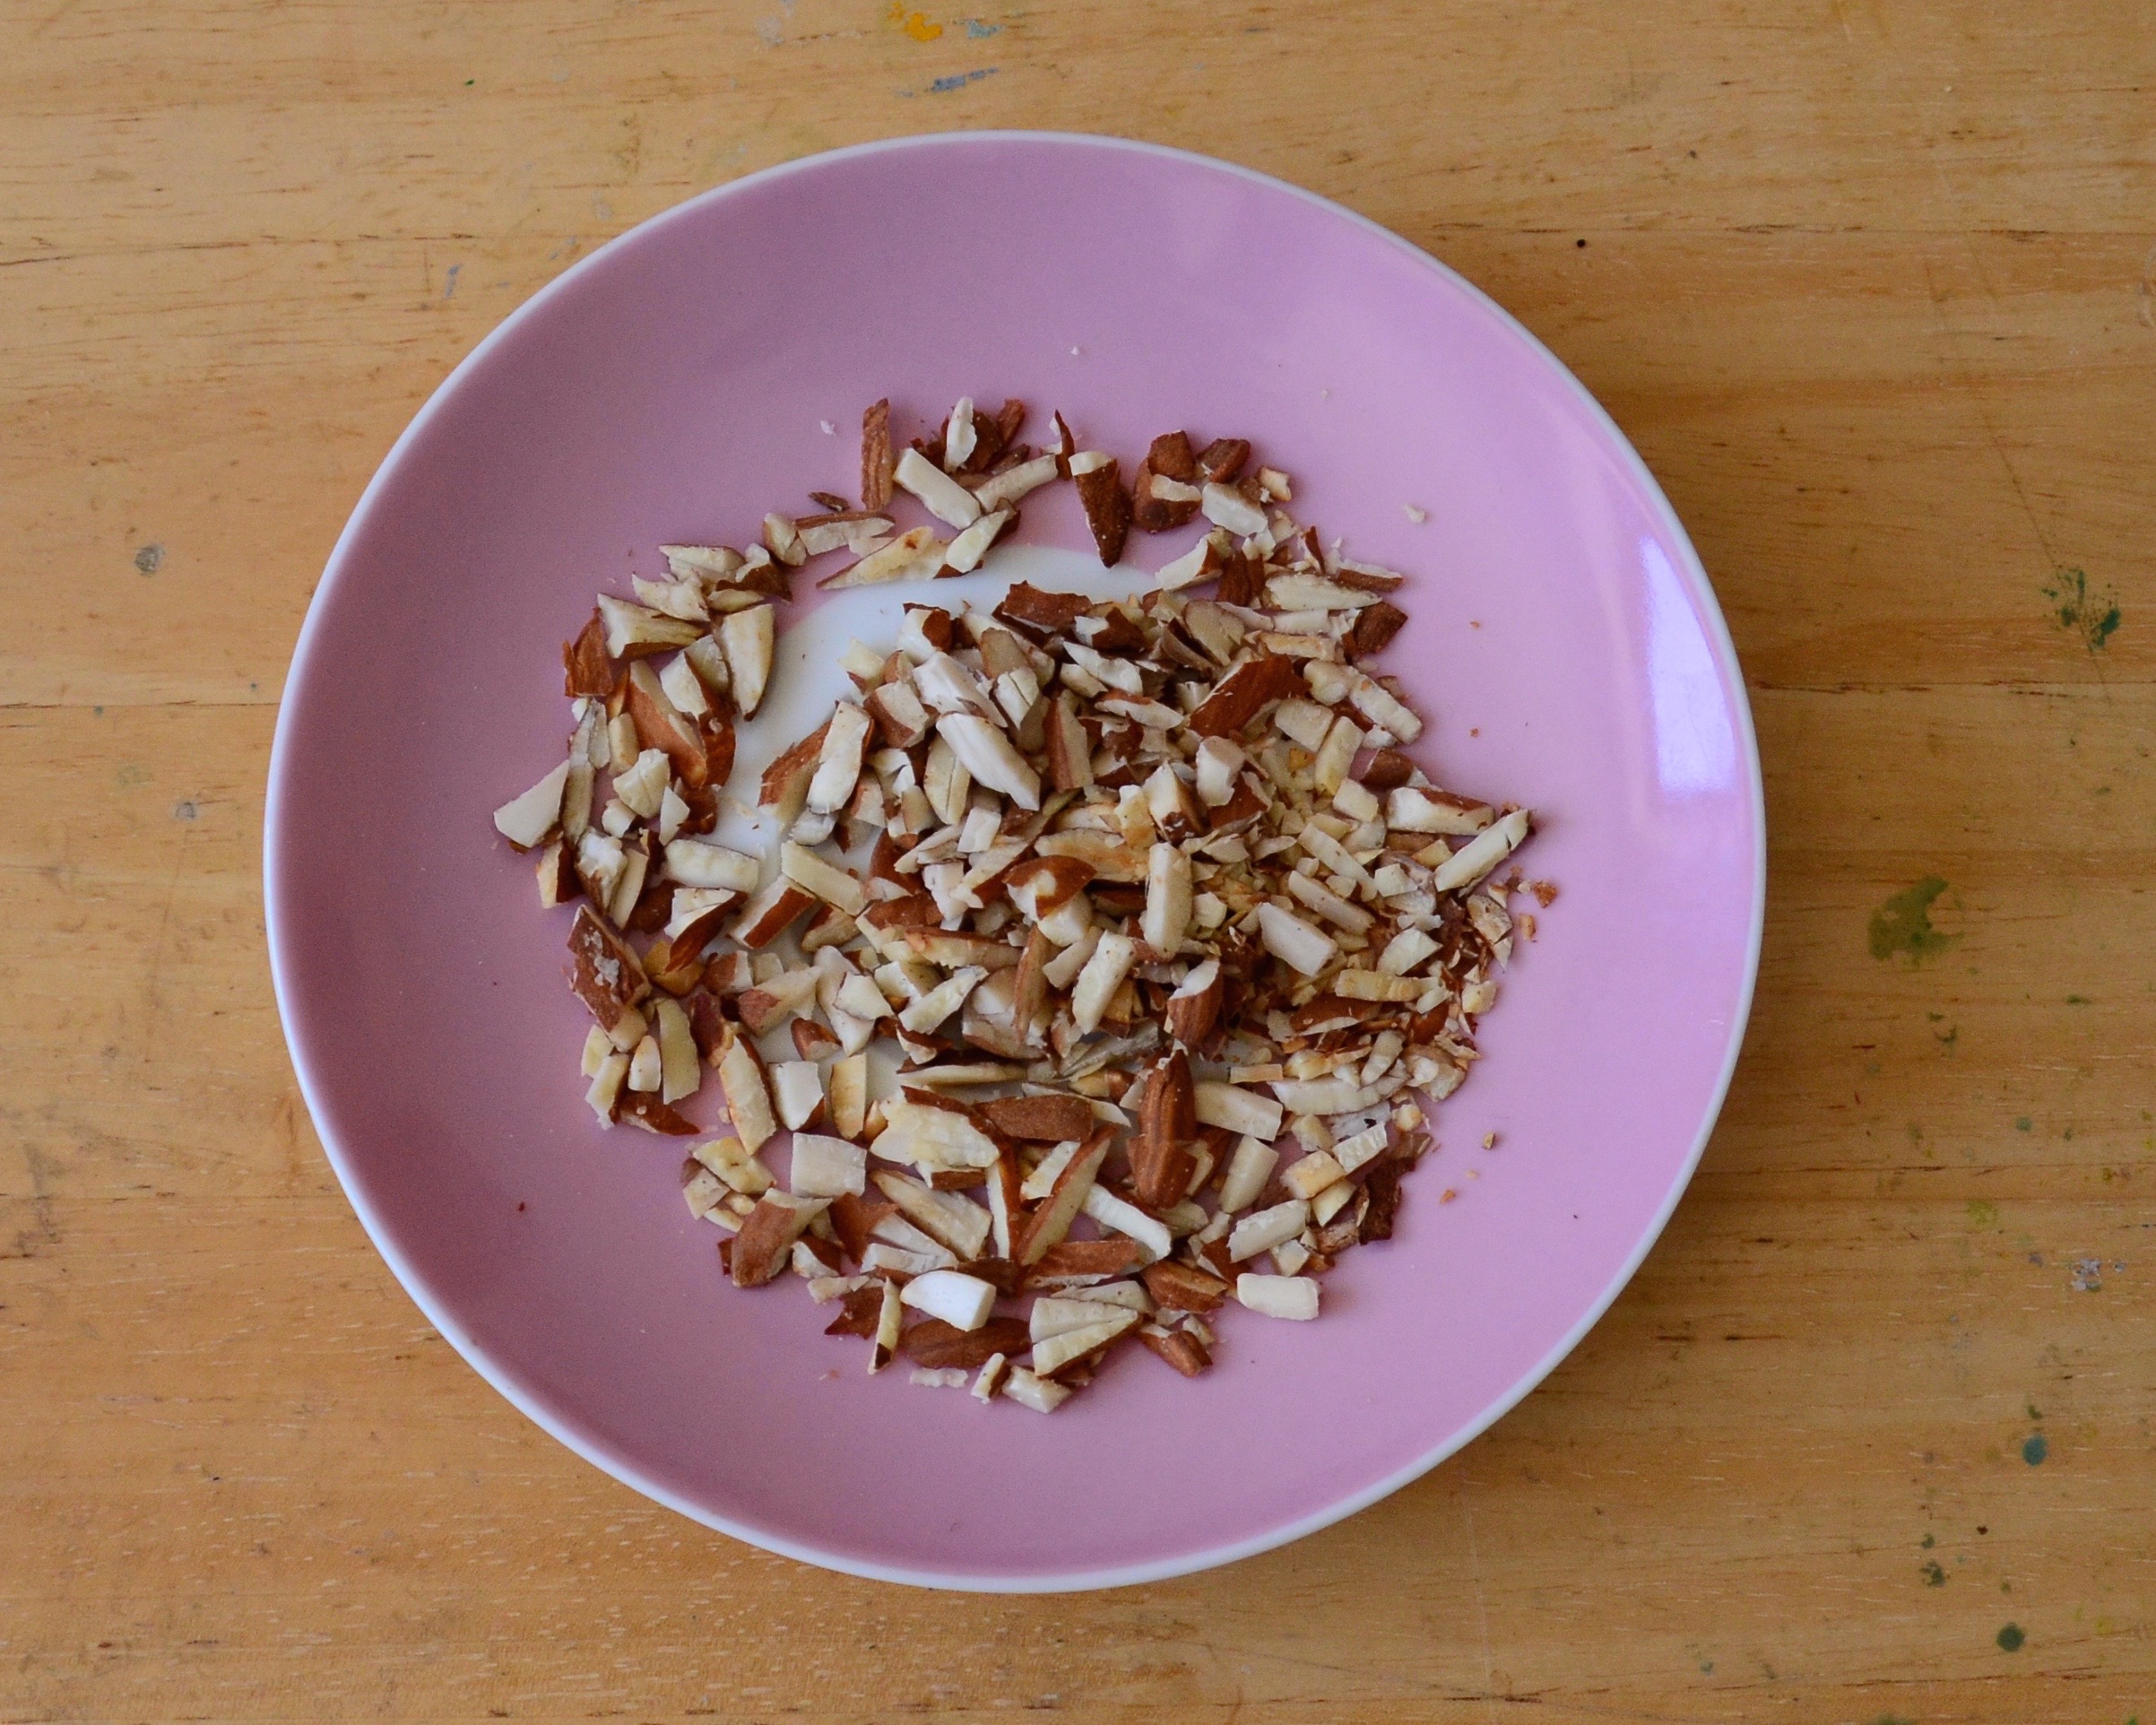
  • Eighteen walnuts chopped (allowing two for tasting to see if toasted)
  • A quarter teaspoon of Himalayan pink salt or good sea salt
  • ————————————————————–
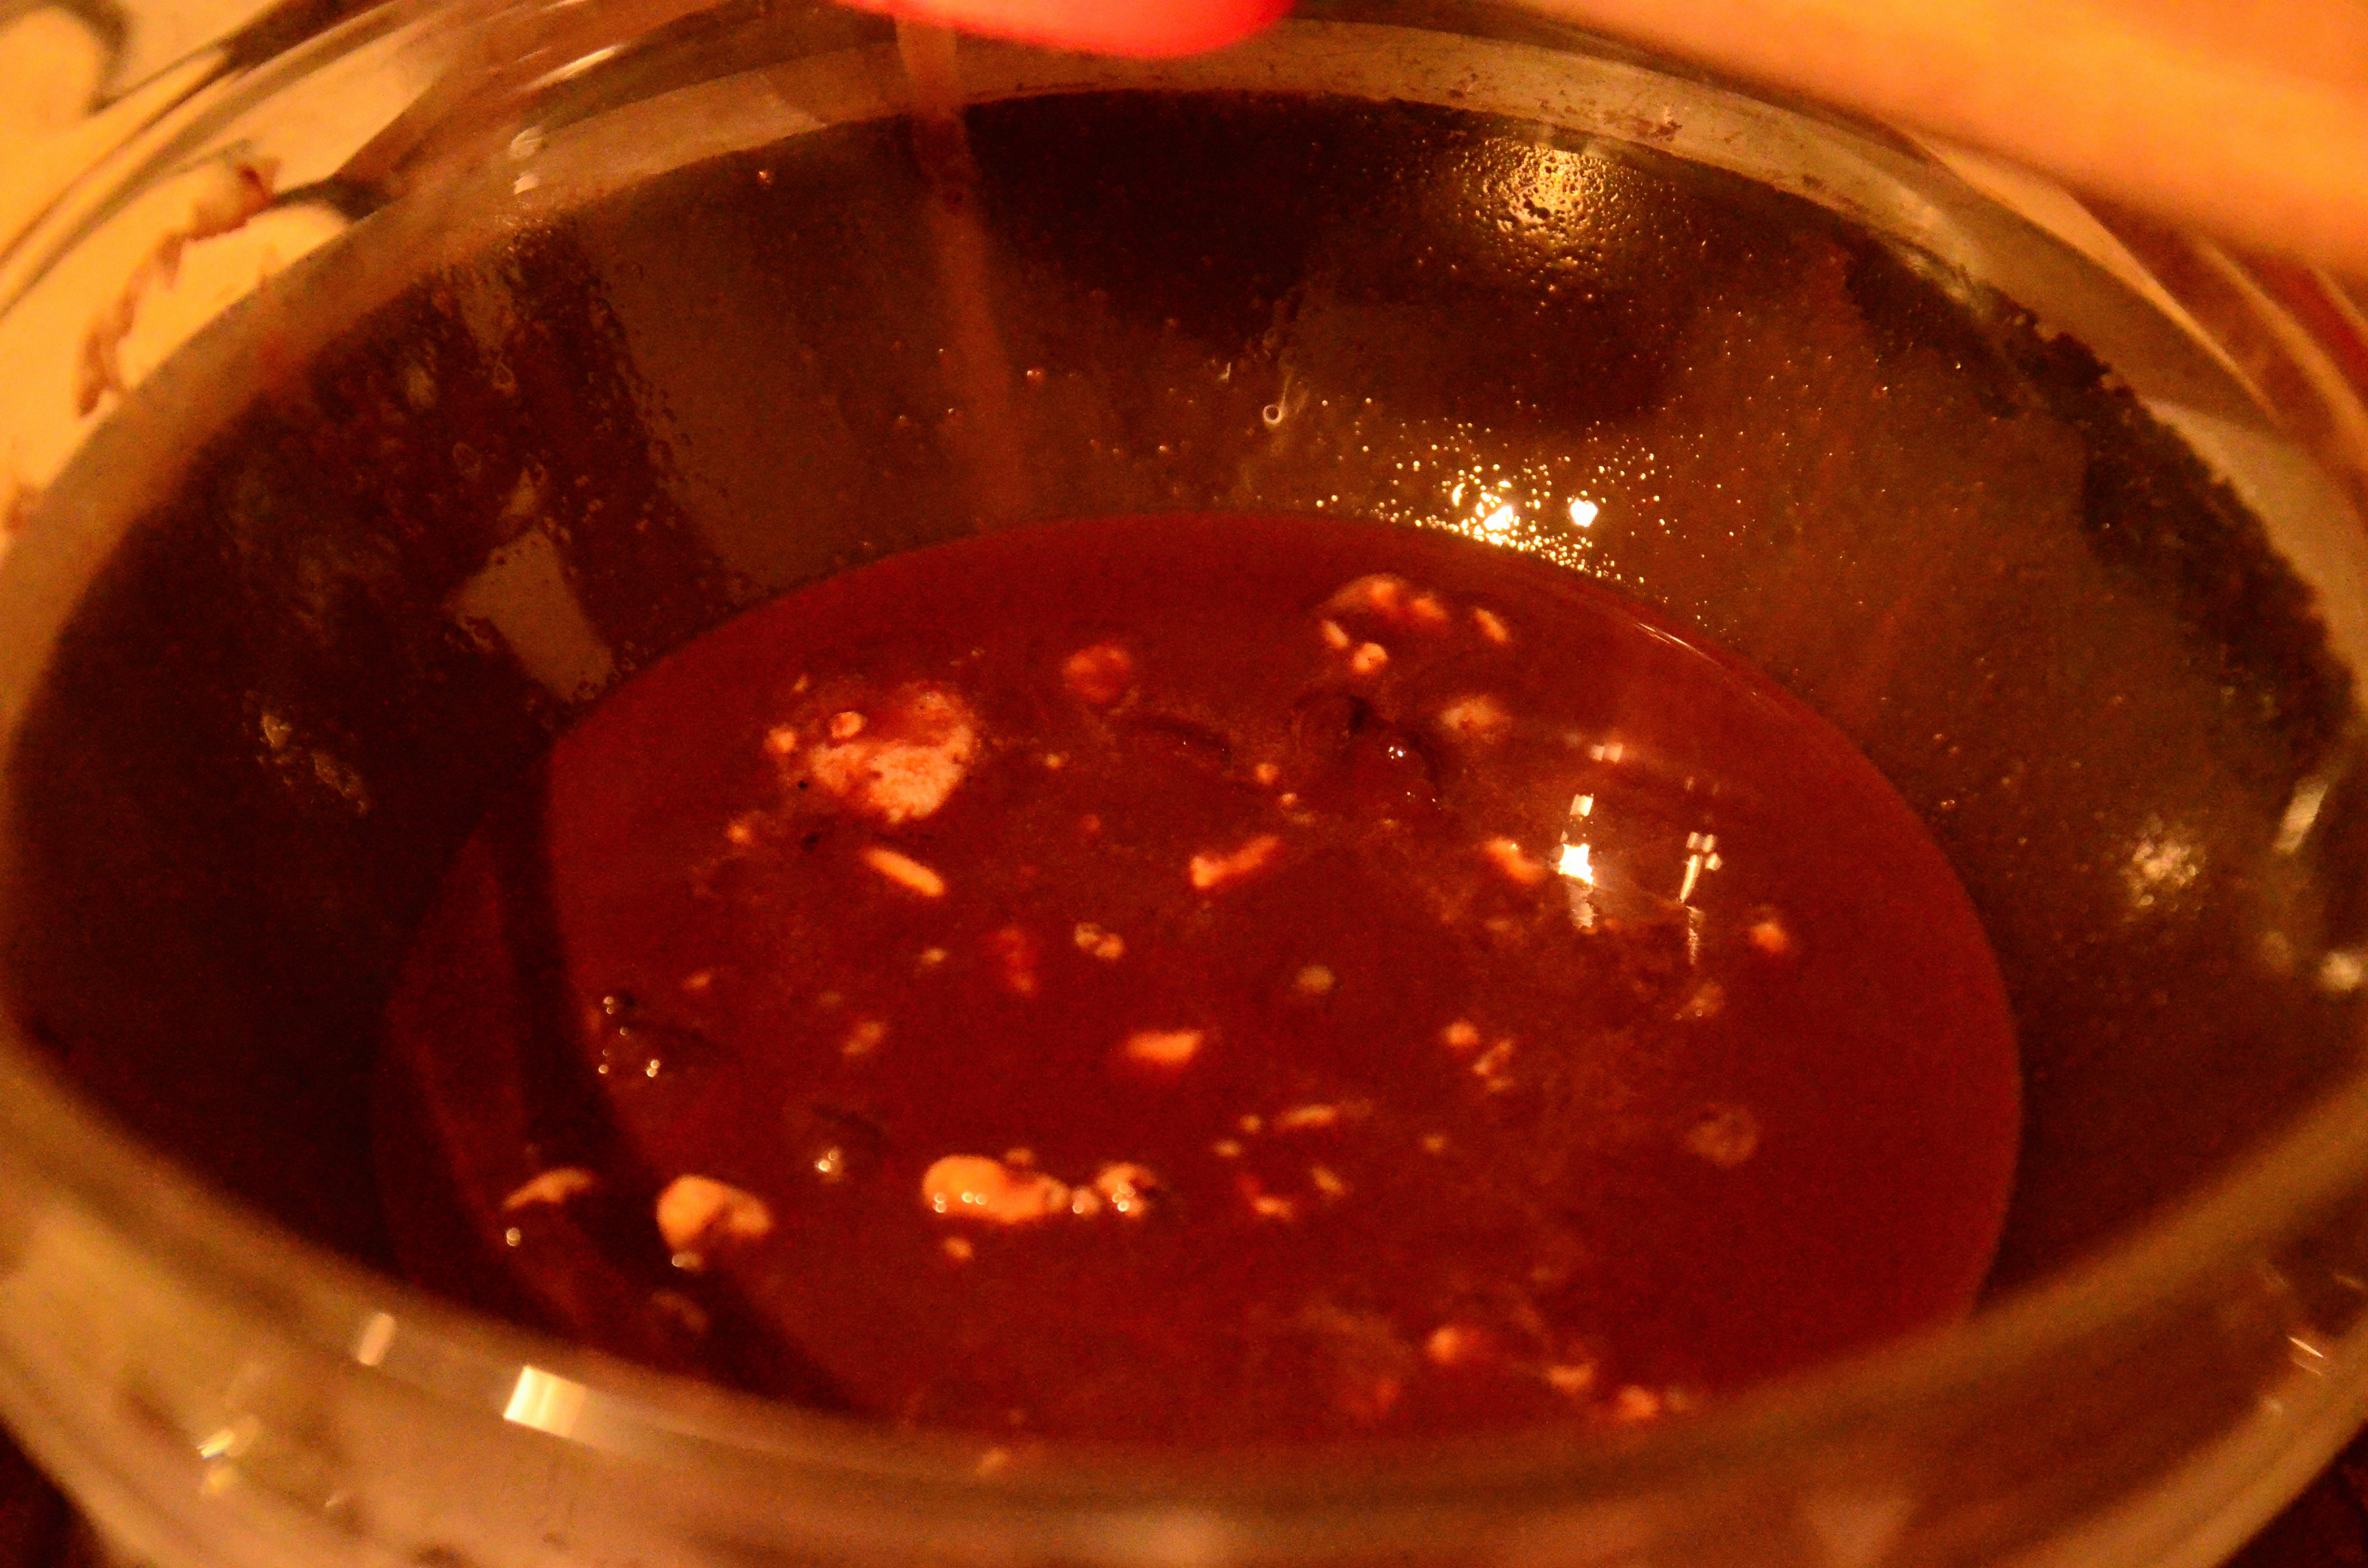
  • A third of a cup of cacao paste chopped
  • Just under a third of a cup of cacao butter chopped
  • One and a half spoons of organic coconut oil
  • Five dessert spoons of rice syrup
  • Two dessert spoons of maple syrup
  • Half a teaspoon of vanilla powder/ one pod/ paste
  • An eight of a teaspoon of Himalayan pink salt of good sea salt

Method: You will need two saucepans. Pick one to put hot water so you can melt your chocolate over it in a perspex bowl. Put it on a medium heat so the water simmer. Insure the water is not touching the bottom of the bowl or it will be too hot. Put your cacao paste, butter and coconut oil into melt.

Avec toasted walnuts

Avec toasted walnuts

When your cacao-y mix is melted add the syrups and mix through. Add in the vanilla and salt next. Take off the heat. Leaving it off the heat for a bit before warming it up again helps the cacao butter crystals align and makes for a better chocolate. They say ten minutes but it was more like six or seven when I did it this time.

melty cacao-ness

Meanwhile put another saucepan on a medium high heat and start toasting your walnuts with the salt. They are done when they change colour a little, they inside become a little more yellow. Be careful not to overdo them, hence the tasting!

I picked my salty walnuts out and sprinkled them over the banana layer. I wanted some of the salt but not all, which is why I didn’t just pour them over it.

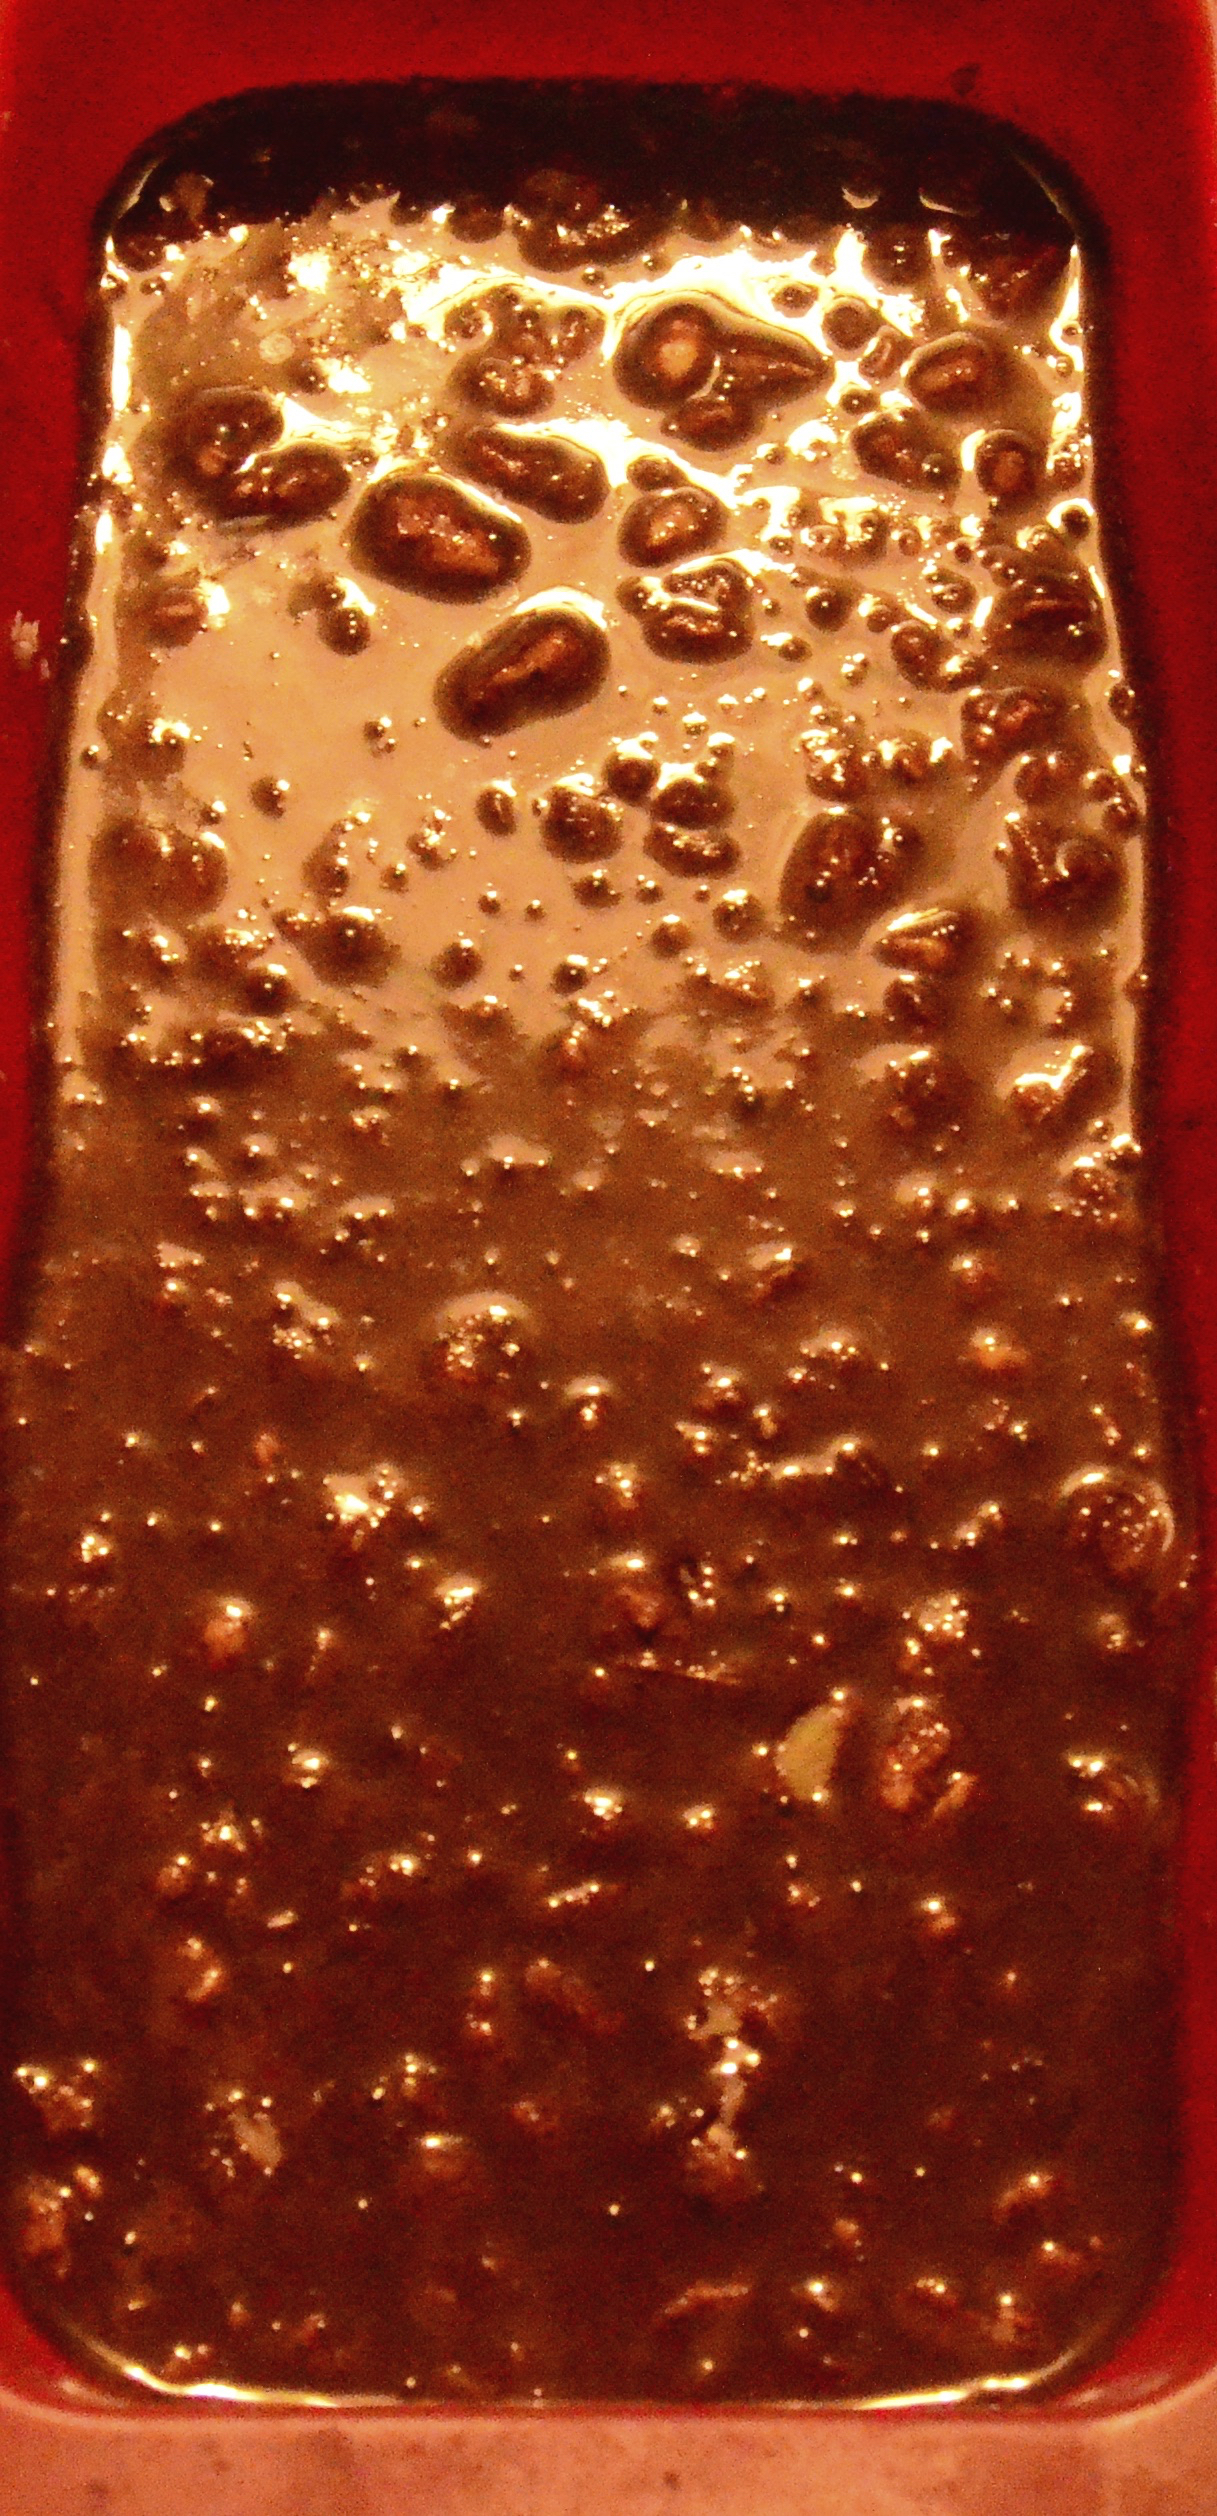
Put your chocolate back on the hit and give it a stir. It will become lovely and shiny after a minute or two. Using an oven glove or towel grab your bowl and pour the chocolate over the walnut layer.

hmmm yum

hmmm yum


Leave for a few seconds. Bang it flat on the table/ counter once or twice to leave air bubbles out. Now put in the fridge to set. I left mine for an hour and a half, but I imagine it would be ready after an hour. I think that after twenty minutes it would be worth taking it out and scoring the top where you plan to cut slices. I will do this next time to make it easier to cut.
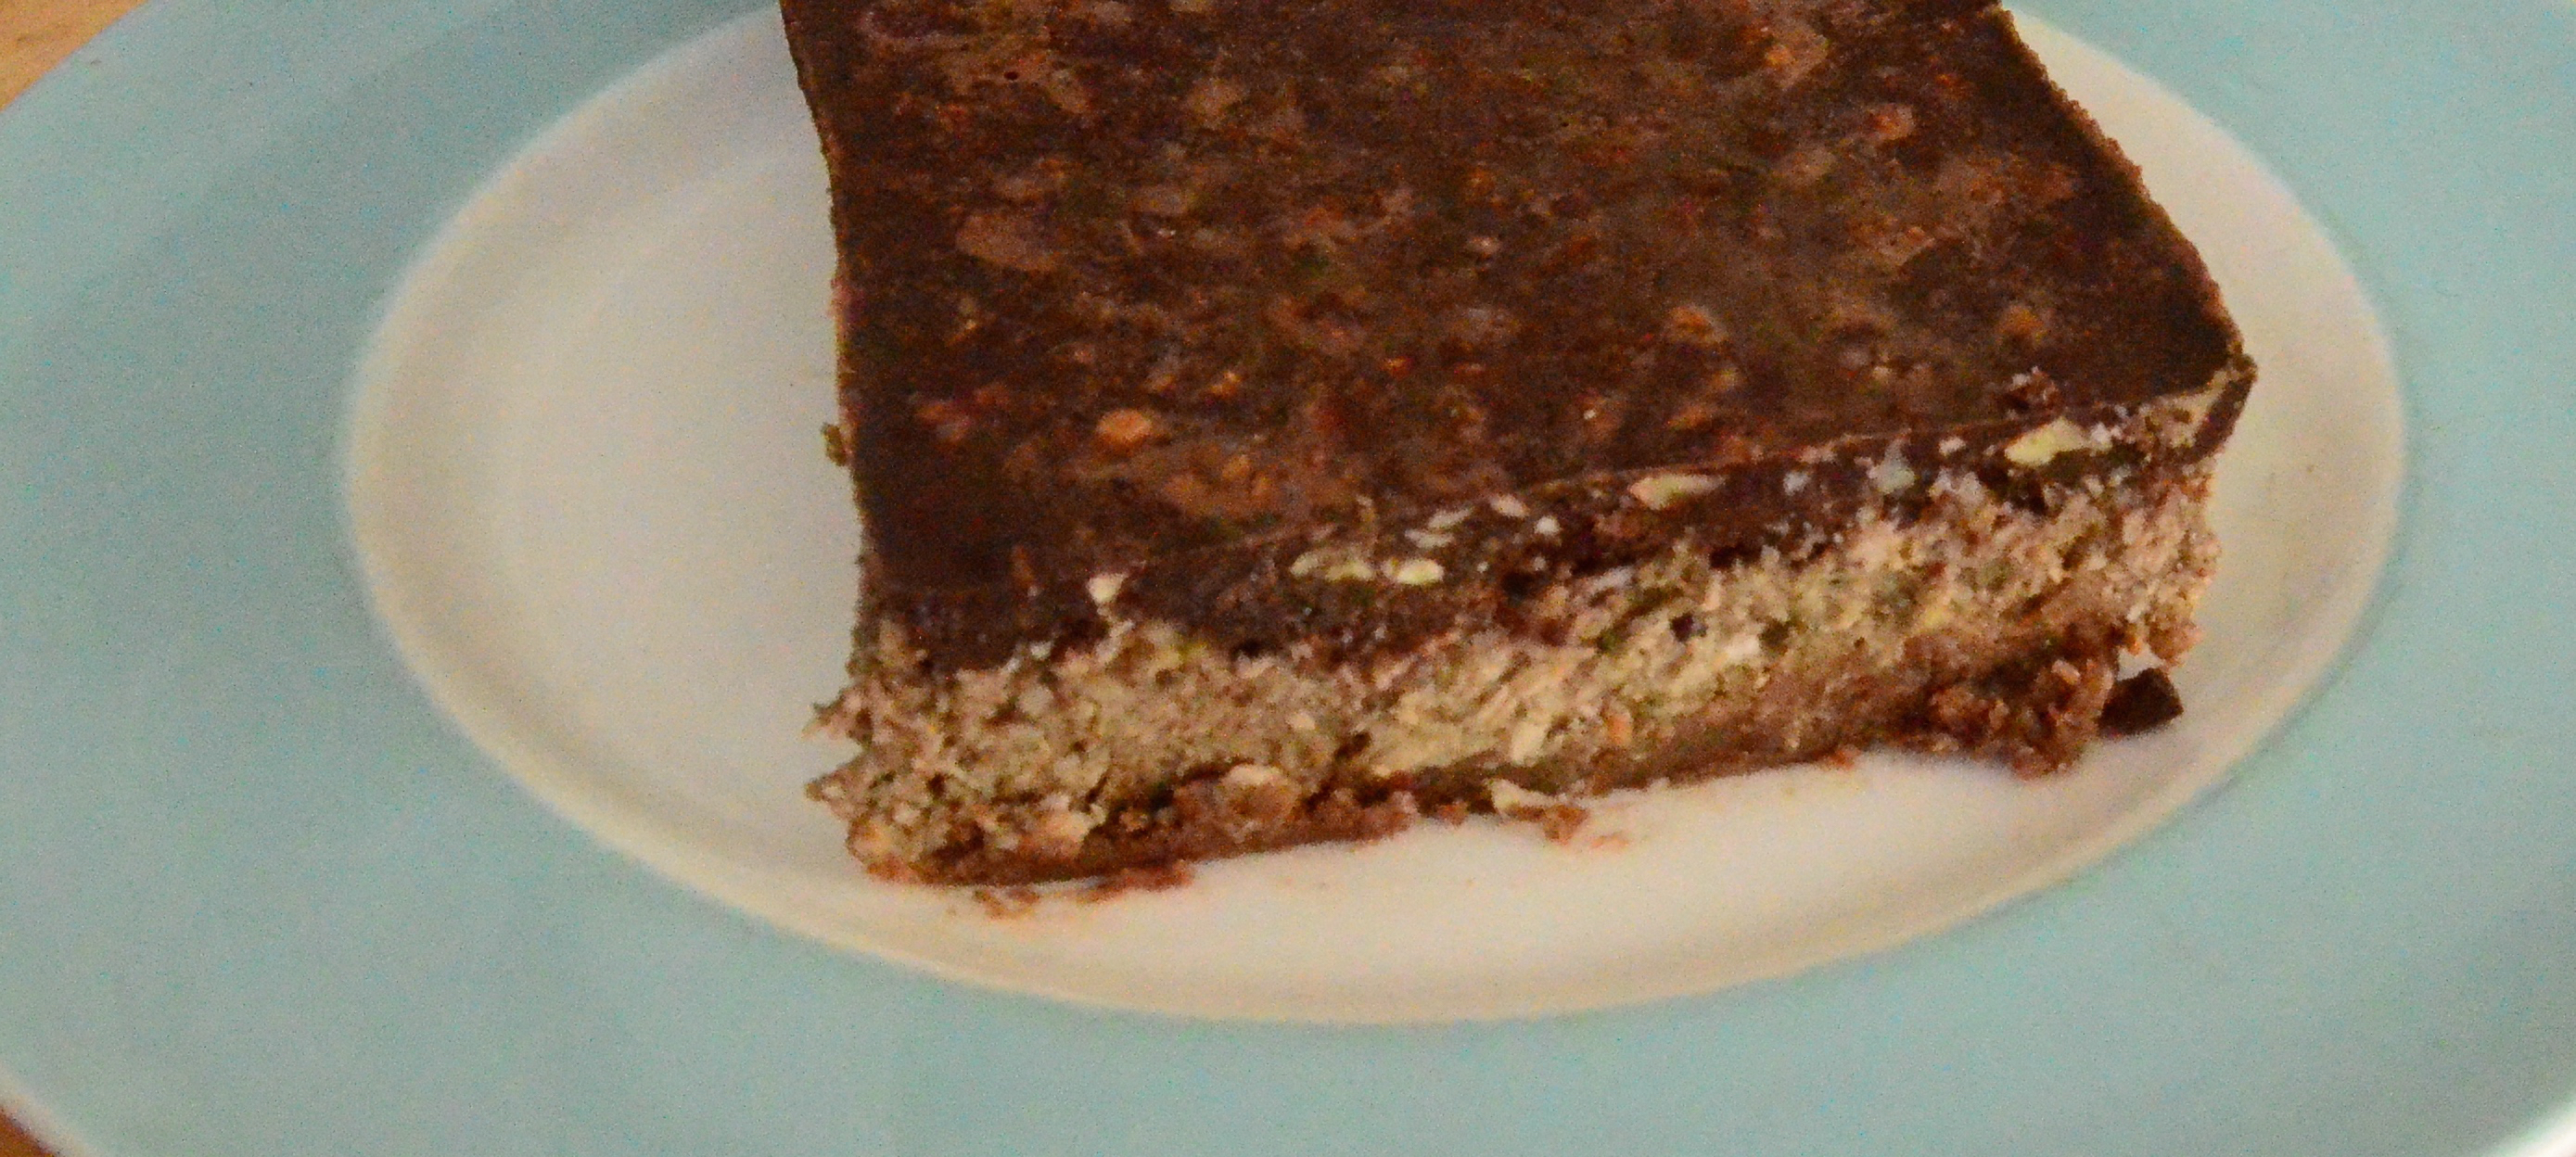
close up

close up

It is fudgey, gooey, crunchy ,sweet and salty taste experience. I had mine with Irish salt caramel vegan ice- cream. Sooo good. It is super filling with all the almonds and walnuts so a little goes a long way!

Salted Chocolate banana Loaf

Salted Chocolate banana Loaf

I recommend storing it in the fridge so the banana gooey layer does not melt, though it is cold enough here enough that it would be fine! e.g. see below…

Yesterday's snow

Yesterday’s snow

O and this…

It's an Organic Lime Fish!

It’s an Organic Lime Fish!

Anyhooooow let me know if you try it out! Xs Aissa


← Older posts

Subscribe

  • Entries (RSS)
  • Comments (RSS)

Archives

  • February 2017
  • August 2016
  • April 2016
  • March 2016
  • January 2016
  • December 2015
  • November 2015
  • September 2015
  • August 2015
  • July 2015
  • June 2015
  • May 2015
  • April 2015
  • March 2015
  • February 2015
  • January 2015
  • December 2014
  • November 2014
  • October 2014
  • September 2014
  • August 2014
  • July 2014
  • June 2014
  • May 2014
  • April 2014
  • March 2014

Categories

  • Biscuits
  • Bread
  • Cake
  • Chocolate
  • Cookies
  • Cupcakes
  • Fermentation
  • Gluten Free
  • juice
  • Natural Health
  • No bake/ Raw
  • Savoury
  • Superfoods
  • Sweets
  • Tart
  • Traditional
  • Uncategorized
  • Vegan
  • Vegan Smoothie
  • yoga

Meta

  • Create account
  • Log in
Follow VeganEtcetera on WordPress.com

Create a free website or blog at WordPress.com.

Privacy & Cookies: This site uses cookies. By continuing to use this website, you agree to their use.
To find out more, including how to control cookies, see here: Cookie Policy
  • Subscribe Subscribed
    • VeganEtcetera
    • Join 93 other subscribers
    • Already have a WordPress.com account? Log in now.
    • VeganEtcetera
    • Subscribe Subscribed
    • Sign up
    • Log in
    • Report this content
    • View site in Reader
    • Manage subscriptions
    • Collapse this bar
 

Loading Comments...