• Home
  • About
  • Vegan
  • Gluten Free
  • Chocolate
  • Cookies
  • Cupcakes
  • Cake
  • No bake/ Raw
  • Savoury
  • Natural Health
  • yoga
  • Tradtional
  • juice

VeganEtcetera

~ Eating healthily easily

VeganEtcetera

Tag Archives: recipe

Beetroot & Red Cabbage Purple Sauerkraut – ferment!

05 Sunday Mar 2017

Posted by Aissa in Fermentation, Gluten Free, Natural Health, No bake/ Raw, Savoury, Superfoods, Traditional, Vegan

≈ 2 Comments

Tags

Fermentation, Gluten free, Natural Health, Raw, recipe, Sauerkraut recipe, Savoury, Superfoods, Traditional, Vegan

There is a lovely beetroot sauerkraut you can buy in good health shops here… after a couple of jars I was like “I should just make this.” I have a collection of KJOVS (kilner jars of various sizes) at home and though I did not travel very light when moving to Sweden I did draw the line at kilner jars.

I seemed to have lost the lovely pics I took of this process- so please bare with my phone photographs! If the originals turn up then I will delete these ones and this note of my incompetence. 🙂

Gothenburg has a many second-hand shops and a picked up a glass jar with a rubber seal easily. So you will need a mason or kilner jar, steam sterilise it or wash in very hot water* and rinse very well – so there was no soapy residue, the only other equipment needed is a knife, a bowl and a plate and maybe a veg peeling tool. (*not too close to boiling- glass can explode! I have foolishly done this and have a scar to prove it)

I prefer to ferment organic veg, I find the idea of fermenting chemicals a bit off-putting. That said if you peel the non-organic beetroot and remove the outer leaves of your cabbage you will certainly lower the levels.

It is very simple and quick to prepare. I chopped everything but you could give things a whizz in a food processor or use a spiralizer for the beetroot.

Beetroot & Red Cabbage Purple Sauerkraut

  • Two and a half medium purple beetroot
  • Just under Half of a medium sized red cabbage (chop half)
  • A flat dessertspoon of sea salt
  • Maybe some boiled cooled water with a pinch of salt in it.
  • A bulb of garlic if you like

Method:

You will prob only need two beetroot and under half the cabbage, but it is good to have extra, as you need to fill your jar.

So chop them into small bits. Not teeny tiny bits, but kind of as small as you’d get in a normal slaw.  As you chop, put stuff in a bowl, I tend to add half the salt half way through and then the rest at the end.


The Vegan's use of a cheese slicer- beet peeling!

The Vegan’s use of a cheese slicer- beet peeling!

chopped

chopped

Now to dye your hands a purple colour. With clean but NOT soapy (antibacterial and we don’t want to risk killing the good guys). Squeeze, mash, rub and press your mix. Lots of water will start to be drawn out by the salt. If not much water has come out yet, you can put a plate on top and leave it rest for a bit. You can put a weight on top if you like (I’ve used a bag of flour in the past). I didn’t use a weight this time.

Now start squishing the veg into your jar. If the liquid is not covering the contents you can add some of your cooled salty water. You could squash everything down with a bulb or layer of garlic cloves. But you will have some of a garlic-y flavour to sauerkraut. When doing large jars and I have been caught out by not enough prepared veg I have pressed everything down with a glass jar. Check it out in my detailed Sauerkraut post inc. troubleshooting Sauerkraut the new old superfood. I am tagging this again as a superfood, it is filled with colourful anti-oxidants and SOO much live bacteria it deserves the title, as do the beetroot red cabbage and garlic…I will stop or I will end up listing all veg, nuts, legumes, seeds, beans and herbs and spices in the world.

Once the jar is up to the tip-top put on your lid. I would ideally leave for 10 days to a month. I know some people leave their sauerkraut for even longer, but I like a bit of a bite in this slaw. I was nervous as to how well my vintage jar might keep it all airtight, I still opened everyday to leave gases out – to prevent a build up and explosion – kinda like burping the sauerkraut. I stuck mine in the fridge after a week I might be barely, barely fermented. I think I will buy a traditional kilner jar (rubber seal and metal clamp) in the second-hand shop this week and ferment again- in a less nervous manner.

Barely Fermented Purple Sauerkraut

Barely Fermented Purple Sauerkraut

You will know all is well as after about a week you should start to get a vingear-er-ry smell from the kraut. It is an amazing what smell can tell you. It should never smell “bad” or “off putting” or mouldy. It should smell cabbage-y and then a bit vingear-y. It should stay the same colour- i.e no bloom of mould! You shouldn’t have any of these problems if your jar is full, contents covered by liquid and airtight.

It is lovely on toasted rye bread with avocado! Hope you try it!  Xs Aissa

P.S If you have concerns or it is your first fermenting rodeo you might like check out my other Sauerkraut post linked above for more detailed troubleshooting. 🙂 But don’t be overly anxious it really is a simple process!

Vegan Pancake Tuesday… Spelt & in Sweden!

28 Tuesday Feb 2017

Posted by Aissa in Savoury, Sweets, Traditional, Vegan

≈ Leave a comment

Tags

Pancakes, recipe, Savoury, Sweden, Sweets, Traditional, Vegan

Hey guys! Long time no post! 😦 Here I am with another Vegan Pancake Recipe… but it is Pancake Tuesday back in Ireland and my sister is up in Nordic country for a visit … so here we are!

Vegan Pancakes- Spelt!

  • 1 generous cup of whole spelt flour (called Dinkel here!)
  • 2 teaspoons of baking powder (as aluminium free as possible)
  • A quarter teaspoon of sea salt
  • Half a teaspoon of vanilla powder
  • OR a teaspoon of extract in the wet stuff
  • 2 dessertspoons of org raw coconut oil melted
  • 1 and a half dessertspoons muscovado sugar
  • A cup and a few dessertspoons of vegan friendly milk (warm)

I used the Swedish “Oatly”, they have a version here for coffee that is richer … foams so all the cafes here use it.

Method

Sooo melt the said coconut oil on a medium heat. In a bowl… I used a cool green Swedish dish i found in the kitchen…you can use your own, no found Swedish dishes necessary. Where was I?

In a bowl mash your muscovado it is a soft packed sugar and tends to have clumps. Rapadura/sucucant would be fine too. Now pour in your coconut oil and mash and smush them together.

Put your Vegan friendly milk in the saucepan you melted your oil (so no waste!) and warm it up to finger temperature. Do do this, doing this is important as cold milk will make the coconut oil go hard again.

Whilst this warms… measure out the dry stuff. Flour, salt, baking powder and vanilla powder and mix together. If using vanilla extract add it to your warming milk.

Add the warm milk to the oil and sugar- mix mix mix mash mash mash- NO LUMPS PEOPLE! Grab a whisk like implement- being in a foreign country without my kitchen supplies I used one whisk from an electric mixer. Add in your dry ingredients and whisk everything together so no bits.

Pancake stuff Sweden style!

Pancake stuff Sweden style!

Leave to sit for sit least a half an hour, so it thickens up a bit.

Put a frying pan on a quite high heat and put a teaspoon of coconut oil in to melt. You will most likely have to sacrifice the first pancake to the pancake gods, but a good test is to put a tiny drop of the batter in the pan and if it sizzles and changes colour really fast it is hot enough.

This is a small non stick frying pan! ;-)

This is a small non stick frying pan! 😉


I had a small pan so I used only two thirds of a soup ladle per pancake. I like them thin too. Leave one side cook for over thirty seconds, until it turns golden brown at the edges, it should then be ready to flip. Then leave that side sit for a least thirty second before you try and move it. I had my sister supervising me so I did not give into my terrible impatience and interference with  the natural cooking order of pancakes… much more of a mix stick in oven  or fridge or jar to ferment person! 🙂

La Vegan Pancake, in a bowl.

La Vegan Pancake, in a bowl.

TA-DA! Et Volia! Vegan pancakes. I had mine with Oat cream, organic lemon and real Maple Syrup. Because I like the classics!

I have been baking since I got to Sweden, but nothing I felt good enough about to share, my last place the oven didn’t close correctly … weird bakes ensued! The odd batch of biscuits/cookies were okay but by ‘gum were the cakes a mess!! New season, new semester in college and new place- last biscuits I baked took… wait for it FORTY FIVE minutes 🙂  But I currently have a Beetroot and Red Cabbage Sauerkraut brewing do will share that next!

Vegan Cashew Chocolate Chip Cookies

15 Monday Aug 2016

Posted by Aissa in Biscuits, Chocolate, Cookies, Traditional, Vegan

≈ Leave a comment

Tags

Biscuits, Chocolate, Cookies, recipe, Traditional, Vegan

Hi!

It has been a while  😦 sorry ! The last month and a bit life has been crazy but also exciting. I have left Dublin and I am briefly in County Cork with my big sis before I move to Sweden! I am going back to college to do a Masters in Photography… might mean improved pictures for the blog! How you guys stuck with me in the early posts I do not know! Everything looked so orange!!!!

I did make a final bake in our Dublin flat – “On the Move Coconut Macaroons” it was my second time making them, but they were a tad crumbly.. . so when I make them again and have the recipe perfected for nostalgia’s sake I will post a few pics from Dublin too.

I am still trying to pack and I leave County Cork tomorrow! But there is always time for a homemade classic chocolate chip cookies. I have no precariously balance baked goods on a windowsill… this time I put them in the garden and managed to keep them out of reach of my sister’s cute cat 🙂

Cashew Chocolate Chip Cookies in the garden :-)

So Celebrating my move north Vegan Cashew Chocolate Chip Cookies!

  • Two dessertspoons of natural smooth cashew nut butter
  • One rounded dessertspoon of organic raw coconut oil
  • Half a teaspoon of vanilla extract
  • A third of a cup of room temperature almond milk – don’t add it all yet
  • A quarter cup of coconut blossom sugar
  • A quarter cup of rapadura/ turbindo/ sucucant sugar *
  • One cup of unbleached white flour or half & half with fine wholemeal **
  • A quarter teaspoon of himalayan pink salt or fine sea salt
  • Half a teaspoon of low aluminium baking powder
  • Half a teaspoon of vanilla powder/ more extract/ half a pod***
  • Approx. 30g or just over 1 ounce of chopped medium dark chopped chocolate. Mine was an organic 70% cocoa.

O I do love my footnotes !

* I could not get rapadura in my local health shop so I used organic raw cane sugar this time.

** I brought a bag of organic unbleached flour with me but could not get a fine wholemeal as normally I would do half and half. If you would like to do Gluten free I recommend half ground almonds and half a white gluten free flour mix.

*** you can NEVER have too much vanilla 🙂 Though they are also lovely with some orange zest!

Method

Preheat your oven to 170C/ 325F could go up a few degrees if not fan assisted. Make sure your oven shelf is in the middle, the top shelf = burnt biscuits. Have your lined baking tray at the ready.

Grab a medium to large bowl. Put in your cashew nut butter, raw coconut oil and vanilla extract and mash together. Mash mash mash until a smooth mix, a la picture.

Cashew nut butter + org coconut oil + vanilla extract = smiley face

I forgot to take my almond milk out of the fridge so I added a drop of hot water to it and added in half. Important not to add cold non-dairy milk as it will make the coconut oil go solid again and you will get knobs of it in your mix :-{ ugh.

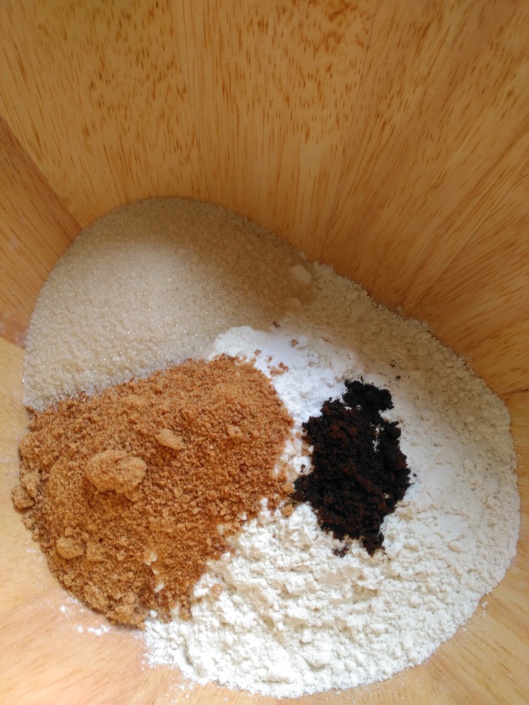
In another bowl bung in all your dry stuff. Sieve the baking powder if lumpy. Mix until all one colour. I used my sister’s lovely wooden bowl 🙂

Dry stuff is my sister's lovely wooden bowl

Chop your chocolate, fine-ish and no need to be precise in the size of the bits- the unevenness gives them character and also varies the chocolate experience!

Roughly chopped chocolate

Now, add your dry ingredients to your wet ingredients. You can use your spoon at first, but it will remain bitty and flakey unless you get your hands in there. I find it is better if your hands aren’t too warm so run them under the cold tap for a sec before you start. Press and fold the dough together once or twice and then sprinkle in your chocolate. If the dough is a bit dry add a little more of the left over almond milk and mix and press the dough again. You just want there to be no flour-y bits and for the chocolate to be pretty evenly distributed. It makes for quite a wet batter.

By the rounded teaspoon place them on your baking tray. Give them a little squish down so they aren’t too high as with the baking powder they will rise a bit anyway.

IMG_20160814_121118This made fourteen cookies. My sister’s oven is hotter at the back, so I had to turn them after ten minutes. The oven is not a crazy uber volcano hot oven like my one in Dublin was and I opened it a million times so they took FIFTEEN minutes. I am going to say ten to fifteen minutes because of my impatience and the unfamiiar oven-ness. When they are browning at the edges they are done. Leave them sit on the tray for a five mins before attempting to eat, they need time to firm up.

Cashew Chocolate Chip Cookies in the garden :-)

Ta-da! Viola! Vegan Cashew Chocolate Chip Cookies in the garden 🙂

Look how safe those biscuits are, all on the ground not three stories up and half off a sloping windowsill. When I find somewhere to live in Sweden (O dear lord God I have nowhere to live!!) I will post as soon as possible, maybe with baked goods on a Swedish windowsill! 🙂

Xs Aissa

Jam Crumble Cookies Vegan & Gluten free

03 Sunday Apr 2016

Posted by Aissa in Biscuits, Cookies, Gluten Free, Sweets, Vegan

≈ Leave a comment

Tags

Biscuits, Cookies, Gluten free, recipe, Sweets, Vegan

Biscuits were required eating yesterday evening.. sometimes they are just necessary. I have made various versions of these over the years, sometimes with spelt flour sometimes with the addition of different nut butters. It is a flexible recipe. Since i planned to share the recipe I thought I would do my GF version! More egalitarian 🙂

You will need : A couple of bowls, measures and an 8inch pie or cake tin.

Jam Crumble Cookies

  • Three and a half dessertspoons of org coconut oil
  • Two dessertspoons of a nut or seed butter *
  • One dessertspoon of real maple syrup
  • Scant half a cup of coconut blossom sugar
  • A quarter cup of buckwheat flour
  • Two big dessertspoons of gram flour/ cornstarch
  • Two thirds of a cup of gluten free flour **
  • Almost half a cup of ground almonds
  • Two big dessertspoons of fine maize meal
  • A good pinch or eighth of a tsp of himalayan pink salt / sea salt
  • A dessertspoon of vanilla powder/ paste / extract
  • Three to six dessertspoons of almond milk
  • Roughly half a cup of no added sugar jam- I used apricot

*I used a sunflower cashew one I had made

**I used a brand called Doves which is a mix of rice, buckwheat, tapioca and potato

Method:

Preheat your oven to 180C/ 350F. Rub a bit of coconut oil on your pie/tart dish or line a metal cake tin with paper.

Grab a bowl and mash your coconut oil and seed / nut butter together. Add in your maple syrup and mash mash mash some more, make sure to press out any lumps of coconut oil that may be hiding in there.

Coconut oil and Sunflower cashew butter

Coconut oil and Sunflower cashew butter

Add in your coconut sugar. Yes you guessed it! More mashing, biscuit exercise, working on that upper body strength! Again make sure it is blended properly so it has all become one colour.

Plop all your flours, the ground almonds, vanilla powder and salt into another bowl. I don’t bother sieving .. but if you are not using gram (chickpea) flour and choosing cornstarch you should sieve the cornstarch alright.

Put your dry ingredients into the wet. It will take a bit of pressing to get them pressed together. If you find it is looking more floury than bread-crumby (see pic) you may need to add a dessertspoon or two of almond milk. Start by sprinkling one spoon of milk over the ingredients and mix and press again. If still dryish add another spoon. It should just hold together when pinched. If you are happy with its crumbliness take a generous half a cup plus a dessertspoonful out and put it aside.

crumble

crumble

Add another two spoons of almond milk and mix again. It should turn to a doughy texture when you squeeze it with your hand. Grab your prepared pie/ cake tin and press the mixture in – evenly.

The stickier dough

The stickier dough

Next the jam! Usually half a cup will do but always good to have a spare spoon to make sure the base is properly covered.

what unevenly spread jam looks like ;-)

what unevenly spread jam looks like 😉

Next get the crumble you had set aside. Sprinkle the crumble over the top making sure no jam is visible!

pre baking

pre baking

Pop it in the centre of your oven (slightly to left in mine as right side of my oven is hotter!). It took 35min in my fan oven so I ‘reckon it could take 40 in a non fan.

Posing for it's close up

Posing for it’s close up

If you used a square tin you could cut little squares but mine is round so it is tart slice style biscuits for me!

Hope you try it or make your own version of it! Xs Aissa

Footnote:

I was inspired by a multitude of jam crumbly recipes when scouring the internet but special kudos mention to “Have Cake will Travel” recipe as inspiration.

It is also lovely made with raspberry or blueberry jam! It is also very easy to make nut free- use a seed butter, use fine maize meal instead of the ground almonds and use a non diary milk not made from nuts! Problem with coconut? Use vegan butter instead of coconut oil and use rapadura / sucucant sugar instead of coconut sugar!

Horseradish Preserve! Vegan & Gluten free

24 Sunday Jan 2016

Posted by Aissa in Fermentation, Gluten Free, Natural Health, Savoury, Superfoods, Traditional, Vegan

≈ 1 Comment

Tags

Fermentation, Gluten free, Natural Health, Raw, recipe, Savoury, Superfoods, Traditional, Vegan

I’m on a spice kick! Wasabi-ing my popcorn and now horesradish-ing my everything! ( I can make my own verbs up and no-one can tell me otherwise!!) Horseradish is a some what overlooked root. Its super heat and flavour add that extra kick to.. well as I said everything, but it also as medicinal properties- anyone who has had the fresh stuff will tell you it clears your sinuses but it is also anti-bacterial (like garlic)- though traditional recommended for helping with respiratory conditions I have heard of it being used for fluid retention, urinary tract infections and inflammation. * So a great thing to have in your kitchen.

In order to keep the heat in your horseradish you need to make this all in one go. So no chopping the horseradish wondering off to look something up on line and spending three hours looking at cat videos 🙂 If left out to the air – esp. ones blended it starts to loose its heat.

I have made this a number of times so here is the list of what you will need to make:

Horseradish Preserve

  •  A good sharp knife
  • A good strong chopping board
  • A little upper body strength or a helper
  • A good strong blender or food processor
  • A jar
  • A Horseradish 🙂
  • Approx. a cup of apple cyder/ cider vinegar raw and with the mother culture in it.
  • Optional: Swimming goggles.

Method

Ideally the horseradish would be organic, but I couldn’t get any this time. So I made sure to peel it really well incase there were any residues left on it. Horseradish is very woody it even has a grain to it so it is a bit like trying to chop a soft-ish stick! If you find the grain it is easier to peel. The other tip is to cut length ways first , chop the top and bottom off and then chop  to smaller bits. With my blender I need to chop to top of finger size bits, you might have to chop smaller.

Horseradish root looking rooty

Horseradish root looking rooty

Pop the chopped up bits in your blender/ processor and add about six tablespoons of apple cyder vinegar. Pulse off and on five or six times – and then blend for thirty seconds. My blender has a setting for nuts and I actually do it on that first as the horseradish is so hard. Once it is pulverised a bit you can blend like normal.

WARNING! WARNING! WARNING! Maybe get the goggles!

DO NOT TAKE THE TOP OFF THE BLENDER WITH YOUR HEAD OVER IT!!!! It is like putting your head in a bowl of twenty freshly chopped onions. You eyes will be scalded and streaming! Even scooping it into the jar I try and keep my face well back.

Fluffy horseradish ready to apple cyder vinegar-d

Fluffy horseradish ready to apple cyder vinegar-d

All that spicy goodness is heading off into the air so to catch it cover the horseradish with the apple cyder vinegar fast! A good apple cyder/ cider vinegar- that is naturally fermented and raw is full of good bacteria and malic acid (helps break down uric acid – which in turn is good for your joints). This good vinegar will preserve your horseradish- I have had a jar for months at a time in the fridge.

Looks like snow but it is HOT HOT HOT :-)

Looks like snow but it is HOT HOT HOT 🙂

It is a wonderful accompaniment to any meal – but is a especially good mixed with avocado, hummus or a pinch added to your homemade salad dressing. even when using the jar I don’t leave it open to the air for long- to keep all the great spices in!

Hope you guys try it out. It is pretty amazing stuff. It will be called a superfood yet! 🙂

xs Aissa

*footnote. I am not a health practitioner. but I have read if you are on low thyroid medication or pregnant you should not being eating truckloads of horseradish!

It’s Silly Season it’s Vegan Stollen with a Rosy Marzipan Heart! Updated recipe – 2015 style!

24 Thursday Dec 2015

Posted by Aissa in Bread, Cake, Sweets, Traditional, Vegan

≈ 3 Comments

Tags

Bread, Cake, recipe, Traditional, Vegan

Stollen Update 2015!

 I thought I would do a re-jig of last year’s Its Silly Season its Stollen Time post. The wonderful Mihl from Seitan is My Motor agreed to let me put her recipe in this post (Thank you again! 🙂 ). I have made my little adaptions- to the wonderful original but do check out the link to her page as she has more pictures, describes the process very well and explains the tradition of Stollen! You can also discover all her other delicious delights.

I am making two batches of Stollen this year- Six mini Stollen- I have three in the oven right now! Starting to smell nice in here!! 🙂

I have been making Stollen for Christmas for a few years. Clearly alcohol laden fruitcake is the Irish tradition, but I never liked it much. I was the person who ate the marzipan off the outside! I came across a wonderful recipe for vegan stollen here on “Seitan is my motor”.  For emphasis her instructions are very clear! Which is what won me over. I was previously a bit intimidated by enriched dough. Knowing if you have kneaded enough, throwing the yeast in on top of the salt and immediately killing it ( 😦 ) etc. Kneading is all about getting your back into it and not being tempted to add more flour 🙂 Once you make this you will realise it can be done, to delicious results.

I have adapted the recipe a little and I make my own marzipan for it (Marzipan recipe inc here!). My changes are few, you have to respect yeast no messing with the recipe too much or the magic chemistry will be off. I use coconut oil instead of margarine, I use a third of a cup. I rub it with coconut oil too. As you would expect because I am a vanilla fiend I use a generous dessertspoon of vanilla powder overall. Finally I do not like raisins- I can stand a sultana in a scone …but raisins eep! and shiver! so I use chopped organic un-sulphered apricots in my stollen.

It takes a little planning. You make the plain dough the night before and leave it to proof in the fridge. You bring all to together, shape, leave to rise and bake the next evening.

So with no further a due the recipe!

Silly Season Stollen Aissa’s adaption of Seitan is my Motor’s wonderful recipe

Stollen with a rosy marzipan heart!

The dough part un (1):

  • 500g/ 5 cups of unbleached plain white flour
  • 7g/ 1 tsp dry yeast or 40g fresh yeast- I’ve never used the fresh in this!
  • Third of a cup of rapadura/ sucucant sugar & one tablespoon of icing sugar
  • Generous half a cup of non-dairy milk and a bit more as needed- I use un-sweetened almond milk
  • A third of a cup of org raw coconut oil

The dough part deux (2):

  • A pinch of himalayan pink salt/ sea salt
  • One and a third cup of ground almonds
  • A tablespoon of non-dairy milk
  • Half a teaspoon of lemon extract or a few drops of food grade lemon oil
  • A quarter teaspoon of almond extract
  • A large teaspoon of vanilla powder/ extract

The dough part trois (3):

  • Half a cup of chopped un-sulphered organic apricots
  • A third of a cup of quite finely chopped whole almonds

For finishing:

  • A quarter cup of coconut oil
  • Third of a cup of icing / confectionary sugar

METHOD: don’t be scared!! 

Seriously- don’t be scared! It will be soooo gooooood!

So dough part un! I put my oven on to 100C/ 220F and put the third of a cup of coconut oil and the generous half cup of almond milk in a heat proof bowl and pop it in the oven to melt.

Next! Mix your flour and sugar- press out any lumps. I don’t bother to sieve anything.

Take the melted oil and milk out of the oven and leave it to cool. You do not want the mix or the bowl to be too hot or it will kill the yeast. It should be body temperature. You could put it in another bowl- I like to save on wash-up though!

Add the yeast, give a gentle stir to dissolve and add in your flour sugar mix. Combine  it too a rough ball- add an extra splash of almond milk if very crumbly. Don’t cover it. Leave to sit for about 15 mins.

Dough part deux: Put the dry ingredients (ground almonds mixed with the pinch of salt- if you are using vanilla powder put it in now) in on top of the dough and mix a bit- you need to use your hands. Mix the wet ingredients – I do it in a teacup- and pour this over your mix. And knead a bit to kinda combine.

Transfer to a very lightly floured surface and knead for about 5 minutes. I do not partake in tons of kneading every day so I tend to take a minute or so to get the hang again, I knead for maybe 7 minutes. My technique is to push away from myself and then pull each side back towards me to form a ball again and then repeat. Try to keep doing it in the same direction Do not add more flour – the gluten will develop and it will stick to itself not the surface- you will even see it getting kinda stringy looking bits- which are the gluten strands!

Now cover it and put it in the fridge for the night so it can rest, and you can too!

The next day. The Dough part trois!

It is usually the afternoon by the time I get around to making the stollen. So take it out of the fridge and uncover it, I usually leave it out for a couple of hours, but if you have a particularly warm kitchen you may not have to wait as long. The yeast will wake up and when the dough warms up it is easier to work with.

Meanwhile chop your apricots and almonds .

Part trois!

Part trois!

Now knead the apricots and almonds into the dough. You need to get your back into it! As the dough will be a bit stiff to start and you want to get them evenly distributed. It can take me maybe 10 minutes. Form it into a rough ball and divide into three. I draw an kind of an upside-down Y into the top of it to give me three even pieces.

stollen dough divided

stollen dough divided

Next bit is the marzipan making! Or if you can buy some and add a little rose flavouring and roll it into logs for your stollen. But lets go back to my 2014 post by the wonderful power of time travel……” do do do do…do do do do do…”

Since I make my own marzipan I put my rose flavour into that instead of the mix. You just cannot get good quality marzipan here. Since I buy my ground almonds in bulk … because I bake so much… it makes sense to make my own.

Marzipan is a wonderful human invention! So versatile! The almond-y heart of your stollen perhaps little marzipan balls that you can dip in melted dark chocolate and leave to set in the freezer. Tasty treats for over the holidays.

Marzipan

  • 200g/ two cups of ground almonds
  • 100g/ one cup org vegan icing sugar
  • A teaspoon of vanilla powder/ a pod/ paste
  • One tablespoon of fresh lemon juice
  • Two tablespoons of maple syrup
  • A quarter teaspoon of sea salt/ himalayan pink salt
  • Half a teaspoon of almond extract
  • Optional: Eight ground apricot kernels or increase the almond extract to one teaspoon
  • Seven drops of food grade rose oil* or a generous dessertspoon of rose water
  • One dessertspoon of cold water

*mine is in an almond oil base as pure rose oil is like twenty five euros a bottle!

Put your dry ingredients in a bowl. Make a well in the centre and add the wet, not the water though! Press it all together. If it still a little crumbly you can add your water and press it together again. It should form a ball like biscuit/ cookie dough. Cover in tinfoil/ baking paper and leave in the fridge for at least a half an hour.

If using in your stollen you will be rolling into three little logs. If you plan to make marzipan chocolate balls you will have billions of them!!! So maybe half the recipe, you could also leave out the rose and use orange zest and a little orange oil or orange flower water instead!?

I digressed in 2014! Back to Stollen!

Roll out one of your stollen. See Mihl’s site here: Stollen recipe and picture instructions!

it should be about 12cm wide and you place your little marzipan log in the middle with a couple of cms to spare on the top and bottom. Fold the right side in and press it on top of your marzipan. Roll it all to the other side so the marzipan so completely covered. Now press the meeting points of the dough together, at the ends fold it over and under and gently pinch so the dough so there are no holes underneath.

Cover with a damp towel, I leave mine for about 15- 20 minutes. My oven takes a while to pre-heat so I turn that on now to 200C / 400F.

Put in the oven and bake for 10 mins. Then cover them up with some tin foil, so they don’t go too brown. Turn the temperature down to 180C / 350F. Bake for another 30 mins … or if you are typing a blog forget about them and bake for longer thereby leaving one a little bit charred. I would go for the former not the latter myself…

Et Voila! That’s it.

Here is mine naked out of the oven !

Triple mini stollen

Triple mini stollen

Ready to wrapped and hibernated for a bit.

snowy stollen

snowy stollen

Hope you guys try it. It really lasts, unless you end up eating it really fast, which has been known to happen. If you are clever and hide one, you can toast slices of it too, sooo good!!!

Will try and post again soon, but just incase Happy Christmas, Solstice, Hanukkah, New Years, or a bit of time off work! 🙂 Xs Aissa
No Bake Nutty Banoffe Pie – Vegan & Gluten Free

26 Friday Jun 2015

Posted by Aissa in Gluten Free, No bake/ Raw, Tart, Vegan

≈ Leave a comment

Tags

Banoffe Pie, Gluten free, No bake, Pie, recipe, Tart, Vegan

We have been having a bit of (lowers voice to a whisper) “summer weather” here recently- shh or we might scare it away!  Warm weather = ripe bananas calling out to be dessertified. Hence Banoffe!

This is my second version of this pie. In the first version I did a base with medjool dates and I just found the fudge-y gooey-ness of the dates just a bit too fudge-y and gooey! Also the taste a little too strong. That said it went down well with my work mates so feel free to blend up four medjool dates instead of using the maple and agave syrup in this one. There will be a lot of either ors in this e.g. I blended cashews but I will give the measure in the recipe for substituting cashew butter if you would prefer to use that.

No Bake Nutty Banoffe Pie

  • Half a cup of cashews soaked over night

Drain the cashews and blend with two dessertspoons of the soaking liquid. I did not blend it completely smooth as I wanted the odd chunk.

Press in Crust

  • One and a half generous cups of ground almonds
  • Three dessertspoons of chopped toasted almonds /almond flakes
  • Two dessertspoons of desiccated / shredded coconut
  • An eighth of a teaspoon of pink himalayan salt or sea salt
  • Half a teaspoon of vanilla powder / insides of one pod
  • Three ground apricot kernels
  • OR a quarter teaspoon of natural almond extract
  • One dessertspoon of organic raw coconut oil
  • Two dessertspoons of the blended cashews
  • OR one and a half dessertspoons of cashew nut butter
  • Two dessertspoons of maple syrup
  • Two dessertspoons of raw agave syrup

Banana Bananas Banana-y topping

  • The rest of the blended cashews
  • OR One and a half dessertspoons of cashew nut butter plus two dessertspoons of non dairy milk
  • Three large ripe bananas or four medium ones*
  • One dessertspoon of organic cold pressed coconut oil
  • Half a teaspoon of runny tahini paste
  • Two dessertspoons of the set coconut from the top of a can of coconut milk**
  • OR two dessertspoons of hard creamed coconut mixed to a tick paste with some warm water
  • Two dessertspoons of chia seeds
  • Optional: one dessertspoon of roughly ground cacao nibs
  • Half a teaspoon of vanilla powder/ insides of one pod
  • A square of dark chocolate for grating on top

*when I say ripe I mean mostly brown skinned. If just ripe you could add a teaspoon of maple syrup to the mix.

** the rest to be used in a curry

Crust Method

So you need a 20cm or 7.5 inch pie tin. Rub it with a little raw coconut oil so you can get the pie out afterwards.

First chop and toast your almonds/ almond flakes and set to one side.

toasted almonds

toasted almonds

Mash your coconut oil with the blended cashews. Add in the rest of the wet ingredients.

Mix your dry ingredients- except the toasted almonds. Add the dry to the wet mashing it together really well. It should be sticky but not sloppy- like a slightly wet drop cookie mix. It should be holding together 🙂 Now add in your toasted almonds and stir through evenly.

Crust mixture pre the toasted almonds

Crust mixture pre the toasted almonds

Press the crust into the pie tin as evenly as you can. It will make a thin crust. Cover and pop in the fridge while you make the topping.

Press in crust

Press in crust

Banana Bananas Banana-y Topping Method

Get the rest of the blended cashews (or cashew butter and some non dairy milk) add in the coconut oil, the tahini, the creamy coconut (or the creamed one you’ve made into a paste) and either one large banana or two medium ones and blend together- or really really really really mash LOTS!

Next roughly mash in another banana- the reason for doing them separately is to give different textures. Add in the vanilla, chia seeds and ground cacao nibs.

The topping- pre the pretty

The topping- pre the pretty

Now so, take the crust out from the fridge. Pour your mix on top and spread evenly. Get your last banana and slice really thinly- like a few mm thick. Decorate your pie with the slices. Next grab your square of dark vegan chocolate and grate it over the top. Cover it up again and leave to set in the fridge. I didn’t decorate it with banana the last time- I think the banana decorating should probably wait until you are serving it it incase they turn black.

Banoffe in (shh) Sunshine! I actually nearly threw it out the window...

Banoffe in (shh) Sunshine! I actually nearly threw it out the window instead of gently placing it… oops, flying banoffe pie.. ? Or maybe it just wants to fly- I ramble.

There you have it – Nutty No bake Banoffe Pie! Hope you try it out! Xs Aissa


Quick and Zesty Pickled Cucumber Salad! Vegan & Gluten Free

01 Monday Jun 2015

Posted by Aissa in Gluten Free, No bake/ Raw, Savoury, Vegan

≈ Leave a comment

Tags

Gluten free, Raw, recipe, Savoury, Vegan

My wonderful partner was, yet again, cooking me dinner and said it would be lovely to have pickled cucumber with it. Just to give a refreshing acidic side to our onion-y, lentil tomato sauce. My task was set. Had I a few days notice as opposed to forty-five minutes, I could have actually pickled, fermentation style, some cucumber, but this is healthy next best. I imagine it would get yummier if you have the time leave it for a couple of hours!

I used a spiralizer but you could use a potato peeler to get thin strips, or if you are the daring type and like to risk your fingertips you could use a mandolin (shivers all over 😉 )

Quick and Zesty Pickled Cucumber Salad

  • One organic cucumber- spiralized
  • One small organic carrot- spiralized
  • A quarter cup of proper fermented brown rice vinegar
  • A tablespoon of real fermented tamari (gluten free )
  • Two tablespoons of extra virgin olive oil/ sesame oil
  • A teaspoon of grated ginger
  • A dash of mirin
  • Juice of half a lemon
  • Five or six twists of black pepper
  • A third cup mix of lightly toasted sunflower & poppy seeds
  • Toast the seeds with an eighth teaspoon or pinch of himalayan pink salt/ sea salt

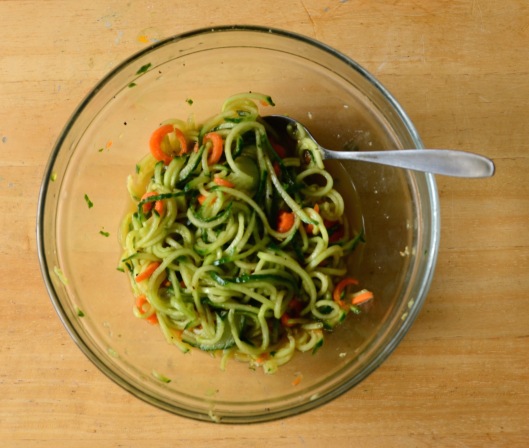
Grab a salad bowl. Whisk together your vinegar, tamari, oil, mirin, pepper, ginger and lemon. Add in your cucumber and carrot, mix so that it is all covered in the liquid.

Everything in the bowl

Everything in the bowl

Press mixture down so it is covered and leave to macerate for thirty minutes.

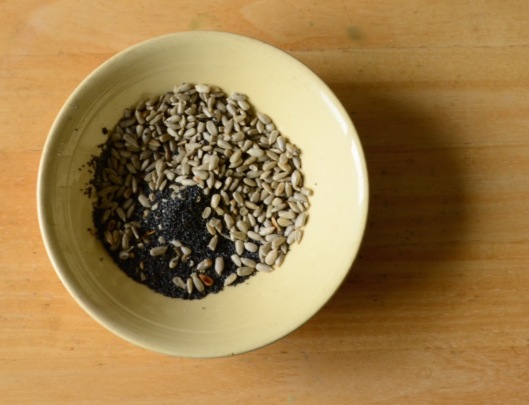
The toasted seeds

The toasted seeds


Toast the seeds with the salt, in a dry pan on a high heat for about a minute. The sunflower seeds should be barely changing colour. Add in the seeds when you are about to serve – so they are still crunchy!

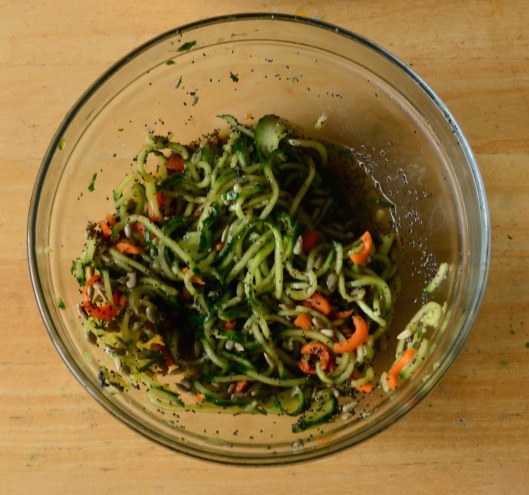
Quick and zesty pickled cucumber salad!!

Quick and zesty pickled cucumber salad!!

There you have it Quick and easy zesty pickled cucumber salad! Hope you like it. Xs Aissa


Seasonal Chestnut Chocolate Tart / Pie- Vegan, Gluten Free & No Bake!!

01 Thursday Jan 2015

Posted by Aissa in Chocolate, Gluten Free, No bake/ Raw, Tart, Vegan

≈ Leave a comment

Tags

Cacao, Cacao Butter, chestnut puree, Chocolate, Gluten free, recipe, Tart, Vegan

Autumn and Winter are the times for chestnuts. You may even have a can of chestnut puree left over from the Christmas stock pile, or the cooked vacuum packed kind you can puree yourself. Organic Bergamot lemons have just appeared back on our shelves and I could not resist adding some zest to the chocolate mousse-y goodness of the filling. I have decided chocolate to be permanently in season, no arguments!

The recipe can be made lickety split! The longest part is waiting the three or four hours for it to set in the fridge or freezer, whilst you lick bowls,spoons and spatulas 🙂

mousse filling

Chestnut Chocolate Filling!


 Seasonal Chestnut Chocolate Pie / Tart

Prepare a 20cm/ 7.8inc tart dish by greasing lightly with a little coconut oil. If using a spring form tin line it with some baking paper to prevent sticking. You will need a saucepan and perspex bowl to melt your chocolate in. I use a handheld immersion blender and a coffee grinder for the nuts, if you have a jug blender that will do even better.

The Press In Base

  • One and a half cups of ground almonds
  • A third of a cup of walnuts
  • One tablespoon of cashews
  • Eight apricot kernels*
  • An eight teaspoon of Himalayan pink salt or fine sea salt
  • An eight of a teaspoon of cardamon powder
  • Half a teaspoon of vanilla powder/ one pod/ one tsp of vanilla bean paste
  • Three drops of lemon oil/ a quarter tsp of extract
  • One and a half tablespoons of organic cold pressed coconut oil
  • One tablespoon of cashew nut butter
  • One and a half tablespoons of raw dark agave**
  • Two and a half tablespoons of maple syrup**

* You can use a quarter teaspoon of almond extract instead

** You could also soak six or seven medjool dates or un-sulphered apricots over night. Puree them and use them instead of the syrups.

Chestnut Chocolate Mousse-y Filling

  • One small avocado- mashed
  • Optional: Zest of one unwaxed organic bergamot lemon*
  • Zest of one unwaxed organic orange*
  • Five drops of orange oil/ one tsp of natural extract/ zest of another orange
  • One cup/ 225g of unsweetened chestnut puree
  • Juice of half an orange
  • Make up a quarter cup of raw dark agave and maple syrup
  • One scant teaspoon of vanilla powder/ two pods/ two scant tsp vanilla bean paste
  • 70g/ 2.5oz bar of at least 70% good quality dark chocolate
  • Three tablespoons of roughly chopped cacao butter
  • Optional: One tablespoon of cacao paste
  • One tablespoon of cocoa or cacao
  • A generous eight of a teaspoon of Himalayan pink salt or sea salt
  • Half a cup of non-dairy milk

*Organic as I do not want to zest chemicals

Base Method

Ready your ingredients and grab a bowl. I like to prepare the dry things first. Grind your walnuts, cashews and apricot kernels to a soft meal. Put in your bowl. Add in the ground almonds, salt, cardamon and vanilla powder. If using vanilla bean paste add it to the wet.

dry ingredients

dry ingredients

In another bowl mash your coconut oil, cashew nut butter, lemon oil/ extract, agave and maple syrup.

Add your dry ingredients to the wet ones. Give it a stir, you will need to get in there with your hands in order to get it to turn into a crumbly meal. It should stick together when pinched between your fingers.

crumbly base

You can now press it into the tart dish. Try and get it nice and even. Cover it with baking paper or foil. You can now pop it in the fridge or freezer while you make the delectable chocolate top!

The press in base

The press in base

Chestnut Chocolate Mousse-y Filling- Method

Put some hot water in a saucepan and keep it on a medium heat on your hob. Make sure you use a saucepan that your perspex bowl will fit over later when melting the chocolate.

In another bowl start combining your ingredients. If you have a jug blender you can add them all to this. Firstly mash together your small avocado, zests, orange oil /extract.

avocado & zest

Avocado and zest looking like alien goo

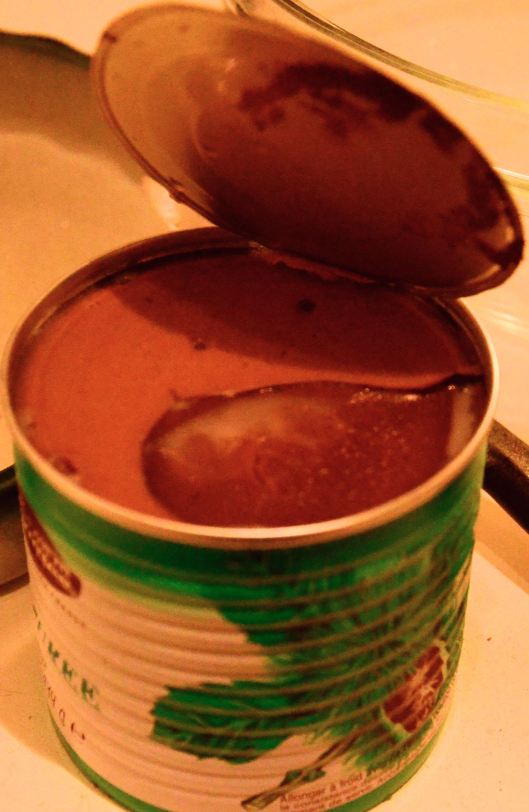
Next grab your can of chestnut puree. So pretty and smooth and shinny! Doing a good impersonation of chocolate. Mash this into the other ingredients, add the juice of half an orange and the agave and maple syrup. Using your blender, blend them all together to a soft fluffy puree. Leave to one side while you get ready to melt your chocolate.

chestnut puree

Giant can of puree! I will have to think of another recipe for the left overs! 

Roughly chop your bar of chocolate and add it to the perspex bowl on the saucepan. Add in the cacao butter and cacao paste if using, keep stirring until it melts. Turn off the heat. Add your vanilla powder/pod/ paste, the salt and the cocoa or cacao. Mix throughly. Gradually start trickling in the half cup of non-dairy milk. Stir it all together.

melty chocolate

Must not stick my finger in, must not stick my finger in

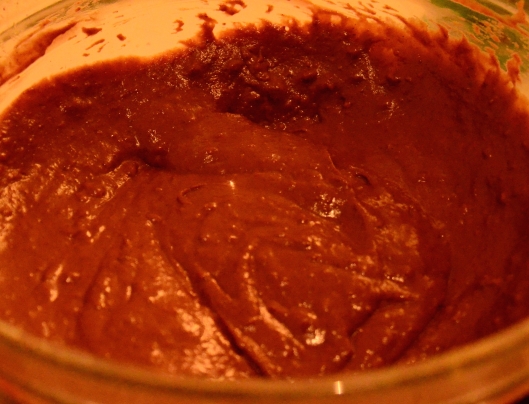
Take your base out of the fridge/ freezer and uncover it. Now using an oven mitt or towel pick up the bowl with the chocolate and carefully add to the chestnut-y puree, gently folding it through at the same time. Use a spatula to get the very last bit of the chocolate goodness.

Chestnut Chocolate Pie

Oooo!

Quickly, before it begins to thicken, pour the mousse on top of the base. Using a spatula spread it evenly. Do not be heavy handed, you want to keep the air in it. Grate a little extract orange zest on top. Cover it up again, try not to have it touch the pie filling or it will mark it, you could make a foil tent if you like. Leave it to set in the fridge or freezer. A minimum of three or four hours. It is even better if you can leave it overnight.

I store mine in the fridge. When you are serving it leave the slices warm up a little. You can taste it better when it is not too cold. I served mine with some shaved chocolate and a little coconut yoghurt. You could also use your favourite vegan ice-cream.

Perfect start to the new year! Yum yum.

Perfect start to the new year! Yum yum.

Happy new year to you all. I think it would be lovely to add tablespoon of Grand Marnier, let me know if you try that! Xs Aissa


Breaking a food blog rule for Christmas & Vegan Lentil Nut Loaf

24 Wednesday Dec 2014

Posted by Aissa in Gluten Free, Savoury, Traditional, Vegan

≈ Leave a comment

Tags

Christmas dinner, Gluten free, Lentil Nut loaf, recipe, Savoury, Traditional, Vegan

I am visiting family for the Christmas break. So I am laptop-less and without my large collection of baking supplies. This means I may not post many recipes. I brought a Stollen with me, which turns out I put too much rose oil in, I think I lost count when adding the drops. My terrible attention span strikes again! Turns out the stollen is especially lovely toasted this time though.

Most years I make the very traditional Lentil Nut Loaf for Christmas dinner. It is handy as it can be pre-made, sliced and popped under the grill or in the oven to heat up. Here is the blog rule breaking part….I feel awful doing this but I am going to share the recipe without a picture of it! 😦 Don’t hate me!!!!

It is just that this Christmas I am going to have a festively seasoned soup like thing instead. Therefor I am not making said Lentil Nut loaf and have no pictures. Previous to blogging I did not photograph my food, surprisingly enough. 😉

Here is a link for this year’s dinner over on the PPK.com, Mushroom Hot Pot. I have adapted the recipe a little; I use fresh shiitake in it and leave out the red peppers and lemongrass. I think lemongrass tastes slivery coloured, metallic and a little medicinal. I am not a fan in other words. I have the Hot Pot with veggies on the side and maybe lentils or beans thrown in to it.

Here is my imageless….

Very Traditional Vegan Lentil Nut Loaf

This recipe is a mix of many, from cookbooks and various websites. It also changes slightly every time I make it. I seem to have never written down the many versions!!! Only for my friend Fiona asking for the recipe recently it may never have appeared in text form. 🙂 I think the most influential recipe for my Lentil Nut Loaf is from My Vegan Cookbook, Lentil Loaf, it is only fair to give him credit. Also he has pictures !! (Hides face behind hands and blushes)

I do a Basic tomato sauce to spread on top of it before it goes in the oven.

  • A tin of tomatoes or passata
  • A scant dessertspoonful of coconut oil
  • One finely chopped onion
  • Three finely chopped cloves of garlic
  • A round teaspoon of dried oregano
  • Black pepper to taste
  • A pinch of sea salt or pink Himalayan salt
  • A quarter teaspoon of rapadura/sucucant sugar alternatively you can use date syrup. It helps reduce the tartness but you can leave it out.

Cook off your onion and garlic in the oil until the onions are soft and clear. Add everything else and heat through. The loaf will be in the oven for forty minutes so the sauce will definitely be cooked by then! O and do the sauce first as you will be adding a bit to the loaf.

Next the Loaf-y Bit!

Pre-heat your oven to 190C/370F. You will also need a lightly greased loaf tin, tin foil and a bowl!

  • Two cups of cooked lentils, I suggest brown or puy lentils
  • A cup of ground almonds
  • A cup of some sort of breadcrumbs that suit you wheat free, gluten free etc.
  • A tablespoon of cornstarch / fine maize meal
  • Two tablespoons of natural no salt peanut butter
  • A tablespoon of your premade tomato sauce
  • Nearly all recipes call for two sticks of grated celery-I do two carrots instead
  • Garlic to taste but no less than three cloves
  • One large or two small chopped onions
  • A dessertspoon of coconut oil
  • A half of a teaspoon of mustard
  • Half a cup of chopped fresh parsley
  • A teaspoon of dried thyme
  • A quarter teaspoon of cumin
  • A tiny pinch of sea salt
  • A dash of tamari
  • A little black pepper to taste
  • A small dash of apple cyder vinegar

Sooo cook your onions and garlic with the dessertspoonful of the coconut oil until the onions are transparent. Leave to cool down for a five minutes.

The puy lentils!

I had a picture of puy lentils!

In your bowl combine all the other ingredients and then add in your onions and garlic to them. Press it all together. If not sticking together you can add another spoon of tomato sauce.

Grab your loaf tin, put some of your tomato sauce on the base and side. Add in your lentil loaf mix and put the rest of the tomato sauce on top. Cook for twenty minutes and then cover with tinfoil ( to stop the top burning). Cook for another twenty-five minutes. Let it cool for a minimum of ten minutes before turning out and another ten before slicing.

Serve with your favourite veggies, salad and maybe some vegan gravy! It is very filling and is just as lovely the day after.

Organic salad

Also found a picture of salad

Once again if you celebrate the Yule, enjoy it! Hope you had a good Solstice, a good almost finished Hanukkah! Or maybe just some time with friends and or family with a few days off work! Xs Aissa

← Older posts
Follow VeganEtcetera on WordPress.com

Create a free website or blog at WordPress.com.

Privacy & Cookies: This site uses cookies. By continuing to use this website, you agree to their use.
To find out more, including how to control cookies, see here: Cookie Policy
  • Follow Following
    • VeganEtcetera
    • Join 93 other followers
    • Already have a WordPress.com account? Log in now.
    • VeganEtcetera
    • Customize
    • Follow Following
    • Sign up
    • Log in
    • Report this content
    • View site in Reader
    • Manage subscriptions
    • Collapse this bar
 

Loading Comments...