
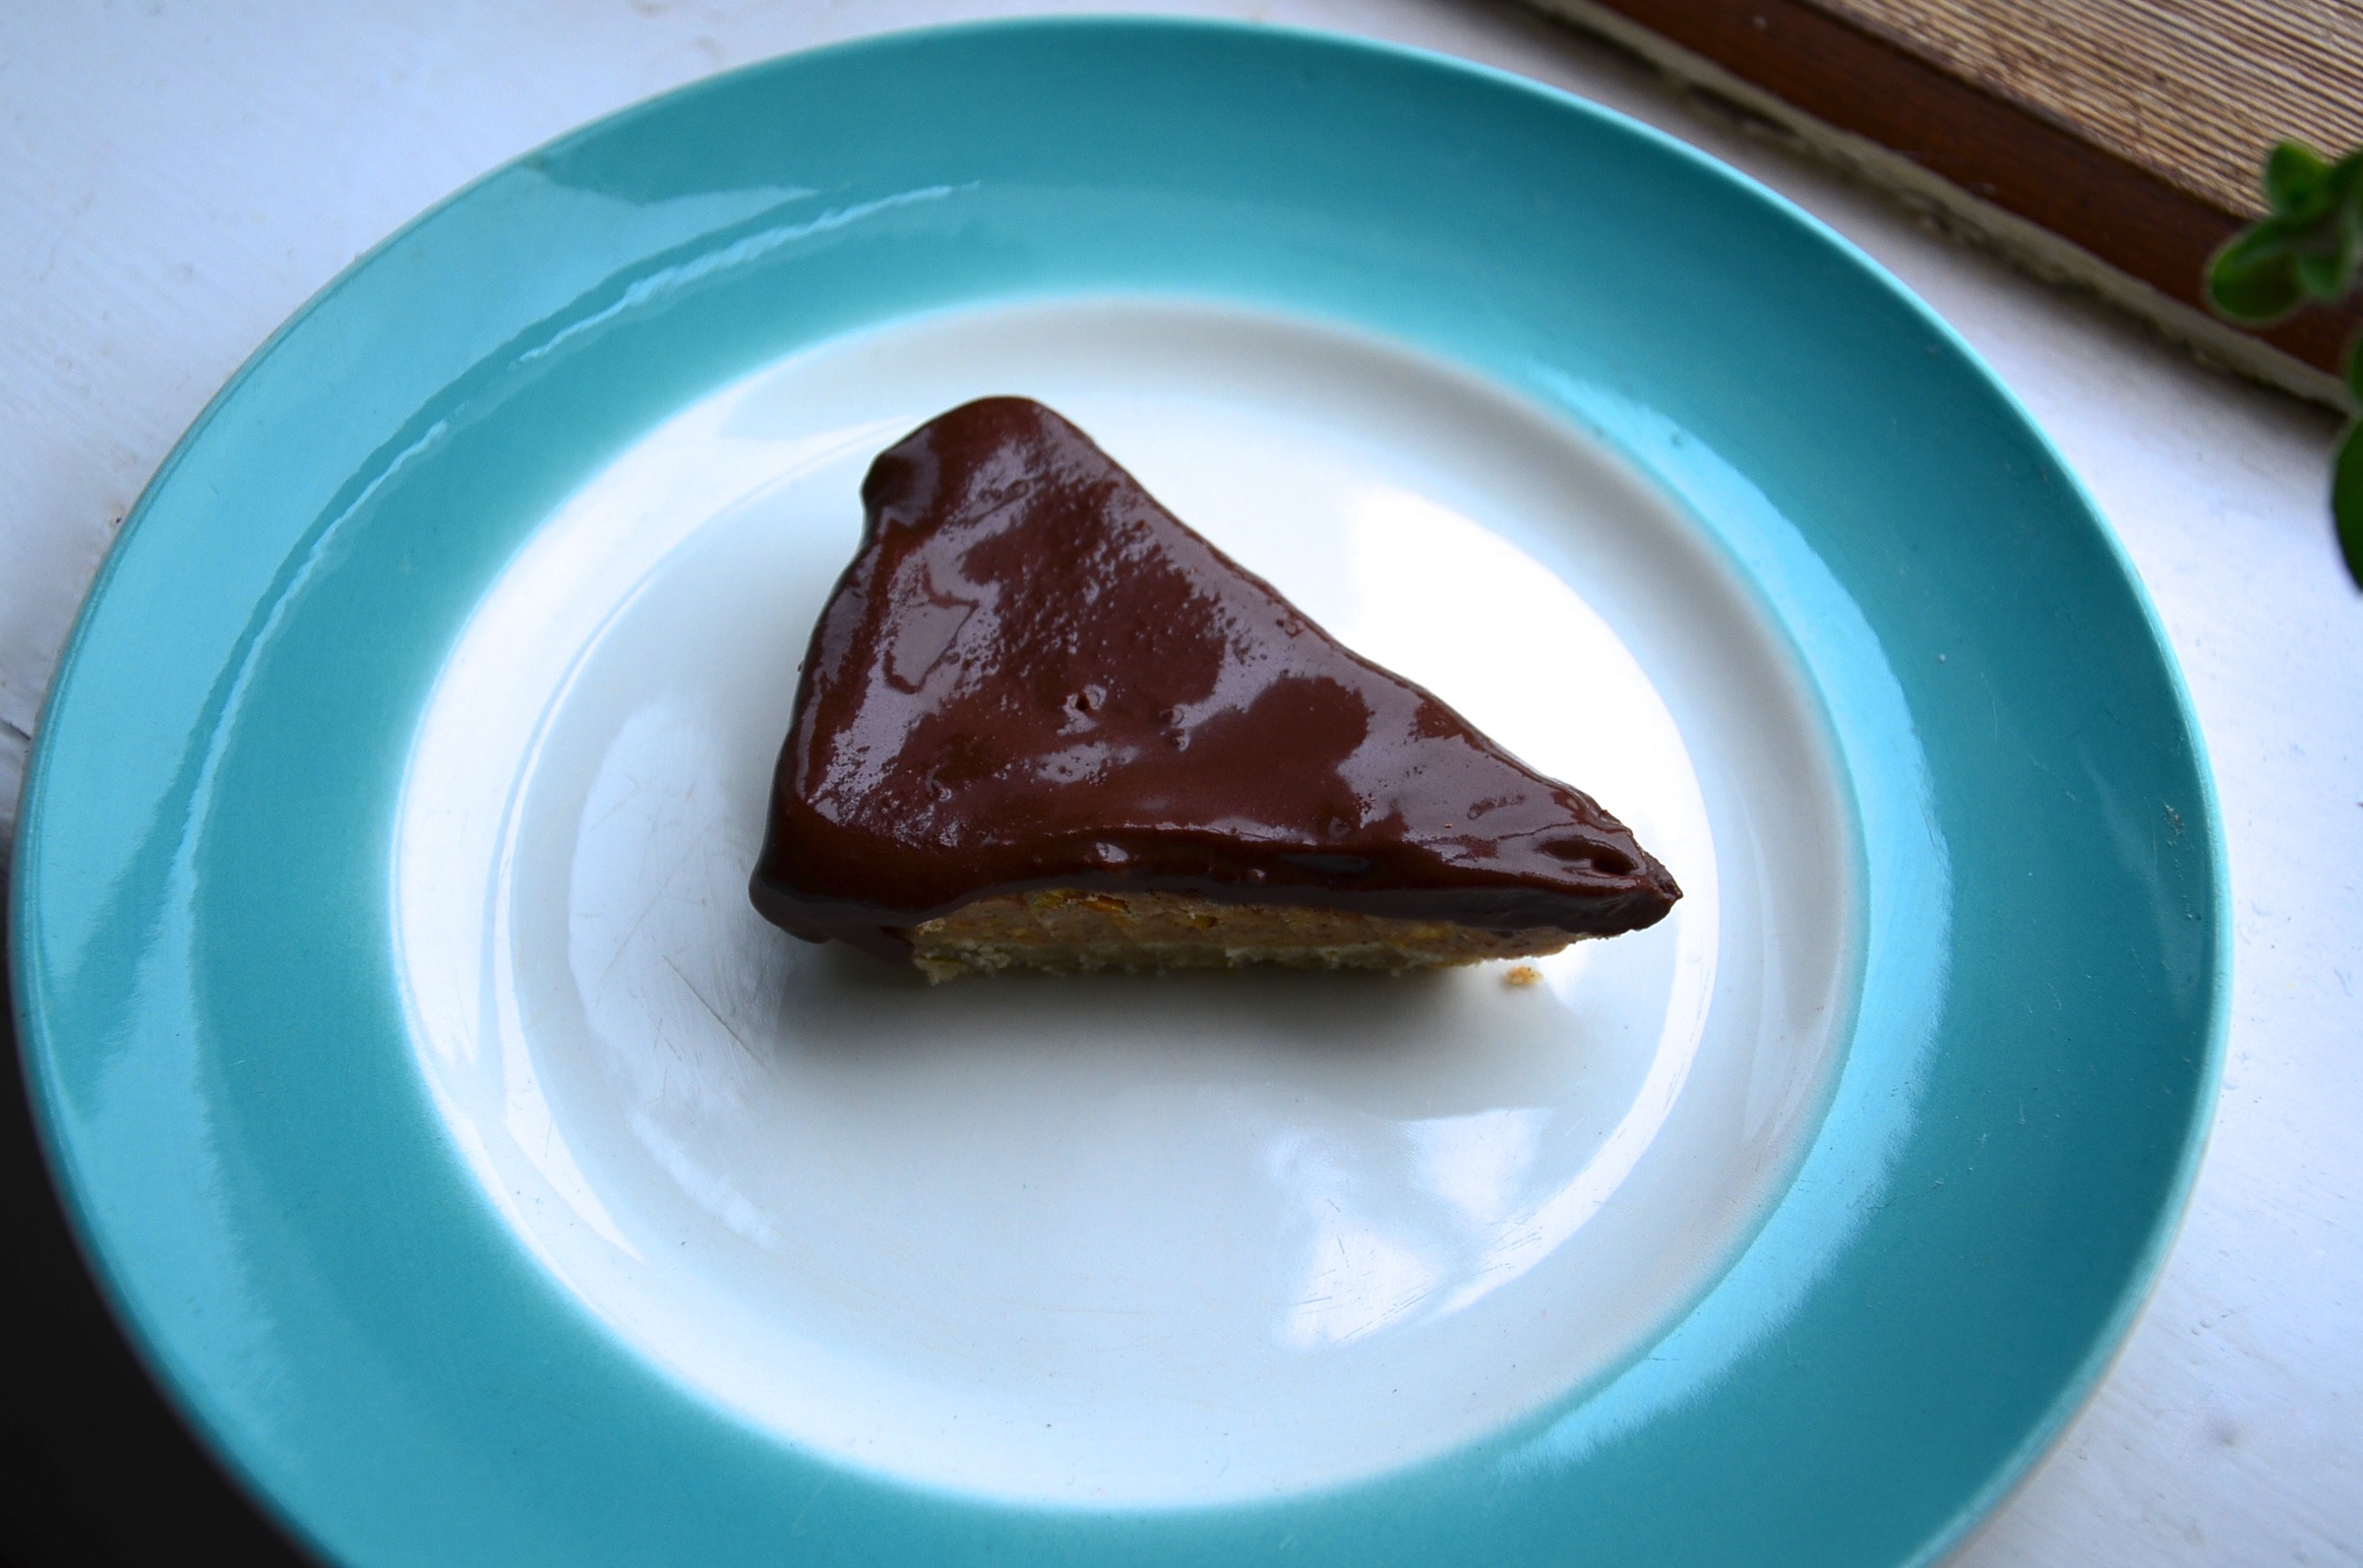
This is a Pie of three parts. Do not be put of, it really isn’t hard. Also it is scrummy. The crust is light and crumbly. The nut butter layer is a mainly peanuty gooey extravaganza. The chocolate layer is the velvety soft melt in your mouth type. The different textures really make it all work.

Chocolate lake hiding the layers underneath!
This recipe originated from little sweet ball versions I made a few years ago. My partner and I had been living in Canada and I became aware of the existence of very processed and not at all vegan chocolate peanut cup type things. I read the ingredients with a horrified stare. When we returned to Ireland I decided I could make a version very easily, maybe better too by adding a crunchy layer. I made cookies, added a blob of peanut butter with maple syrup and dipped them in chocolate. My Logic- what was lovely bite size could be lovely pie size!!
Nut Butter Chocolate Pie! or is it Tart?
First Part: The Crust
- One cup of ground almonds
- Three quarters of a cup of buckwheat flour
- A quarter cup of tapioca and rice flour mixed (I used a gf brand that is a mix of these)
- Two dessertspoons of rapadura sugar i.e. turbindo sucucant
- A quarter teaspoon of Himalayan pink salt or good sea salt
- Half a teaspoon of vanilla powder/ extract / half a pod
- Four dessertspoons of mashed coconut oil
- Three or four dessertspoons of non diary milk
- A cup of dried beans of some sort to weigh down the crust
Pre heat your oven to 180C/350F. Grab your 7.5inc 20cm tart/ pie pan. Grease it with a little coconut oil. If using a spring form one put a little paper square in the middle.
Put all your dry ingredients in a bowl.
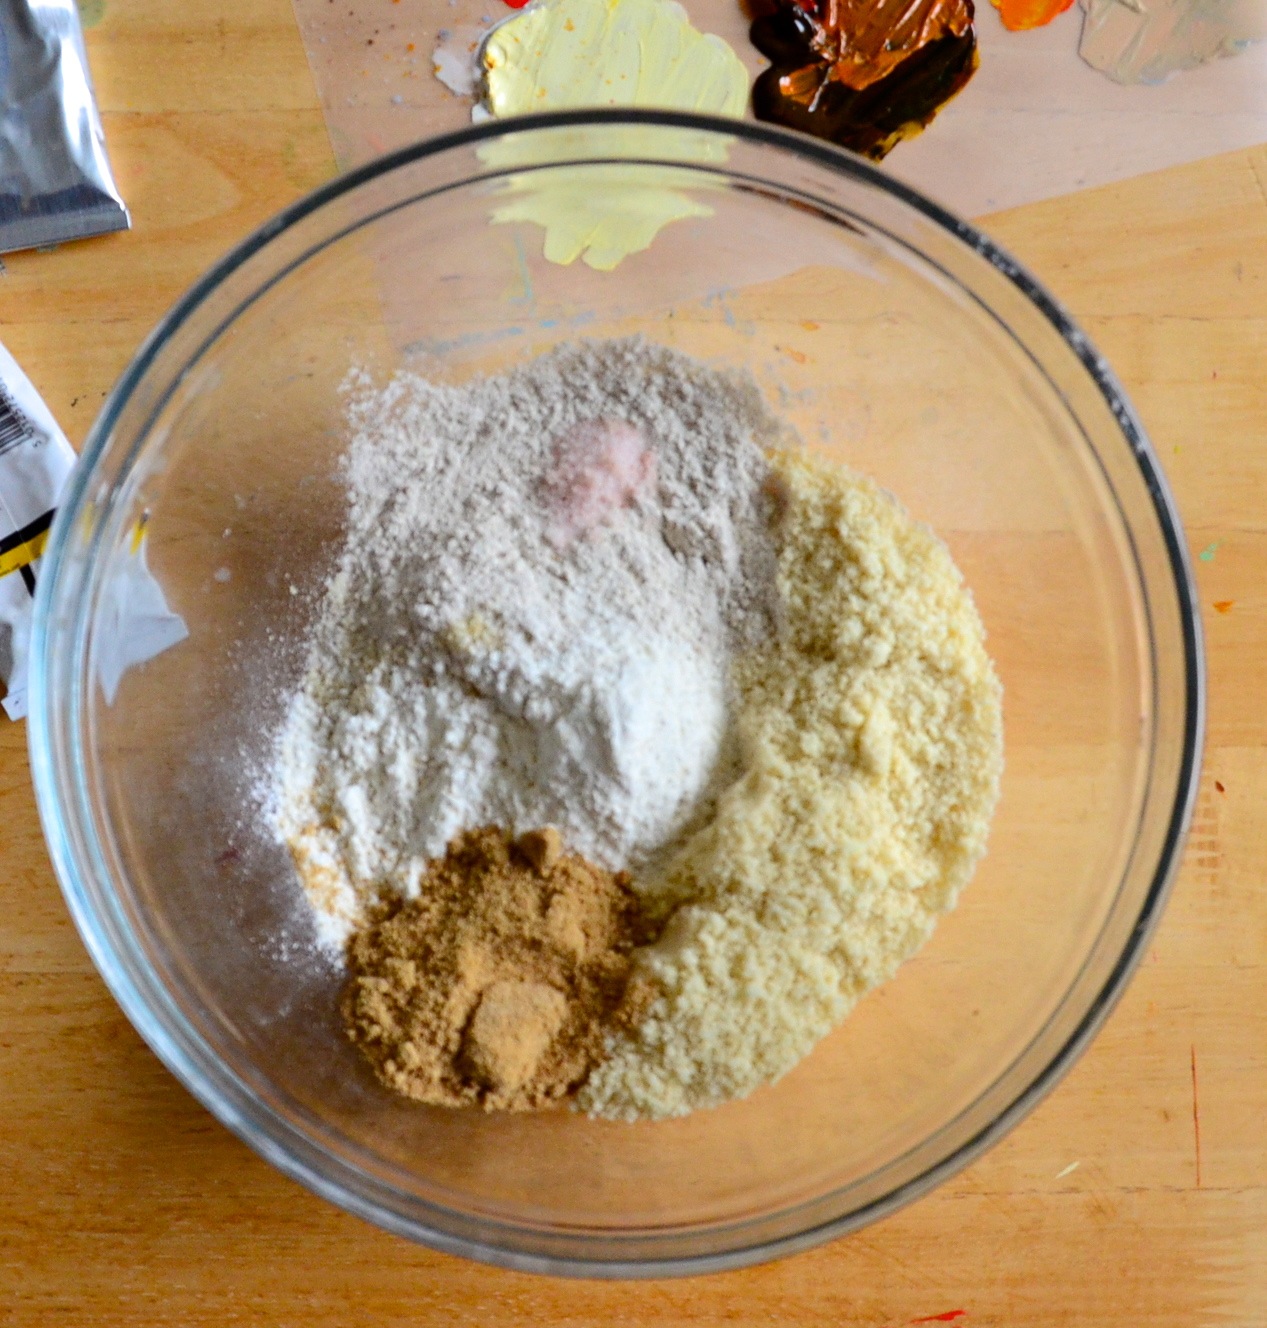
Like this. Paint palette not part of the recipe.
Now get your mashed coconut oil. Mix in one spoon of non diary milk. If using vanilla extract add it to this.
Add the oil mix to the dry stuff. Work it in with your fingers. You will need another two spoons of the milk at least. Add the milk a spoon at a time, mix in-between. It should be crumbly looking. You know it is the right consistency when it holds together when pressed between your fingertips. See pic!

Crumbly crust mix
Now! Tip it into your pie/ tart pan. Spread it evenly and start pressing it down. Be firm, make sure it is right to the edges and even. As I have said before “Woe betide the uneven crust!” Now stab about the surface with a fork. This leaves any steam out and helps stop the surface buckling. If you add too much milk there will be too high a water content and therefor more steam! Put your dried beans/ pastry weights on top. Some people like to put baking paper underneath, I do not bother. Save the trees man! 😉
Put it into the middle of your oven and bake for 12 minutes. Fast I know. I have a fan oven, it may take 15min in a non fan. It should be starting to go golden brown at the edges, like a big biscuit/ cookie.

Just out of the oven.
In the winter it can be cold enough to cool on the windowsill. I did leave it out there for a 10 minutes as I was worried my pie dish would crack if I put it straight in the freezer. Take the beans off. Cover it up and stick it in the freezer to cool.
Second Part: The Nut Butter Layer or the taste lots layer!
You will need to melt the ingredients in a bowl over hot water. So have a saucepan with water lightly simmering in it ready. Use a bowl that can take heat to put your ingredients in e.g perspex.
I am giving an optional extra bit to this layer. Reason being I previously used to make it this way and it was lovely. Unfortunately I can no longer get yacon root powder so I have condensed the recipe. It is really good without, a little more gooey and intense, but since I like it both ways I thought I would share.
- Four dessertspoons of coconut oil
- A quarter cup of natural crunchy salted peanut butter
- A quarter cup of natural un-salted skinned peanut butter
- One dessertspoon of a runny tahini
- One dessertspoon of natural almond butter
- One teaspoon of vanilla powder/ one pod/ one generous tsp extract
- A dessertspoon of lucuma powder
- Scant half a cup of organic icing sugar
- OR generous third of a cup of maple syrup & three dessertspoons of arrowroot mixed
Optional extras:
- Third of a cup of yacon root powder
- Two dessertspoons of agave
- Four dessertspoons of non diary milk.
Combine your oil and your nut and seed butters in a bowl. If using vanilla extract add it in now. Taste to make sure they are as lovely together as they are apart. Put the bowl over the simmering water in the saucepan. Now either add your icing sugar (or your maple syrup mix) and the lucuma and vanilla powder . Stir it all together while it gets melty. Taste it again because it will be amazing. If partaking in the optional extras add the yacon first and then the agave and milk. It should be a gooey thick mix. Taste again to make sure it is still as good. Take it off the heat and leave it for just a few minutes to cool.

Soo good so hard not to stick my finger in it
Take your crust out of the freezer. Now pour the nutty mix over this. Spread it out evenly. I put it on my windowsill for a few minutes again. Cover it again with a parchment paper/ cling film or foil and stick it back in the freezer. It needs to be in there for three quarters of an hour. I left mine over night this time as I did not have everything for my chocolate layer!
Third Part: The Chocolate Cacao Ganachy Layer
You will need a saucepan of simmering water and a heat proof bowl. There will be melting again.
- Third of a cup of almond/coconut milk
- Approx. 40g of good quality chocolate.*
- Cacao liquor paste bits. 3in x 2in x 1in thick, 50g?
- Two scant dessertspoons of coconut oil
- A third of a cup of dark agave
- Three dessertspoons of cornstarch
*This time I used a direct trade Beni amazon mix of wild harvest and organic, previously I used a lovely madagascar dark chocolate.
Chop your chocolate and cacao paste. Keep a small bit of the cacao to one side.

chocolate and cacao
In the bowl over the water start by warming your milk. Bring it a very slight simmer and add the cornstarch. Turn the heat down so milk is no longer simmering. Add your cacao,chocolate and coconut oil. Let it all melt and then add your agave, stir it through. Take it off the heat for ten seconds. When back on the heat add the last bit of cacao and let it melt in, stirring with a spatula. Once melted take it back off the heat. This helps make the chocolate shinny.

Melted chocolate cacao glory!
Take your two thirds made pie out of the freezer and pour your melted chocolate goodness over the top. I give the pie a few raps on the counter- the whole base- incase there is any air trapped. Carefully cover it up. I recommend making a tent by sitting it in the centre of paper/foil squeezing it together like a roof over the pie. This is so it doesn’t fall into the melted chocolate. put it into the freezer. Leave it for a minimum of two hours.
I took mine out after and hour this time. I was bringing to a work mate Alanna’s going away pot luck party. Luckily there was lovely savoury salads and Vietnamese style rice paper wraps to be had first. An hour and a half in the fridge at her place meant it was perfectly set. Phew to not serving goo!
Not set pie! 🙂
Nutty, chocolatey crumbly fantastic-ness. It is rich and moreish. A small slice goes a long way. As you keep it in the freezer or fridge it will last… not that eating it quickly should be a problem!
Xs Aissa
P.S I found out from somewhere about different uses of cornstarch and arrowroot, maybe from theppk.com. Here is a helpful little article about thickeners http://www.foodsubs.com/ThickenStarch.html

Looks amazing 🙂
Thank you so much!
This looks amazing!!!
Lovely to hear, thank you. Hope you try it out!
Holy crap girl, this looks stunning!! Not a huge fan of the peanut butter/choc combo, maybe I could just use a different mix of nut butters? YUM.
Hey! 🙂 Glad you like it. Hmmm blanched almond butter and cashew nut butter could be good, bit sweeter so you could reduce the sugar a bit. Let me know if you ever try it. I did a recipe from My Rawsome Vegan Life cookbook last night and it had chocolate with a avocado banana layer….maybe that??? xs
Pingback: Vegan French Onion Stew-oup Quick! | VeganEtcetera