• Home
  • About
  • Vegan
  • Gluten Free
  • Chocolate
  • Cookies
  • Cupcakes
  • Cake
  • No bake/ Raw
  • Savoury
  • Natural Health
  • yoga
  • Tradtional
  • juice

VeganEtcetera

~ Eating healthily easily

VeganEtcetera

Tag Archives: Traditional

Armadillo Apple Pie or Armoured Irish Apple Tart

28 Sunday Sep 2014

Posted by Aissa in Tart, Traditional, Vegan

≈ Leave a comment

Tags

Apple Pie, Apple Tart, Pie, Tart, Traditional, Vegan

My lack of bloggin’ is disgraceful. I was down with brief cold and then on holidays. So no sympathy necessary as I was in Italy for a week! One of my key phrases was senza formaggio! 🙂

I have returned in perfect time for Irish Apple season! First day back and my friend who recently moved to the countryside brought me beautiful yellow cooking apples from her garden. Apple Pie or Apple Tart it is! I have made it with green tart Granny Smiths and  I made it last year with Braeburn apples from my sisters garden. Every time the apples have been different! Cooking apples tend to be tarter and more firm. Depending on your variety of apple you should adjust the sugar levels. If you are using a eating apple maybe reduce the sugar by a dessertspoon or so.

I really should have used six apples this time as two were rather small

I really should have used six apples this time as two were rather small

The spelt gives the pastry a depth of flavour, a little nutty. Spelt’s gluten is a little more brittle which makes it easier to digest. That brittle gluten is the reason I balance it some strong white flour so that the dough can be handled well and rolled out nice and thin.

The wonderful Vegan Pie in the Sky book by Isa Chandra Moskowitz & Terry Hope Romero was a good source of tips when I was perfecting this recipe. Esp. the apple cyder vinegar to stop the dough becoming tough when working with it!

You will need a few bowls, measures, a 20cm/7.5inch pie/ tart dish and tinfoil.

It is Armadillo Apple Pie or Armoured Irish Apple Tart as the sugar coating gives it a crunchy crust!

The Crust

  • Half a teaspoon of sea salt
  • One and a half cups of wholemeal spelt flour
  • One cup of strong white flour
  • Two dessert spoons of rapadura sugar
  • Six spoons of organic coconut oil
  • Three spoons of olive oil
  • 6-12 dessert spoons of chilled water
  • One dessertspoonful of apple cyder vinegar

Put the dry ingredients into a bowl and stir them together.

Dry stuff!

Dry stuff!

In another bowl mix your coconut oil and olive oil. Add the oils into the dry stuff. Rub the oil into the dry ingredients. The mixture should start to have a mealy pebbly look.

Grab your chilled water and put FOUR dessert spoons of it into a bowl and add your one dessertspoonful of apple cyder vinegar. By the dessertspoonful drizzle the mix over the floury ingredients. Mix each time. Another two dessert spoons of iced water will definitely be needed. Start pressing the mixture together to form your dough. If you end up having to add another six spoons you may have been over generous with the flour or too scant on the oil! The more water the more steam created when it is evaporating off in the oven. So be extra sure not to forget to prick your base to allow the steam out!

Wrap the dough and stick it into the fridge!

The Filling

  • Five or Six peeled and cored apples, sliced thinly
  • One generous third of a cup of rapadura/turbinado/ sucucant sugar
  • Two or three dessert spoons of more rapadura sugar
  • One dessertspoonful of cornstarch
  • Two dessert spoons of wholemeal spelt flour
  • One teaspoon of cinnamon
  • Half a teaspoon of vanilla powder/ one teaspoon of extract
  • One teaspoon of sunflower oil suitable for heating
  • Four drops of food grade lemon oil or the zest of one unwaxed lemon
  • Two dessert spoons of lemon juice
  • Optional: One large dessertspoonful of chopped creamed coconut

Peel, core and slice your apples as evenly as possible and set to one side.

At this stage I start preheating my oven to 200C/ 380F as it takes ages to heat up!

Mix the dry ingredients. In another bowl mix the wet ingredients. Add the oil lemon mix to the dry and stir together. For an extra creaminess add the creamed coconut. Rub the coconut into the mix.

Now toss the apples in the mixture so they are all coated. If using an eating apple be aware sometimes they can be a bit more crumbly and delicate, so handle with care. I cover the bowl with a plate and stick it in the fridge.


Apples covered in filling mixture

Apples covered in filling mixture

Topping

  • One teaspoon of vanilla powder or a generous spoon of extract
  • Two dessertspoonful of rapadura/ caster sugar
  • Two dessertspoonful of cold water

This is to coat the surface of the tart just before you put it in the oven

Putting the Pie/ Tart (“Pitart?”) Together

So you make your dough first and pop it in the fridge. Then make up the filling and put in the fridge if the weather is warm. You can make the topping then too if you like.

Take your chilled dough out of the fridge. Cut it so the lump for the topping is every so slightly bigger than the part for the base. Put the dough for the top back in the fridge.

chilled dough

chilled dough

Roll out your base on a clean surface. Check it is the right size by placing your greased 20cm/7.5inch tart/pie dish over it. It should be a little bigger than it so there is enough dough to go up the sides of the dish when pressed in. Roll the dough onto your rolling-pin and unfurl over your dish. Press the dough in, if it is a little uneven at the sides- don’t freak out, you can patch with bits that go over the edge. If there is not enough steal some of the dough set aside for the top and patch it with that!

Prick the base seven or eight times with a fork.

Start Filling! I start in the middle and work my way out in a circle. Overlaying the apple slices. I keep the odd little bits of apple for laying on top, try to spread the gooey filling evenly over the top. It may seem like there is a little too much, but it will shrink as it cooks.

O the bad lighting pitart filling!

O the bad lighting, pitart filling!

Cover it up, pop into the fridge and take out the dough for the top.

The Roof! Roll out the dough for the top layer. It should be a little thinner and bigger than the base. This is so it will cover the apples and there is enough to crimp the dough where it meets the base. Gently use your rolling-pin to lift it again. Tuck the edges into the pitart and crimp/ press the edges together so the apples cannot escape! Put five slits into the top so all the steam can escape. I had a tiny bit of dough left so I stuck on a badly shaped heart! darn I should have made an apple shape.

Covered up, I used a fork on the edges

Covered up, I used a fork on the edges

Pour your prepared vanilla-y topping mixture over the top and stick into the middle of your preheated oven.

After fifteen to twenty minutes turn the heat down to 180C / 350F. I find it is usually starting to brown at this stage. If not give it another few minutes. Do not open the oven to check. Use a torch if you do not have an oven light see what is happening. I have used torches, bike lights and currently its a radio with a light on it that doubles as my oven spy.

Once browning cover it with a loose tinfoil dome, do NOT tuck all the sides. I push two points under, just to hold it in place. The pie/ tart needs to breath, the tinfoil tent is to stop the pastry burning.

Bake the pie/tart for a total of 50mins, it may even take 60min in a non fan oven. It takes this long as there is no blind baking and a lot of filling.

Take out and leave it too cool for 30minutes. I know I know after all that you have to wait again. The insides need to cool, if you cut it straight away it could be all runny.

I will take a photo again tomorrow as the light is so awful the pie looks weird!

Low light Armadillo Apple pie or Armoured Apple tart!

Low light Armadillo Apple pie or Armoured Apple tart!

Hope you like this mash of pie and tart. It is sweet and caramel-y and has filled my flat with smells that remind me of my Mum and Nana. Just need to get some vegan vanilla ice-cream to have it with tomorrow! 🙂


How’s the Ferment?

05 Thursday Jun 2014

Posted by Aissa in Fermentation, Gluten Free, Natural Health, Superfoods, Traditional, Vegan

≈ 2 Comments

Tags

Fermentation, Gluten free, Natural Health, Sauerkraut recipe, Superfoods, Traditional, Vegan, water kefir

About a month ago I posted my Sauerkraut recipe. Any one join me at the time? Here is what mine looks like now. The water is nice and clear. No floating scumminess. Nothing on the glass above the water line. This is a sign all is well. It has a good strong vinegary smell too. Fermented foods are sadly missing from many of our diets, and they are so good for us!

The backlighting is flattering!

The backlighting is flattering!


I also keep Water Kefir and Kombucha. The water kefir is very active in the current warm weather. I changed mine last night. I thought it would be nice to add extra flavour. The orange colour comes from the rapadura sugar I feed it, i always put in a little ginger too. After straining it I added organic parsley and mint. It is a lovely drink for these warm long evenings. Filled with billions of good live bacteria and yeasts, fantastic for keeping your gut happy and healthy. I hope the summer will continue in this form and in another month I will be sitting in the sun having my sauerkraut with a big organic salad! 🙂

Xs Aissa

Apricot Bread

25 Sunday May 2014

Posted by Aissa in Bread, Cake, Traditional, Vegan

≈ Leave a comment

Tags

Bread, Cake, Traditional, Vegan

This Apricot Bread was inspired by a couple of my Nana’s recipes. Her “Granny cake” which is an Irish style bread cake a bit like a big sweet scone that has sultana’s in it. The other recipe was her light Soda bread that was made with a sweet milk as opposed to a normal buttermilk/ sour milk one. I am not a huge sultana fan but don’t mind the less sweet dried apricot.

Apricot Bread 

  • Two thirds of a cup of chopped organic unsulphered apricots approx. seventeen apricots
  • One and a half cups of wholemeal spelt flour
  • Half a cup of oat bran. I actually made it with half a cup of buckwheat flour this time but it wasn’t as nice.
  • Three rounded teaspoons of baking powder
  • Two dessertspoons of rapadura sugar
  • Two dessertspoons of caster sugar
  • One generous teaspoon of vanilla powder/ vanilla extract in with the wet ingredients
  • Zest of an unwaxed orange
  • A pinch of sea salt
The dry stuff!

The dry stuff!

  • A quarter cup of dark agave
  • A quarter cup of sunflower oil (one suitable for frying)
  • Two thirds of a cup of soya/ almond milk (you could put a little orange juice in and reduce the milk a bit)
  • Seven drops of an orange oil suitable for food use/ A teaspoon of a good orange extract
  • A few dessertspoons of fine maize meal for sprinkling on top
The wet stuff!

The wet stuff!

Preheat your oven to 200C / 390F. Prepare a loaf tin. I use a normal pound loaf tin though the measurements may seem small for that. It will not expand like a ballon to the top of the tin, but don’t worry it isn’t meant to.

Chop your apricots and put them to soak in a cereal bowl of water.

Soaked apricots

Soaked apricots

Grab a mixing bowl and start putting in your dry ingredients, pausing to sieve the baking powder.

In another bowl (or jar in my case) put in your wet ingredients.

Pour the wet into the dry. Gently mix everything together, be carefully not to overwork. Once your ingredients are combined fold in the soaked apricots.

Dark Battter!  Haha bad pun ;-)

Dark Battter! Haha bad pun 😉

Pour the batter into the cake tin, making sure it is even.Sprinkle the coarse maize meal onto. The maize meal will prevent it from burning. Put a few diagonal slashes on top to help with the rise.

Place in the centre of your oven. After five minutes turn the oven down to 180C / 350F.

It is done when it is coming away from the sides and a golden brown colour. It will take a minimum of thirty minutes, do not be tempted to take it out before then. I have a fan oven and it takes thirty five minutes , it could take forty five in a non fan. While writing this I forgot about the aforementioned Apricot bread and nearly burnt it. When you take it out leave it sit for five minutes. Wrap it in a clean towel and leave it to cool for another fifteen minutes. I leave mine cool on the windowsill. If you cut it while it is warm the texture can turn gummy. This is what will probably happen mine, since I cut it so I could take a photo!

Apricot Bread

Apricot Bread

Try it toasted with coconut oil. It is reaaaally good. Xs Aissa

Sauerkraut – the new old superfood.

10 Saturday May 2014

Posted by Aissa in Fermentation, Gluten Free, Natural Health, Savoury, Superfoods, Traditional

≈ 3 Comments

Tags

Fermentation, Gluten free, Natural Health, Sauerkraut recipe, Savoury, Superfoods, Traditional

Fermented foods, how do I begin to sing their praises? I suppose I did already with my brief posts declaring the life force of my water kefir. I also have a wonderful kilner jar inhabiting kombucha scoby. These two and my sauerkraut all live and grow together in the corner of my kitchen named “ferment-ville”. I will rave a bit more about them after my “How to make sauerkraut”. There are many variations, lots of traditions but this is the one I made Thursday night!

How to make sauerkraut! I may be bordering on a Kimchi, because of the ginger.

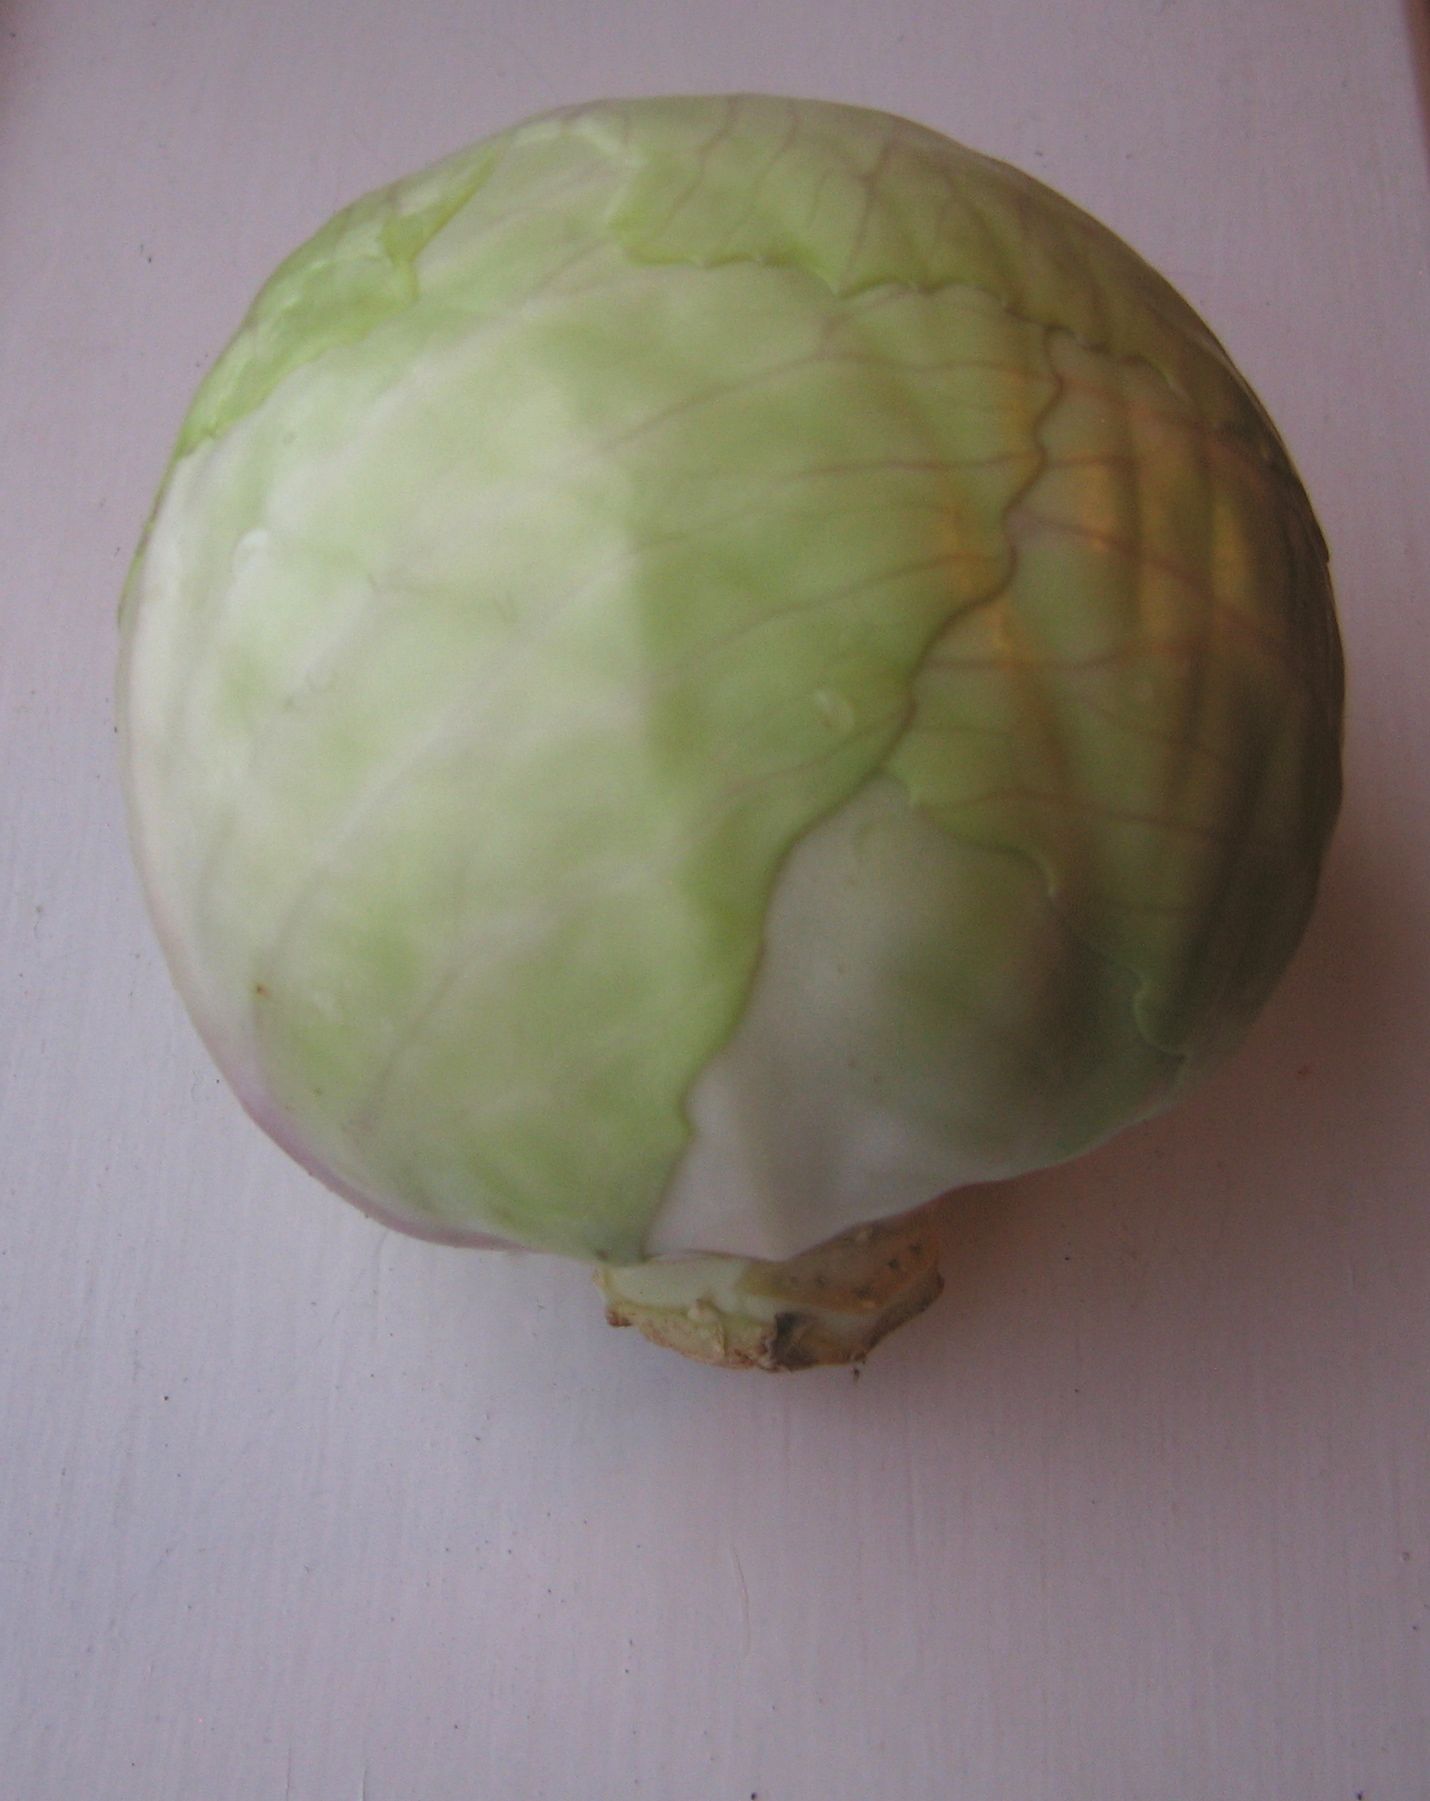
First the Organic cabbage- organic because who wants to ferment chemical sprays!

Beautiful Organic white cabbage!

Beautiful Organic white cabbage!

Second get a kilner jar, I used a 1 litre( 1+3/4 pints) jar, as I intended to do two cabbages. It is important to have sterilised the kilner with almost boiling water (that’s what I do) or steam sterilise. This is what your sauerkraut will be living in, it is better that it be really clean than risk bad bacteria getting a foothold.

  • Two white cabbage- remove the outer leaves and discard. The leaves not the cabbage!
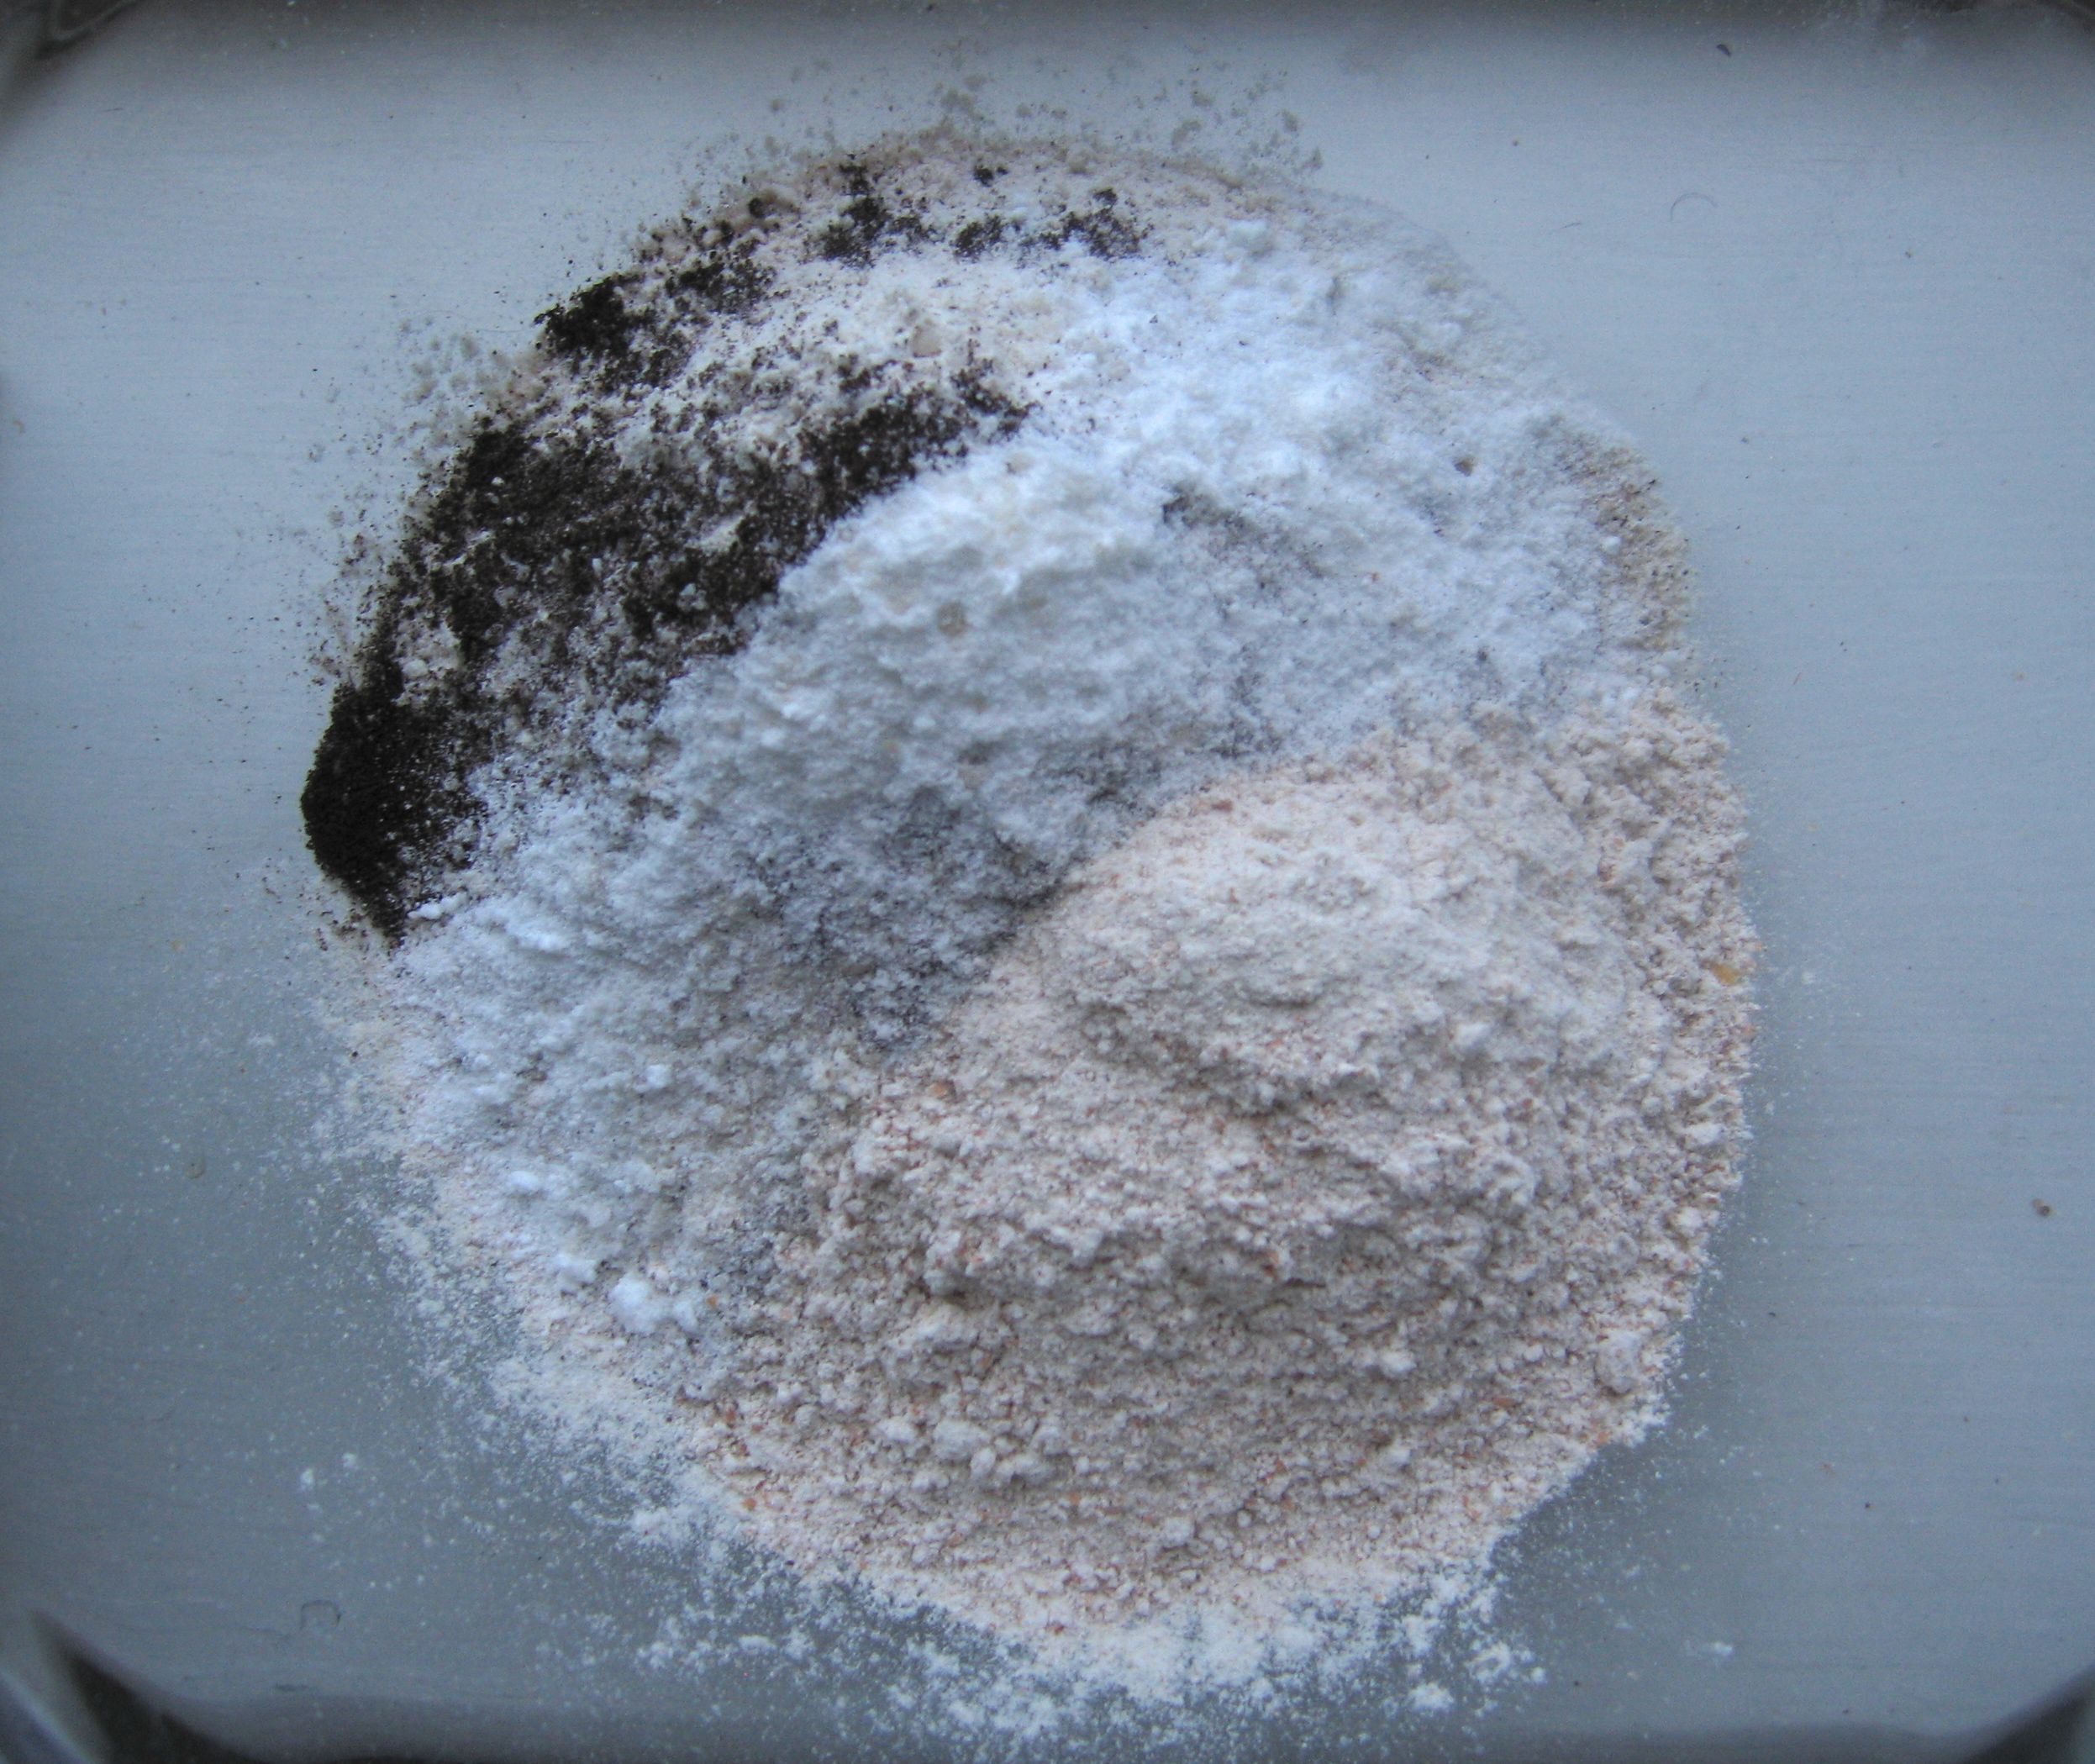
  • Two inches of organic ginger
  • Optional: some organic cucumber, three inch piece (approx. 7.5cms)
  • Generous teaspoon of organic cumin seeds
  • Six cloves of organic garlic
  • Three dessertspoons of fine sea salt
  • Roughly 400ml of still mineral water
  • Extra optional: A dessertspoon of sauerkraut you have made before or a good quality raw one from your health store.

Rinse your hands, make extra sure there is no soap residue on them. Soap will kill the bacteria and inhibit the fermentation.

Cut the base off each of your cabbages, hold onto the hard stem as you can use this later. It can be a useful “cap” to hold your sauerkraut down with.

I was given a spiralizer for my birthday by my lovely work mates. I am attempting to spiralizes everything at the moment. Including the cabbage for this! It spiralized for a bit. It then became stubborn and I stubbornly persisted for another bit. The wonderful contraption certainly sped things up.You can of course put it in a food processor or just chop it finely, think of the thickness you would expect in a slaw.

Measure half the water, add two and a half dessertspoons of the salt and give it a stir.

Pour the salt water (brine) over the cabbage. Mix things up and knead the cabbage for a couple of minutes. The salt and kneading helps draw water from the cabbage.

Prepare your ginger. I rinse it and peel off bits that still seem dirty. Chop it finely and throw it in with the cabbage.

Add your cumin seeds.

Chop your cucumber. Add this to the rest. Toss the mixture and give it another knead.

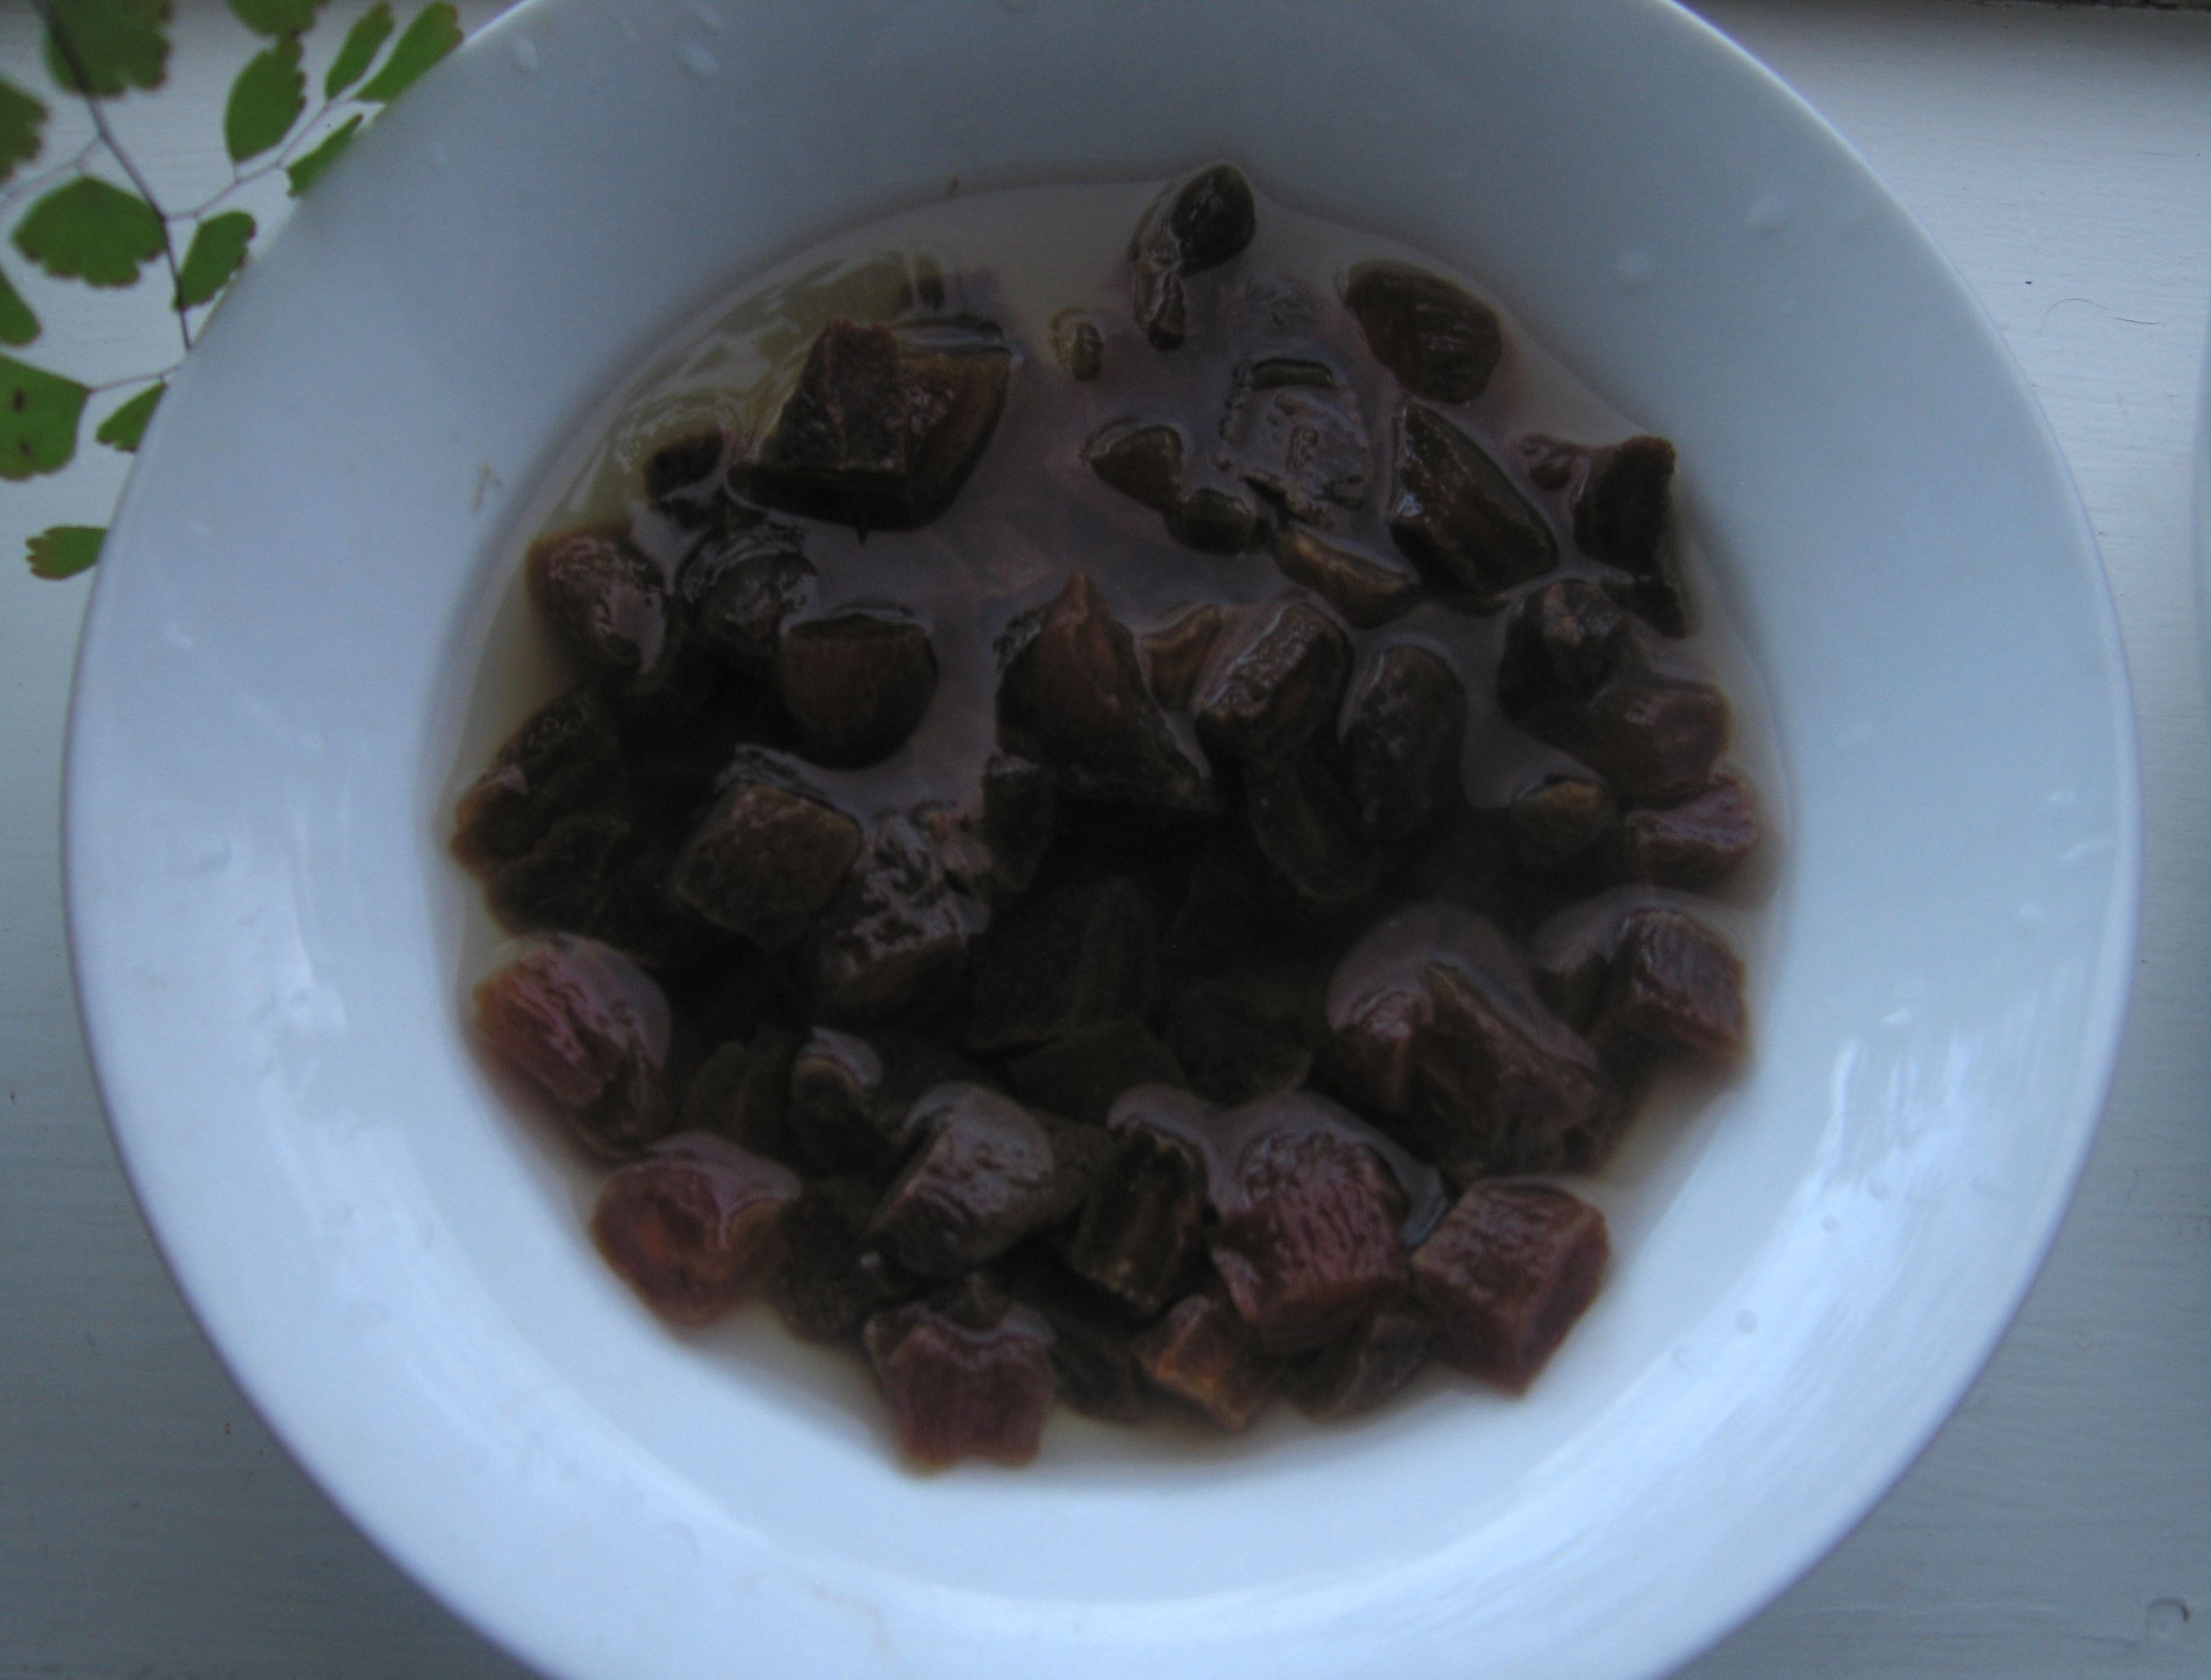
It will look like this picture, if you look at it before you add your cucumber! 🙂

Spiralized and chopped!

Spiralized and chopped!

Next put a plate on top of it and weigh it down with something, I use a 1kg/ 2.2lb bag of flour. Leaving it sit gives the salt a chance to draw more water from the veg. During this time I usually clean up the bits of cabbage I have scattered to the four winds about the kitchen! Give it twenty minutes if you can.

Cut your cloves of garlic in half.

Grab your sterilised kilner jar. Uncover the almost sauerkraut. Grab handfuls of the mixture and press it down into the jar. if you find that there is not enough water to cover the cabbage add half a dessertspoon of salt to the left over water and add this to the kilner jar. Really get in there and try and compress the mixture as much as possible. Ideally it will nearly be to the top of your jar, maybe an inch/ couple of centimetres gap. Now arrange your garlic over the top, garlic is a powerful anti-bacterial and anti fungal, but won’t kill the friendly bacteria we want inhabiting the cabbage! Now grab your cabbage base, slice off any dirty bits, place in the jar and press every thing again. Everything should be covered in salty water. Make sure there are no bits of food sticking up out of the water or left on the dry sides of the jar and lid. These bits that are exposed the air will go mouldy and ruin your sauerkraut.

Keep your sauerkraut out of direct light and away from extremes in temperature. Every day open your jar once. This will leave out gases and leaves in air so it ferments to grow good bacteria as opposed to alcohol. Prevents the jar exploding too. After maybe a week you should start to notice the smell changing. It will take on more vinegary notes, a sign all is going well. You could could eat it at this point, it would be like fermented slaw. If you would like a softer texture and more sour flavour I’d say a minimum of two months. The white cabbage takes longer to soften, if you shred so it is EXTREMELY fine it will soften faster. Once opened I keep mine in the fridge.

It will be sauerkraut!

It will be sauerkraut!

Troubleshooting

If you have lots of space in the jar and everything is not covered in water you can grab a whole bulb of garlic and sit this onto. When you close the jar everything should be compressed. If a bit of the garlic is sticking out the top that is okay. Second option: if like me you decided one and a half cabbages would probably fill the jar and gave the rest to your partner so he could make amazingly yummy vegan coleslaw. You may have even more of a gap. So what I did was sterilise a really small jar,  roughly 7cms / 3 inc. high. After I put my garlic and cabbage on top of the mixture, I put in the jar and pressed everything again. I then closed the jar. I have done this before and it worked out fine.

Things to never do. Never use a plastic container A:It can not be sterilised and B: the sauerkraut produces lactic and acetic acids (hence lacti- bacteria being in it). Acids will eat into plastic so not a good combination. Never change jars after you have made it. It upsets the sauerkraut, it does not like change. I speak from experience. I had not left enough of a gap in my jar the first time I made sauerkraut and it all started to try and escape. I transferred it and it started to grow a white mouldy bloom within two days.

What makes Sauerkraut Super. A bit about fermented foods.

Most people in the western world do not regularly consume fermented foods, if at all. Western diets are also high in processed foods and people do not eat enough fresh foods. Vegans and vegetarians generally do better but most people think store bought yogurt is the only fermented food about. Store bought yogurt is nothing in comparison with traditional yogurts or milk kefir (my Nana called it her yogurt plant). Being vegan clearly I am going be staying clear of the poor cow’s milk. But there are plenty other healthy fermented food that one can make or buy in good health stores.

Pre canning and fake pickling (bought jars of cooked things in vinegars) foods were preserved by real pickling and fermenting. They were made from scratch or with live starters, such as sourdough for bread making. The benefits of consuming these fermented foods are many. One benefit is that the food’s nutrients are broken down and delivered to your body in an easily absorbable form. There is of course the delivery of millions if not billions of living good bacteria and good yeasts to your system. These live and active cultures have grown out in the world (not labs) and there is an arguement that therefor they are stronger, more adaptable and therefor better at surviving and setting up home in your digestive system! What I like about sauerkraut is cabbage is a good source of glutamine an amino acid that has been shown to help the gut to repair itself. It also tastes good, which is important! 🙂

If you would like to know more Sandor Katz has a great book called “The Art of Fermantation”

Xs Aissa

Nana’s Brown Soda Bread- Vegan Style

29 Tuesday Apr 2014

Posted by Aissa in Bread, Traditional, Vegan

≈ 8 Comments

Tags

Bread, Traditional, Vegan

I’m from Ireland and like many Irish people my Nana made the best Soda Bread 🙂 When I got back into baking it was one of the first things I tried to make. I now blame my terrible oven at the time- but it was truly awful, I called it my first bread brick in my bread brick house! But I moved- had a better oven and discovered it was really easy- once your oven door closed properally! So here it is

My Nana’s Irish Brown Soda Bread- vegan style

You will need -> a measuring jug, cup measures or the mug you usually use for measuring (like me),spoons, a loaf tin, a sieve and a clean tea towel.

If using a metal loaf tin line the base with a little parchment paper and rub it with a little oil, if you prefer to use silicone you will need to put it on a baking tray so it is flat in the oven*

Preheat your oven to 220C / 425F

Ingredients

  • Three Quarters of a pint / 450ml of Soya or Almond Milk (you can include a little vegan yogurt here if you like, makes a nice moist loaf)
  • Two dessertspoons of apple cider vinegar- which you put into the soya/ almond milk
  • One cup of brown spelt flour
  • One cup of whole wheat bread flour (or you can do two cups of the whole wheat brown if you like)
  • Half a cup of strong white flour
  • A quarter cup linseeds i.e. flaxseed
  • A quarter cup of other seeds. This time I added sesame seeds, one dessertspoon of ground linseed and two dessertspoons poppy seeds.
  • One and a half teaspoons of bread soda i.e. baking soda
  • One and a half teaspoons of baking powder
  • A good pinch of salt- an Irish granny would throw a pinch over her left shoulder too
  • A dessertspoon of seeds for sprinkling on top

This is really easy to make.

Measure your non-diary milk, add the apple cider vinegar and give it a stir.

Get a bowl and put your flours into it.

Sieve in your bread soda (baking soda) , your baking powder and your salt. Mix these into the flours.

Add your seeds and stir them through the flours , just so its evenly mixed.

Make a well in the centre and pour your soured non-diary milk in- all in one go.

Gently fold the mix together, just until there are no giant lumps . You need to act fast, the alkaline soda immediately starts to react with the acidic soured milk to create the bubbles. If you are too slow, too rough or over mix you will loose the air bubbles and therefor miss out on having a nice rise to your bread.

Pour the batter into your prepared loaf tin, it will be very wet so will naturally even out. Put three slashes across the bread (sideways). This helps the rise, through traditionally it is to leave the fairies out… Sprinkle your seeds on top. They add a nice crunch and prevent the top burning.

Put in the centre of your oven.

After five minutes turn the temperature down to 200C /400F. In my Uber fan oven it takes a total forty five minutes, but when I had a regular oven it took fifty five minutes (including resting time in oven). You will know it is done when it is coming away from the sides and is good brown colour. If you are worried take it out and using a tea towel tilt the loaf out and give the bottom of the bread a gentle tap of your finger, it should sound hollow. If you are confidant your bread is done turn your oven off and leave it in for another five mins.

Leave the bread to cool in the tin for another five minutes. Get a clean tea towel and gently take your loaf out of the tin. Loosely wrap your loaf in the tea towel, this stops the crust from being too hard. Let it cool completely before cutting, if you cut it too early the texture will turn gummy.

Loosely wrapped bread left to rest and cool

Loosely wrapped bread left to rest and cool

Yummy!

Yummy!

Great with organic coconut oil and peanut butter!!! X Aissa

* A note on silicone : some cheaper produced ones can contain fibreglass, from what I have read you can tell by twisting the silicone if there are white flecks or stretch marks then it has fibreglass in it.


Nana’s Coffee Cake turned Vegan

21 Friday Mar 2014

Posted by Aissa in Cake, Cupcakes, Gluten Free, Traditional, Vegan

≈ 9 Comments

Tags

Cake, Cupcakes, Gluten free, Traditional, Vegan

So there’s a style of coffee cake that seems to be particular to Ireland ( though I’m open to correction on this ) anyhooow my Grandmother made a rockin’ coffee cake and I really wanted to veganize it. I also made it moderately healthier. The Irel Coffee essence mentioned here has been around in Ireland for donkey’s years and is a mixture of coffee, chicory and sugar you can use a good strong coffee extract instead. So here is what you will need…
A mug or cup measures. I tend to just use the one mug for everything, like I’ve said before as long as you use the same mug it will all be in proportion.
A 20cm/ 7.5 inch cake tin and some baking paper to line it.

Dry ingredients

  • A third of a cup of sunflower / rapeseed oil (canola)
  • Half a cup of apple and apricot puree – I buy an organic one by a brand called Clearspring, if you are amazing you can make your own. You could also use plain apple and use apricot yoghurt and just switch the measurement about.
  • A quarter cup of coconut/ soya yoghurt – you could use apricot flavour to intensify the fruitiness or I must insist on apricot flavour if you are using half a cup of this and a quarter cup of puree.
  • A third of a cup made up of 3 dsp of raw rapadura sugar (i.e. turninado ) and the rest Xylitol
  • 4 tsp of Irel Coffee essence or 4 tsp of good quality coffee extract use (use 3 if your coffee extract is strong)
  • One round teaspoon of cornstarch

Wet ingredients

  • A half a tsp of vanilla powder or a tsp of vanilla extract but if using extract put this in with the wet.
  • One cup of fine maize meal
  • One generous cup of ground almonds
  • Two round teaspoons of baking powder
  • A quarter teaspoon of baking soda
  •  A pinch of sea salt ( if full Irish granny mode throw a pinch of your left shoulder too )

Making it

Preheat your oven to 180C/ 350F. Prepare your 20cm / 7.5inch cake pan, this size pan makes a low cake. this is perfect if you want to make a two layered cake without the hassle of cutting through cake slices. If you prefer a higher rise just use a cake tin a size smaller.
First a get a bowl and put in your oil, fruit puree, yoghurt and coffee extract. Grab a sieve and sieve the cornstarch, now put your sugar and xylitol into it, I always sieve my rapadura sugar but is hard work sieving xylitol so even if you just sieve out the lumps in the sugar it should be sufficient. If using vanilla extract add it now. Give it all a good whisk.

Get another bowl and put all the dry ingredients into it. Make a well in the centre and pour your wet mixture into this. Gently fold the mixtures together, be nice to it, you just want to get rid of any floury lumpy bits. If you are too rough or over mix you will knock the air out and end up with a dense cake.

Pour (or push cos it’s thick) the batter into your cake tin making sure it is evenly spread. Place in the centre of the oven

After 5 mins turn down your oven to 170C/ 340F. It takes 23 minutes in my Uber fan oven it could take 25 or even 30 depending on your oven. You will know it is done when it is coming away from the sides maybe little cracks are starting to appear ontop, also when you stick with a skewer it should come out dry. You will get to know your oven, like I have to put everything on the right hand side cos the left is too hot.

So you could leave it like this, slice it into fingers and have it with tea or coffee. But to really finish it off it needs to be iced (frosting). Just make sure it has cooled down first!

Icing

This is like a soft royal icing or a butter-cream.

  • Two dsp of organic raw coconut oil
  • 1 tsp of Irel coffee essence or good quality coffee extract
  • Half a cup of icing sugar ( confectioner’s sugar )
  • Two dsp of hot water
  • Eight walnuts for decoration

Get a bowl and add your coconut oil and mash it until soft. Add your coffee essence/ extract and mash again. Now add your icing sugar, really get in there to make sure really mixed together, use the back of your spoon to press out any lumps. Now add your hot water, it is important that it is warm, cold water will make the coconut oil re-solidify. Mix to a nice smooth spreadable texture.

Put on your cake and arrange the walnuts to decorate.

Pre- icing, a certain someone had some while I was waiting for it to cool

Pre- icing, someone had some while I was waiting for it to cool

Here is the finished thing!

So much nicer iced

So much nicer iced

Newer posts →
Follow VeganEtcetera on WordPress.com

Blog at WordPress.com.

Privacy & Cookies: This site uses cookies. By continuing to use this website, you agree to their use.
To find out more, including how to control cookies, see here: Cookie Policy
  • Follow Following
    • VeganEtcetera
    • Join 93 other followers
    • Already have a WordPress.com account? Log in now.
    • VeganEtcetera
    • Customize
    • Follow Following
    • Sign up
    • Log in
    • Report this content
    • View site in Reader
    • Manage subscriptions
    • Collapse this bar
 

Loading Comments...